 Tweet
Tweet
All pictures and vid were taken with my phone so i apologize if the quality isn't the greatest.
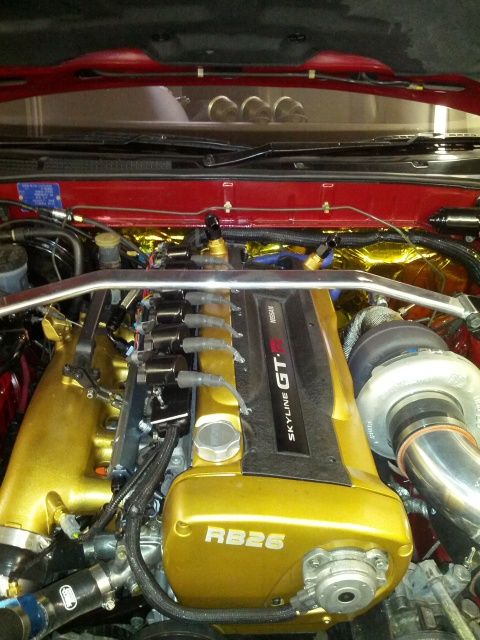
I wanted to make this DIY for anyone else that is interested in swapping to the LS2 (Yukon truck coils). After some research and first hand experience ive concluded that these coils are definitely the best bang for buck performance mod/upgrade that can be had for about $300
Most of us have had issues with weak spark, stuttering, mifires, blow out, and so on. This swap will completely resolve any coil pack related problems you may be having with your OEM, SplitFire, YellowJackets etc. and at the same time deleting your ignitor thus reducing even more potential issues.
*DISCLAIMER* As with any other modifications you may make to your car/engine nothing is guaranteed, i take no responsibility for any issues you may experience after swapping and i always suggest to anyone before working on their vehicle that if they don't know, do the research prior.
Ive had these running for about a week and have had no issues at all.
Now heres some info on ls2 coils i found during my research http://www.megamanual.com/seq/coils.htm
I will be repeating some of the info from that thread in this DIY
The swap was pretty straight forward, i found the hardest part to be thinking of an idea for a mounting bracket. Once they were mounted up the wiring was straight forward. There wasnt a whole lot of info / other DIY's that i could find to help with, but there is a specific one that can be seen here. http://forums.nicoclub.com/my-ls2-ls...p-t353832.html
Firstly you'll need to buy some LS2 truck coils with the pigtails/plugs. They can be had from a member here on the forum, or you can always ebay them. Cost for the coils with pigtails was around $200 for me.
You are also going to need a set of plug wires. Im using 8mm NGK's for the time being because thats all i had kicking around my shop. Eventually the plan is to buy a set of "cut to length" wires and make my own lengths. Bare in mind the LS2 Coils have a funny contact connector, that i believe is gm specific, Regular plug connectors will work but you may have to crimp/bend them a little for a tight fit.

I also suggest purchasing a 6 pin electrical connector of some sort, i wanted to use a deutsch connector but i could only find them locally at a lordco and the price was rediculous @ $15 for each side male/female and then $25ish for each pack of pin connectors male/female. I love baller status but Im not prepared to spend $80+ on one connector! So i opted for the much cheaper gm style weatherpack connector that works just fine. If you want to use deutsch connectors for this or any project, i suggest buying some from ebay, they can be had for under $10.
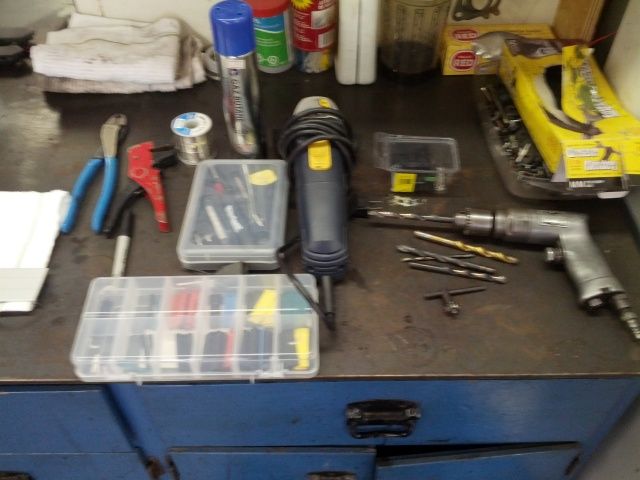
Along with the connector your going to need the supplies/tools for wiring (i soldered and shrink wrapped) and some fabrication materials for however you plan to mount them.
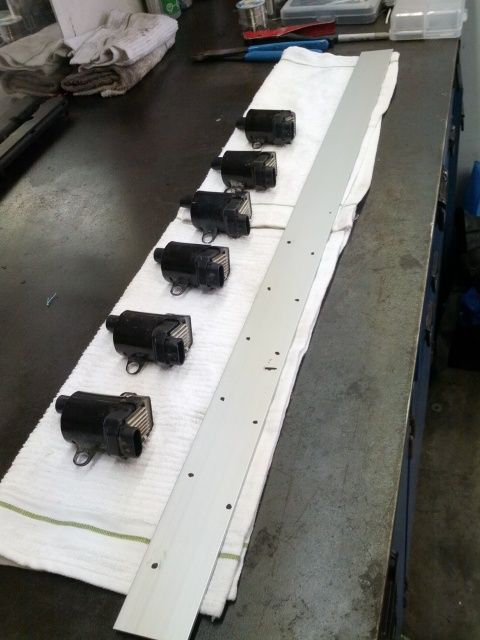
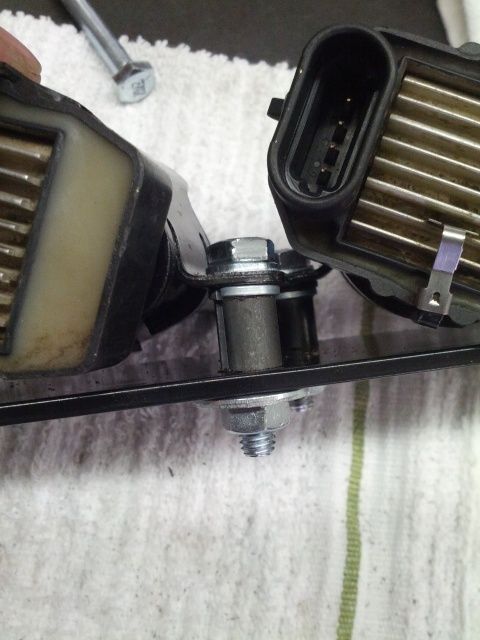
So for my bracket i chose to mount them above the injector wiring loom.
I bought a peice of aluminum from Rona and thought of an idea. I was going to mount the coils to the aluminum plate and mount the plate with longer bolts to the 3 points on top of the ballance tube that the plastic harness cover mounts to.
making measurements
Mounted

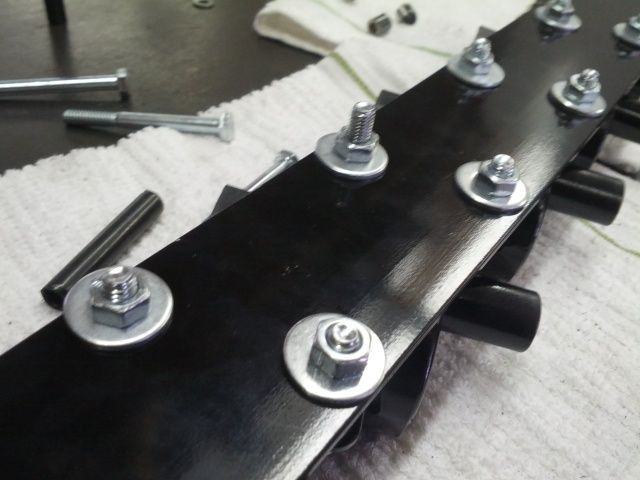
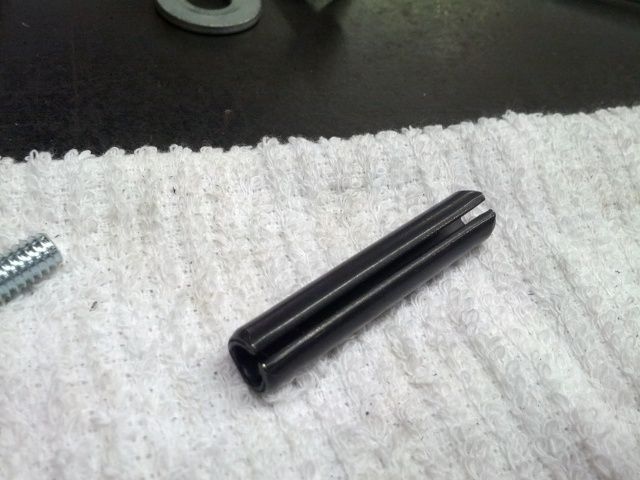
The coilpack mounting tabs are set in a way that you will need to make some spacers so the packs mount nicely to the plate. I just got some split pins from lordco ($4) and cut them to a half inch. Here they are
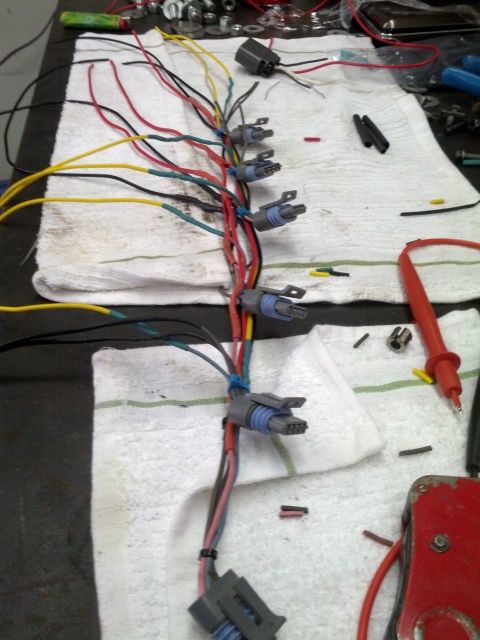
So with the bracket all made and the coils mounted to the bracket, it was time to start the wiring.
The wiring is quite straight forward.
2 grounds
a signal wire
and a switched +12v
I wanted this to be plug n play, so i opted to keep the factory coil power supply connector which came with 1 ground.
i cut this plug from the factory coil pack harness and soldered it up so i now have my switched +12V (white wire) and im using the ground for my coil sequencer ground.
Keep in mind you can just run both of the ground wires to the same ground, but from what ive read it leave the potential for static noise, so i just separated the two grounds. one to this plug and the other to the head where the old coil brackets mounted to.
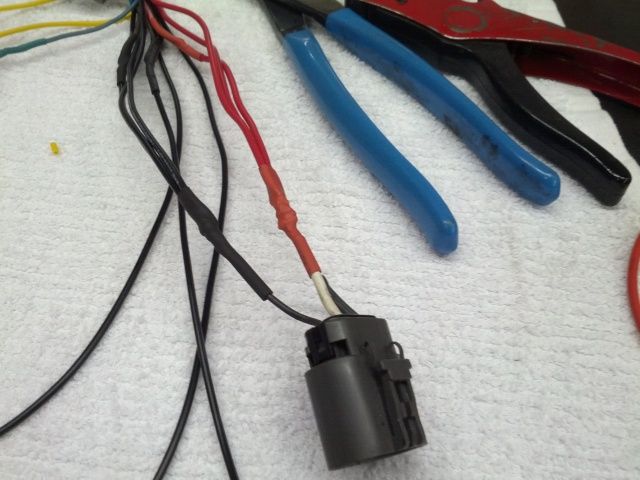
The three wires are switched +12V white, ground, and a timing loop. The loop is not used anymore.
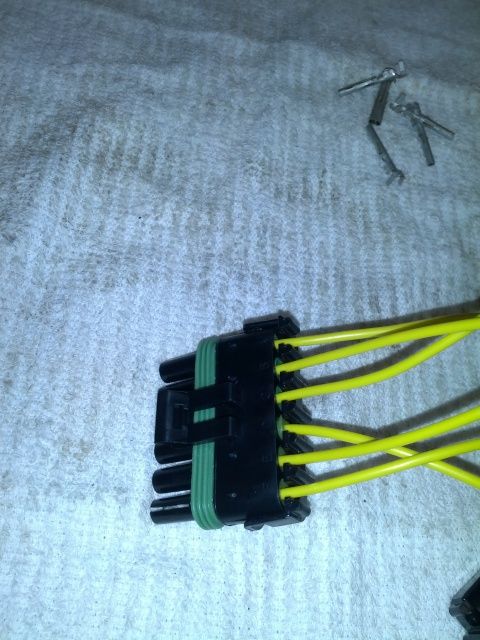
Heres the wiring coming together
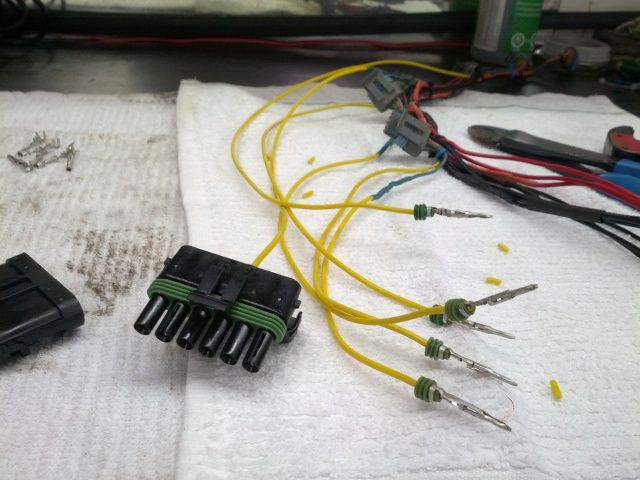
Once the wiring is completed and you have your harness ready for install, You need to delete the factory ignitor. When you cut it, i recommend leaving a short pigtale on the ignitor connector in case you ever want to re-wire it back in. You cut it away on the pre-ignitor side
This picture was taken during my testing, hence why there are plug connectors and nasty tape

The ignitor has two different plugs on it. One is a 6 wire (PRE-ignitor firing signal wires) and the other is a 7 wire (POST firing signal wires) the 7th wire is just a ground for the oem harness. When looking at the ignitor's backside, on the pre ignitor side there are numbers 1-6, these numbers are corresponding to what cylinder signal wire that is. So quite simply crimp on the other side of the weather pack connector to the same order it is on the coil harness you made and away you go. To make matters easier the weather pack connector is labeled for each wire A-F. The factory wires are color coded, so there shouldn't be any confusion of which wire is for which cyl. Just take your time and double check everything.
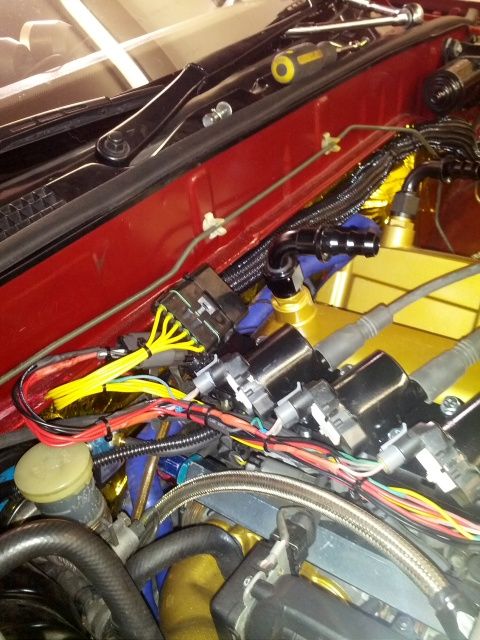
connected and ready for a test fire
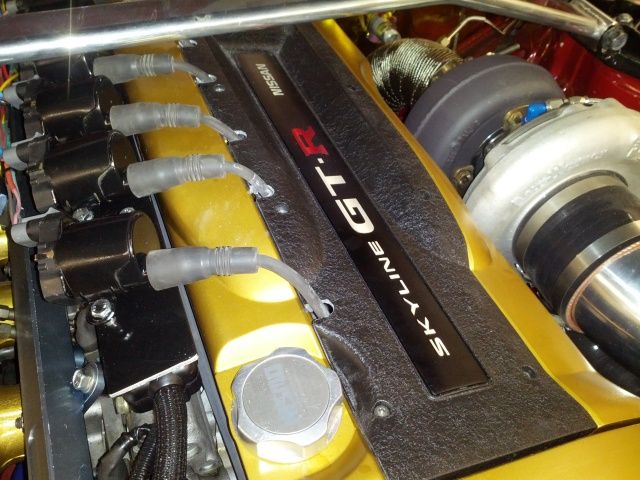
Now that its running and everything is good, i wanted to clean up the mess of plug wires. so i modified my coil cover
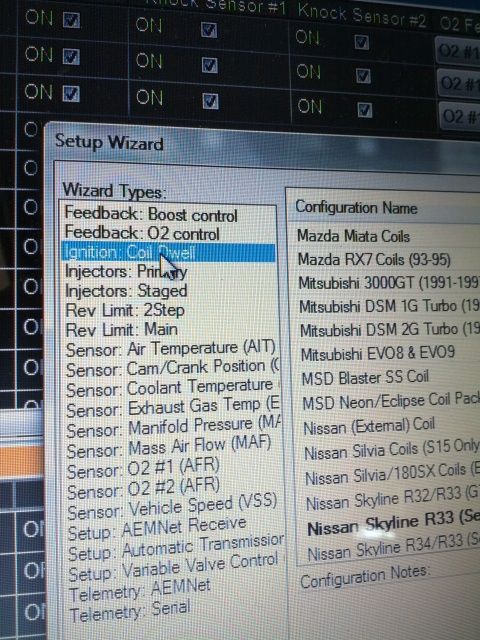
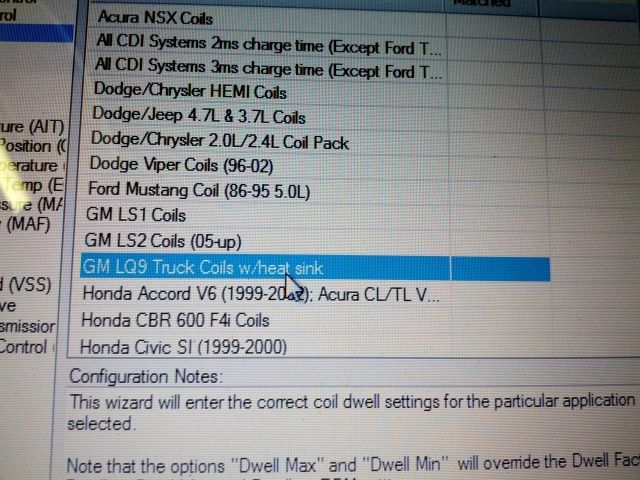
Okay so now that everything is good to go, there is one last step. You may want to change the coil firing dwell settings in your ecu.
For the record i tested this without changing the dwell settings and everything worked just find, apparently though if they aren't changed to around 5ms then you aren't using the full potential of the packs.
I am running an ems v2 so it was really easy to change the settings with AEM Tuner software.
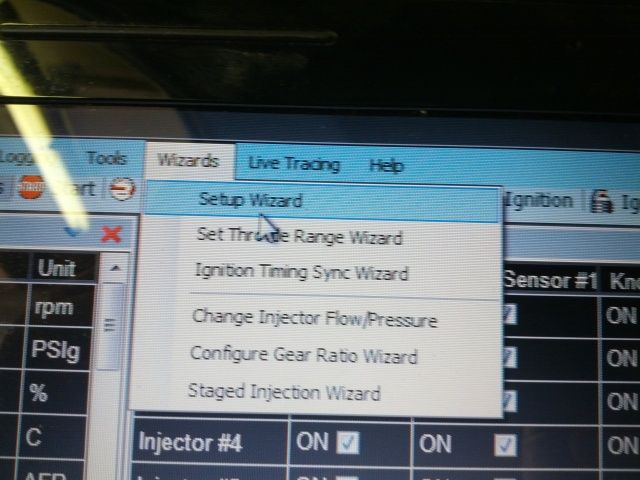
If you are running a different ecu and don't know how to change your settings then check with your tuner. you can drive without any issues.
Ive read that its recommended to double check your timing with a light as-well.
i didn't check mine before hand so my results were skewed and i don't know if my base timing changed.
That's it that's all. Can be done in less than a day. Total cost with new wires should come in near or just over $300, which is half the cost of splitfire's and much more powerful
Here's a video of my new engine running with these.

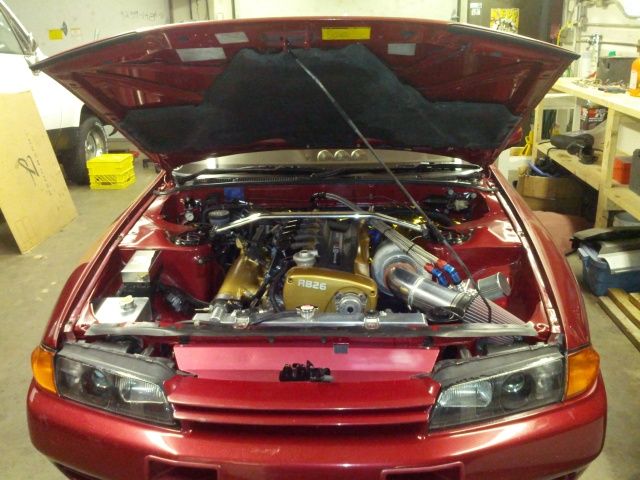
finished
I wanted to make this DIY for anyone else that is interested in swapping to the LS2 (Yukon truck coils). After some research and first hand experience ive concluded that these coils are definitely the best bang for buck performance mod/upgrade that can be had for about $300
Most of us have had issues with weak spark, stuttering, mifires, blow out, and so on. This swap will completely resolve any coil pack related problems you may be having with your OEM, SplitFire, YellowJackets etc. and at the same time deleting your ignitor thus reducing even more potential issues.
*DISCLAIMER* As with any other modifications you may make to your car/engine nothing is guaranteed, i take no responsibility for any issues you may experience after swapping and i always suggest to anyone before working on their vehicle that if they don't know, do the research prior.
Ive had these running for about a week and have had no issues at all.
Now heres some info on ls2 coils i found during my research http://www.megamanual.com/seq/coils.htm
I will be repeating some of the info from that thread in this DIY
The swap was pretty straight forward, i found the hardest part to be thinking of an idea for a mounting bracket. Once they were mounted up the wiring was straight forward. There wasnt a whole lot of info / other DIY's that i could find to help with, but there is a specific one that can be seen here. http://forums.nicoclub.com/my-ls2-ls...p-t353832.html
Firstly you'll need to buy some LS2 truck coils with the pigtails/plugs. They can be had from a member here on the forum, or you can always ebay them. Cost for the coils with pigtails was around $200 for me.
You are also going to need a set of plug wires. Im using 8mm NGK's for the time being because thats all i had kicking around my shop. Eventually the plan is to buy a set of "cut to length" wires and make my own lengths. Bare in mind the LS2 Coils have a funny contact connector, that i believe is gm specific, Regular plug connectors will work but you may have to crimp/bend them a little for a tight fit.
I also suggest purchasing a 6 pin electrical connector of some sort, i wanted to use a deutsch connector but i could only find them locally at a lordco and the price was rediculous @ $15 for each side male/female and then $25ish for each pack of pin connectors male/female. I love baller status but Im not prepared to spend $80+ on one connector! So i opted for the much cheaper gm style weatherpack connector that works just fine. If you want to use deutsch connectors for this or any project, i suggest buying some from ebay, they can be had for under $10.
Along with the connector your going to need the supplies/tools for wiring (i soldered and shrink wrapped) and some fabrication materials for however you plan to mount them.
So for my bracket i chose to mount them above the injector wiring loom.
I bought a peice of aluminum from Rona and thought of an idea. I was going to mount the coils to the aluminum plate and mount the plate with longer bolts to the 3 points on top of the ballance tube that the plastic harness cover mounts to.
making measurements
Mounted
The coilpack mounting tabs are set in a way that you will need to make some spacers so the packs mount nicely to the plate. I just got some split pins from lordco ($4) and cut them to a half inch. Here they are
So with the bracket all made and the coils mounted to the bracket, it was time to start the wiring.
The wiring is quite straight forward.
2 grounds
a signal wire
and a switched +12v
I wanted this to be plug n play, so i opted to keep the factory coil power supply connector which came with 1 ground.
i cut this plug from the factory coil pack harness and soldered it up so i now have my switched +12V (white wire) and im using the ground for my coil sequencer ground.
Keep in mind you can just run both of the ground wires to the same ground, but from what ive read it leave the potential for static noise, so i just separated the two grounds. one to this plug and the other to the head where the old coil brackets mounted to.
The three wires are switched +12V white, ground, and a timing loop. The loop is not used anymore.
Heres the wiring coming together
Once the wiring is completed and you have your harness ready for install, You need to delete the factory ignitor. When you cut it, i recommend leaving a short pigtale on the ignitor connector in case you ever want to re-wire it back in. You cut it away on the pre-ignitor side
This picture was taken during my testing, hence why there are plug connectors and nasty tape
The ignitor has two different plugs on it. One is a 6 wire (PRE-ignitor firing signal wires) and the other is a 7 wire (POST firing signal wires) the 7th wire is just a ground for the oem harness. When looking at the ignitor's backside, on the pre ignitor side there are numbers 1-6, these numbers are corresponding to what cylinder signal wire that is. So quite simply crimp on the other side of the weather pack connector to the same order it is on the coil harness you made and away you go. To make matters easier the weather pack connector is labeled for each wire A-F. The factory wires are color coded, so there shouldn't be any confusion of which wire is for which cyl. Just take your time and double check everything.
connected and ready for a test fire
Now that its running and everything is good, i wanted to clean up the mess of plug wires. so i modified my coil cover
Okay so now that everything is good to go, there is one last step. You may want to change the coil firing dwell settings in your ecu.
For the record i tested this without changing the dwell settings and everything worked just find, apparently though if they aren't changed to around 5ms then you aren't using the full potential of the packs.
I am running an ems v2 so it was really easy to change the settings with AEM Tuner software.
If you are running a different ecu and don't know how to change your settings then check with your tuner. you can drive without any issues.
Ive read that its recommended to double check your timing with a light as-well.
i didn't check mine before hand so my results were skewed and i don't know if my base timing changed.
That's it that's all. Can be done in less than a day. Total cost with new wires should come in near or just over $300, which is half the cost of splitfire's and much more powerful
Here's a video of my new engine running with these.
finished
 )
)

Comment