 Tweet
Tweet
I've always wanted to try my hand at a custom enclosure so this weekend I took on the challenge.
I built it to the correct spec's of clarion for a sealed 10" enclosure. Built from 1/2" MDF and braced for rigidity.
Powered by a bridged Rockford p3001 amplifier.
The bottom was also replaced with a custom cut sheet of MDF.
Its all wrapped with a fabric I found at my local fabricland.
In total about $50 in supply's.
I already owned the subwoofer and amp from the past.
Just wanted to share this one with you guys.
im pretty happy with the turn out but if I was to do it again I would probably change a couple things.
Edit:
Added a brief writeup on my installation.
i started with a 4x8 sheet of 1/2" MDF board from home depot ($39)
After researching the correct air space required for my 10" clarion subwoofer, myself and a good friend proceeded to draw up some plans. I wanted a sealed enclosure for 2 reasons, 1; sealed wont produce as much "noise" as a ported box will, and 2; Space was a constraint of mine due to having a rear strut tower bar.
Ported boxes generally require more air space for the subwoofer to function efficiently enough to sound decent?
Once the plans were drawn up, we de-cluttered my storage room only to find a table saw hiding under a million boxes of crap! Success!
I started by creating some templates of the rear trunk from cardbord. I made them slightly large so the fit would be snug, because of this the finished product is near seamless!
Unfortunately i didnt start taking photos untill late into the project so the first half is left for the imagination. my bad.
after some measuring and template making i made a few cuts and by the end of a few hours, and an 8 pack i created this contraptoin:
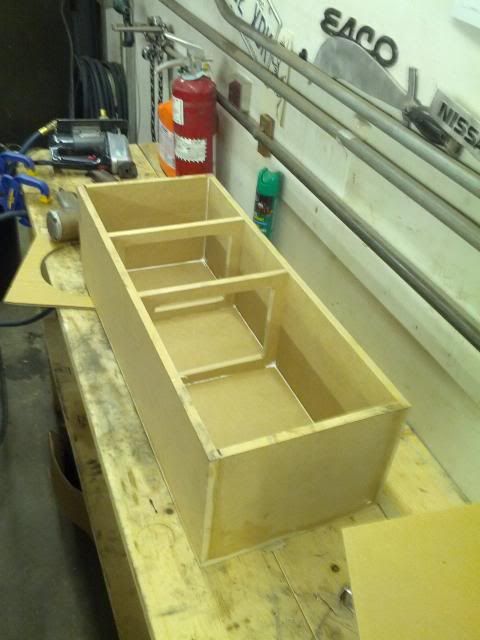
i wanted to attempt at keeping this setup as light as possible, so seeing as though most woofer boxes are made from 3/4" MDF for rigidity, i had to add some bracing in the box i made. I just used a couple more pieces of 1/2" MDF and added them to the inside. Perfect spaced apart of course, and identical in every way. I didnt want to affect any of the air movement, as this can affect how the sub performs in the end.
Another thing to note about this, is that with the braces installed, it changes the measurements because there is less surface area now, this was taken into account when i drew up my plans.
Im not going to include the measurements used mainly because it could be different for everyone based on product used. Not to mention the headache i endured just computing the math in my head. It may be simple mathematics, but alcohol seems to make even the most simple problems into something much more!
so now that the box was somewhat complete, i moved towards building a face, and a trunk base. I probably could have went without the trunk base, but my oem one was sagging and the carpet looked like poo.
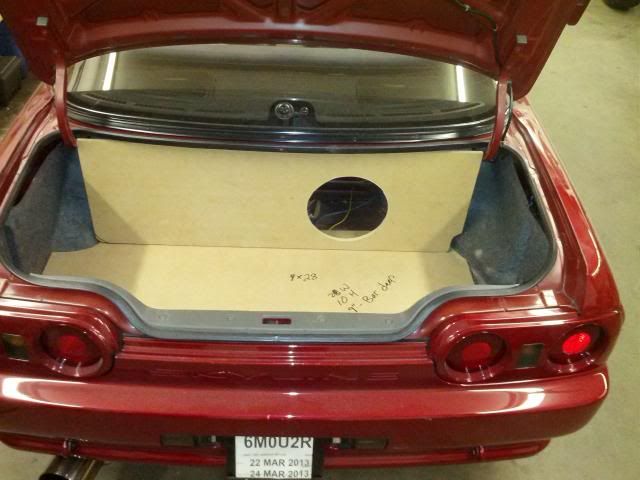
Fitment was pretty well bang on first try, This is where my teacher from woodworks 9 came back into my mind! "measure 3 times and cut once!" Thanks MR. Wright.
Now i proceeded to attach the front face to the box. Again after some carefull measurements, and a few staples....1 more beer, she was together and starting to look like a system!

refitted to check measurements, everythings looking good so far!
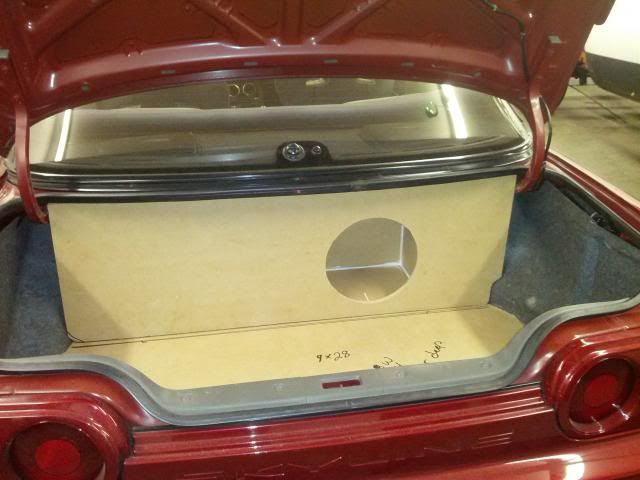
In this photo ^ you can see that i constructed it with Elmer's fast drying wood glue, and 1" Stapled
by an air gun. I was hoping from the start that if i used enough glue in the critical spots, that i wouldn't need to add a silicone sealant. So after i stapled it all together there was some glue oozing from the joints, i wiped all that in to the seams, and after that dried i added another skin with my finger to help promote a good seal. I'll tell you that after an extensive test, it doesn't leak at all.
that was the last of day one.
So on the second day, i made a trip to my local fabric land, and after talking to about 4 different "old bitties" and searching their store from one side to the other, i finally found a carpet that seemed to be a decent match. Not perfect, but to be honest after all was done i really like the little bit of two tone accent it has. Paid $10 Per yard, and bought two yards for a bit extra. (more projects in mind for future).
Using the elmers spray adhesive, I sprayed it on the cloth and wood to promote best adhesion, and let it dry slightly before attaching the two together.
This glue works great, i highly recommend it for anyone doing this type of job. However just a note; it states on the can itself "its not to be used for headliner's"
heres where i was at
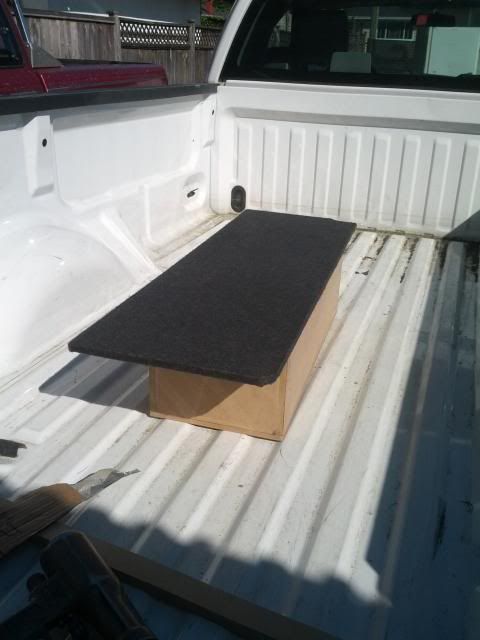
so again theres a lapse in photos here, because i got a little carried away and excited, but all peices were covered in fabric and stretched behind then stapled along the edge of the rear with 1/4" from a hand stapler.
after it was all assembled i took a couple photos, These 2 were prior to my battery box install and wiring everything up.
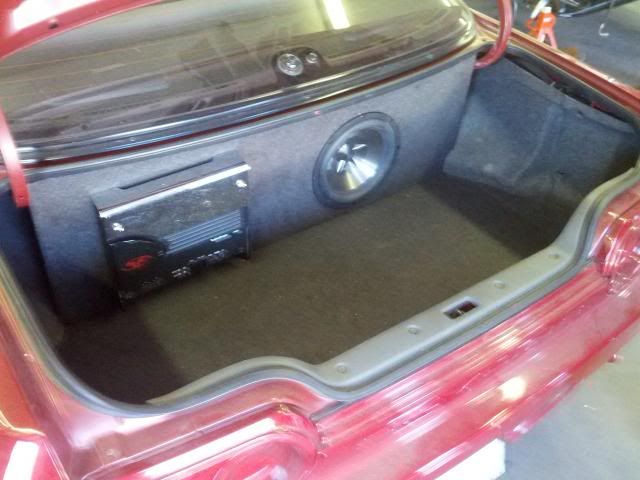
^ crappy cell phone pictures....i know i know.
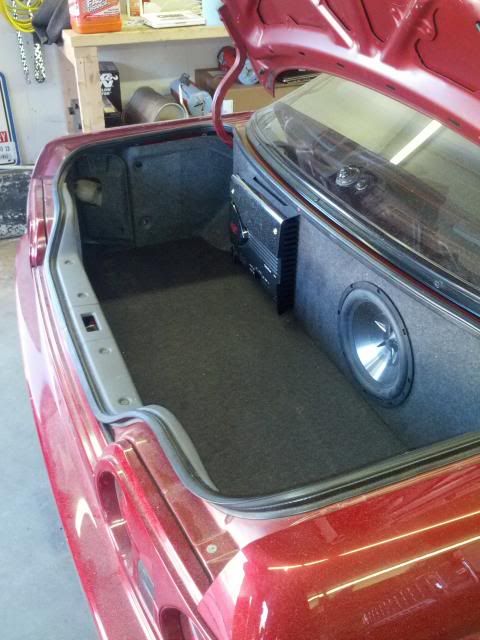
and finally after all was completed
Cheers!
EDIT:
as promised my cheap alternative to Dynamat!
So i've always wanted to try Dynamat, however i'm a cheap bugger so i started searching on Google for "cheap alternative to Dynamat". After a short search i started finding lots of testimonials about a product known as "peel and seal" flashing sealant and it can be found at a local hardware store. This is the stuff that is rubberized adhesive on one side and aluminum like foil on the other.

and what it should look like applied

So off to home depot i went, only to find a product similar called "blue skin", unfortunately this wasn't quite the same. i didn't want to use a product that was black on both sides as i don't think it would be as effective as the foil sided product and i was concerned that maybe the backside would be adhesive as well. So off to Canadian Tire i was to check their stock. There i found another product called roof patch. Now this was more like what i was looking for, however they were asking a ridiculous price for a small quantity, and i was quite certain that somewhere in the lower mainland would carry a product like the aforementioned peel and seal. Off to Rona supplies i go.
This is what i found at Rona,

PERFECT, Eat it Dynamat!
i paid approx $45 for a 20cmX10M roll of this stuff, and a hand roller (which didn't really get used). I still have LOTS left too complete my trunk too. Although after doing the lid, any vibration has pretty well been killed and the sound quality has improved from GREAT to EFFING SWEET!
i'll just post some pics of the tools used, and application.
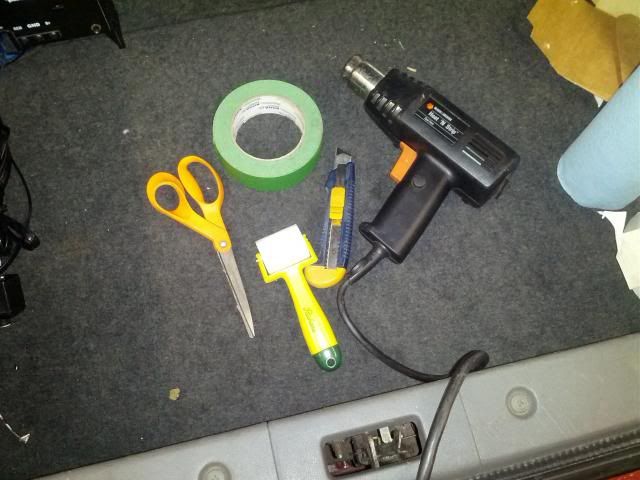
used painters tape to make a template then before peeling it off trimmed the edges with the razor.
transferred the tape to some cardboard so i could keep a decent copy in my shop of the trunk outlines.
this is what i used as my pattern to trace with a felt marker onto the resisto.
Remember that when tracing symmetrical designs to trace one face up and one face down, i wasn't thinking clearly and made a miscalculated cut resulting in an un-needed piece.
cut out and ready for install
I Peeled the backing as i applied it and then hit it with the heat gun to be sure it wasnt coming off, once it was pretty warm i worked all the corners with this little guy:

and about 45 minutes later
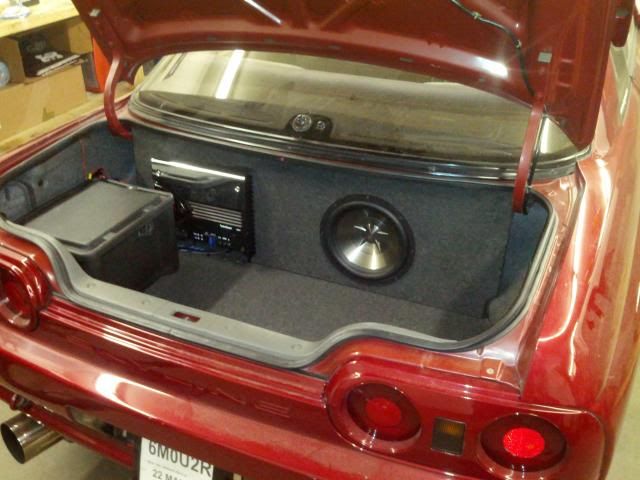
Before testing i knew i wanted to be sure there would be no rattling so i decided to go one step further so this needed to be covered too.
and now

i cannot recommend this enough to anyone!, system or not it will make a drastic difference, and to be honest the weight was probably only around 2 pounds. Now my trunk doesn't sound like a piece of tin when i close it, and the clarity of bass has increased so much that i turned my system down even more than i already had it, and i'm not one for teenage bass to begin with.
i've thought about continuing with the trunk floor but honestly i don't think it needs it, though it may help with road noise. So if i can find the energy in the next week or so i may attempt that. It will be a bit of a chore to remove the system again though.
I'm going to call this mod the least bang for your buck if you catch my drift
I built it to the correct spec's of clarion for a sealed 10" enclosure. Built from 1/2" MDF and braced for rigidity.
Powered by a bridged Rockford p3001 amplifier.
The bottom was also replaced with a custom cut sheet of MDF.
Its all wrapped with a fabric I found at my local fabricland.
In total about $50 in supply's.
I already owned the subwoofer and amp from the past.
Just wanted to share this one with you guys.
im pretty happy with the turn out but if I was to do it again I would probably change a couple things.
Edit:
Added a brief writeup on my installation.
i started with a 4x8 sheet of 1/2" MDF board from home depot ($39)
After researching the correct air space required for my 10" clarion subwoofer, myself and a good friend proceeded to draw up some plans. I wanted a sealed enclosure for 2 reasons, 1; sealed wont produce as much "noise" as a ported box will, and 2; Space was a constraint of mine due to having a rear strut tower bar.
Ported boxes generally require more air space for the subwoofer to function efficiently enough to sound decent?
Once the plans were drawn up, we de-cluttered my storage room only to find a table saw hiding under a million boxes of crap! Success!
I started by creating some templates of the rear trunk from cardbord. I made them slightly large so the fit would be snug, because of this the finished product is near seamless!
Unfortunately i didnt start taking photos untill late into the project so the first half is left for the imagination. my bad.
after some measuring and template making i made a few cuts and by the end of a few hours, and an 8 pack i created this contraptoin:
i wanted to attempt at keeping this setup as light as possible, so seeing as though most woofer boxes are made from 3/4" MDF for rigidity, i had to add some bracing in the box i made. I just used a couple more pieces of 1/2" MDF and added them to the inside. Perfect spaced apart of course, and identical in every way. I didnt want to affect any of the air movement, as this can affect how the sub performs in the end.
Another thing to note about this, is that with the braces installed, it changes the measurements because there is less surface area now, this was taken into account when i drew up my plans.
Im not going to include the measurements used mainly because it could be different for everyone based on product used. Not to mention the headache i endured just computing the math in my head. It may be simple mathematics, but alcohol seems to make even the most simple problems into something much more!
so now that the box was somewhat complete, i moved towards building a face, and a trunk base. I probably could have went without the trunk base, but my oem one was sagging and the carpet looked like poo.
Fitment was pretty well bang on first try, This is where my teacher from woodworks 9 came back into my mind! "measure 3 times and cut once!" Thanks MR. Wright.
Now i proceeded to attach the front face to the box. Again after some carefull measurements, and a few staples....1 more beer, she was together and starting to look like a system!
refitted to check measurements, everythings looking good so far!
In this photo ^ you can see that i constructed it with Elmer's fast drying wood glue, and 1" Stapled
by an air gun. I was hoping from the start that if i used enough glue in the critical spots, that i wouldn't need to add a silicone sealant. So after i stapled it all together there was some glue oozing from the joints, i wiped all that in to the seams, and after that dried i added another skin with my finger to help promote a good seal. I'll tell you that after an extensive test, it doesn't leak at all.
that was the last of day one.
So on the second day, i made a trip to my local fabric land, and after talking to about 4 different "old bitties" and searching their store from one side to the other, i finally found a carpet that seemed to be a decent match. Not perfect, but to be honest after all was done i really like the little bit of two tone accent it has. Paid $10 Per yard, and bought two yards for a bit extra. (more projects in mind for future).
Using the elmers spray adhesive, I sprayed it on the cloth and wood to promote best adhesion, and let it dry slightly before attaching the two together.
This glue works great, i highly recommend it for anyone doing this type of job. However just a note; it states on the can itself "its not to be used for headliner's"
heres where i was at
so again theres a lapse in photos here, because i got a little carried away and excited, but all peices were covered in fabric and stretched behind then stapled along the edge of the rear with 1/4" from a hand stapler.
after it was all assembled i took a couple photos, These 2 were prior to my battery box install and wiring everything up.
^ crappy cell phone pictures....i know i know.
and finally after all was completed
Cheers!
EDIT:
as promised my cheap alternative to Dynamat!
So i've always wanted to try Dynamat, however i'm a cheap bugger so i started searching on Google for "cheap alternative to Dynamat". After a short search i started finding lots of testimonials about a product known as "peel and seal" flashing sealant and it can be found at a local hardware store. This is the stuff that is rubberized adhesive on one side and aluminum like foil on the other.
and what it should look like applied
So off to home depot i went, only to find a product similar called "blue skin", unfortunately this wasn't quite the same. i didn't want to use a product that was black on both sides as i don't think it would be as effective as the foil sided product and i was concerned that maybe the backside would be adhesive as well. So off to Canadian Tire i was to check their stock. There i found another product called roof patch. Now this was more like what i was looking for, however they were asking a ridiculous price for a small quantity, and i was quite certain that somewhere in the lower mainland would carry a product like the aforementioned peel and seal. Off to Rona supplies i go.
This is what i found at Rona,
PERFECT, Eat it Dynamat!
i paid approx $45 for a 20cmX10M roll of this stuff, and a hand roller (which didn't really get used). I still have LOTS left too complete my trunk too. Although after doing the lid, any vibration has pretty well been killed and the sound quality has improved from GREAT to EFFING SWEET!
i'll just post some pics of the tools used, and application.
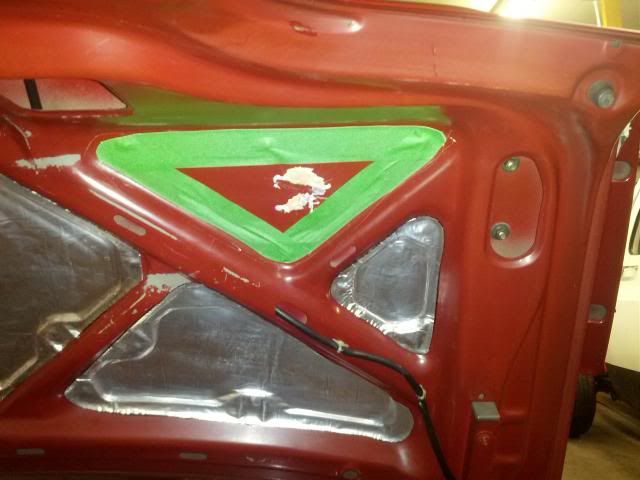
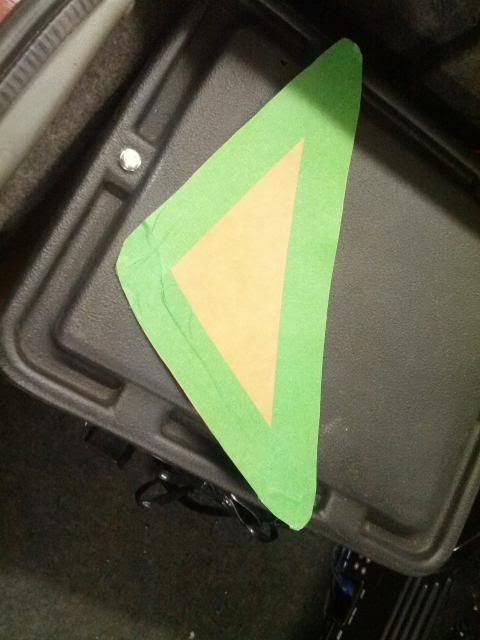
used painters tape to make a template then before peeling it off trimmed the edges with the razor.
transferred the tape to some cardboard so i could keep a decent copy in my shop of the trunk outlines.
this is what i used as my pattern to trace with a felt marker onto the resisto.
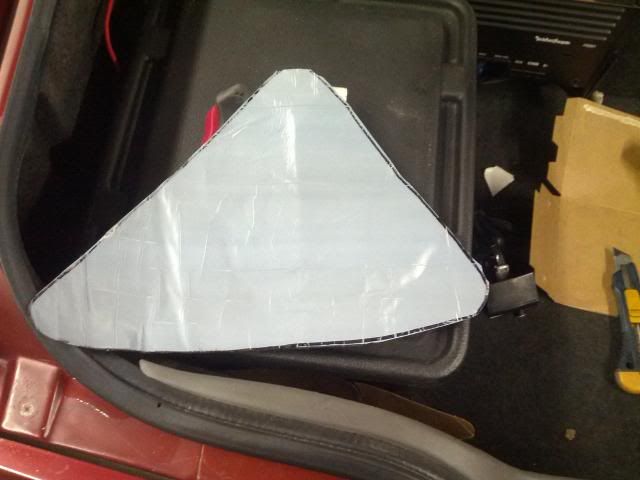
Remember that when tracing symmetrical designs to trace one face up and one face down, i wasn't thinking clearly and made a miscalculated cut resulting in an un-needed piece.
cut out and ready for install
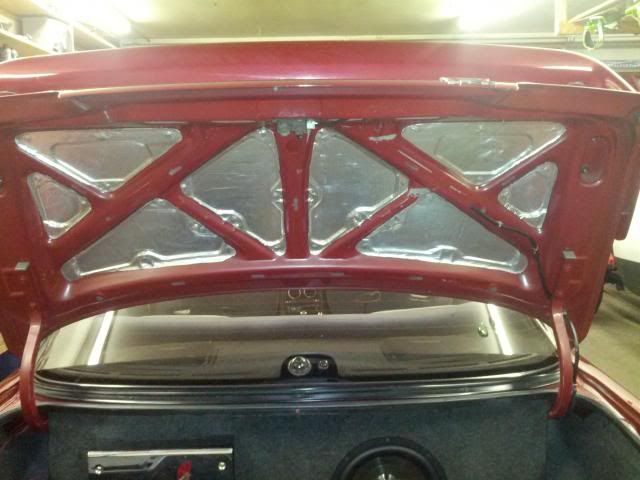
I Peeled the backing as i applied it and then hit it with the heat gun to be sure it wasnt coming off, once it was pretty warm i worked all the corners with this little guy:
and about 45 minutes later
Before testing i knew i wanted to be sure there would be no rattling so i decided to go one step further so this needed to be covered too.
and now
i cannot recommend this enough to anyone!, system or not it will make a drastic difference, and to be honest the weight was probably only around 2 pounds. Now my trunk doesn't sound like a piece of tin when i close it, and the clarity of bass has increased so much that i turned my system down even more than i already had it, and i'm not one for teenage bass to begin with.
i've thought about continuing with the trunk floor but honestly i don't think it needs it, though it may help with road noise. So if i can find the energy in the next week or so i may attempt that. It will be a bit of a chore to remove the system again though.
I'm going to call this mod the least bang for your buck if you catch my drift


Comment