 Tweet
Tweet
working on it..
-
My car keeps on stealing my money . -
Chapter 25 - Bolt-on? not so much, week15, part1
------------------------------
Day 50
The first 2 days (49,5 and 50) were spent simply clearing old stuff out, cleaning the garage and re-organizing my parts storage
Centralized my hardware depot

Then I spent well over an hour trying to fix an alignment issue with my front swaybar endlink on the driver side
For some reason, since I installed the new Whiteline bar, its been crooked a bit too much for my liking

So I tried loosing it and sliding it to the passenger side, but that didn�t work
Then I checked the suspension�s height on either side, and saw a difference of ��
So I grabbed my wrenches, adjusted them equal, but still I had the saw issue
Anyway, I ended up leaving it like that because I just couldn�t figure out what the problem was
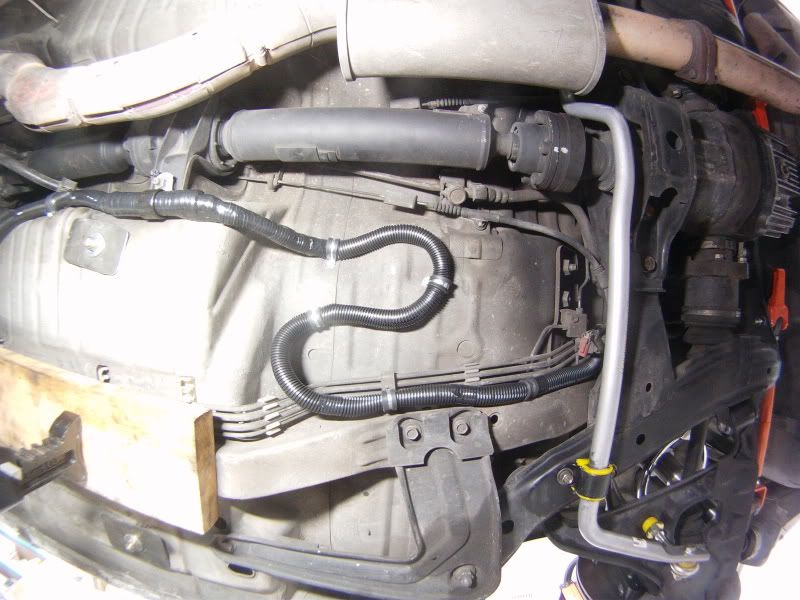
Then I started work on finishing the battery relocation wiring,
The cables had been hanging underneath the car for a couple weeks now
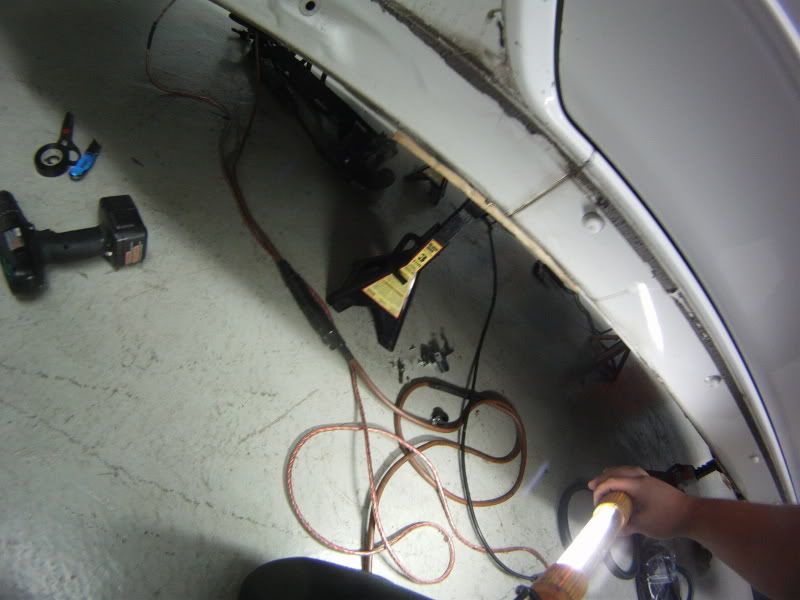
I inserted both cables in a protective plastic loom, and taped it every feet or so

And heres the funny part, because I never really measured the cables, and they ended up being almost the same length, luck
Then, to bring the loom into the engine bay, I dropped a string beside the engine and attached it to the loom,
Then pushed the loom up into the engine bay from underneath
And finally pulled it with the string from up top

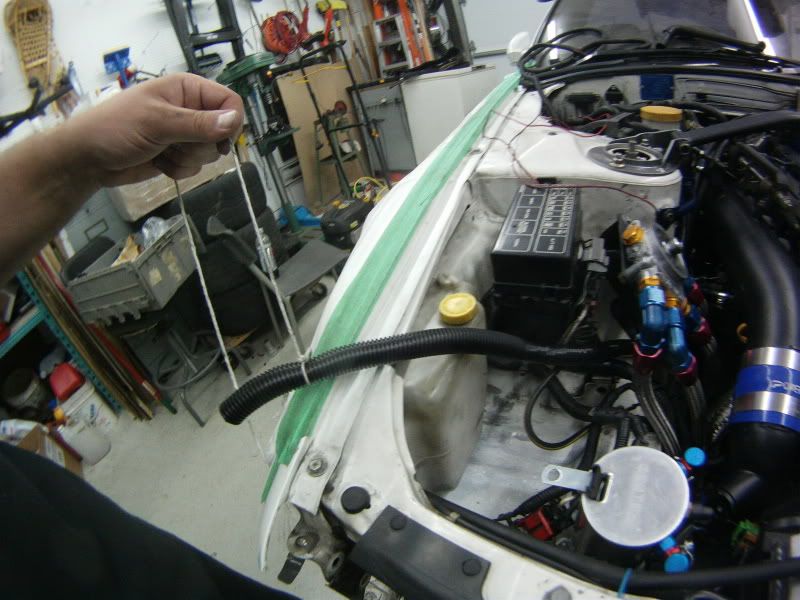
Then I checked what length I needed in the engine bay and clamped down the loom with a neoprene clamp
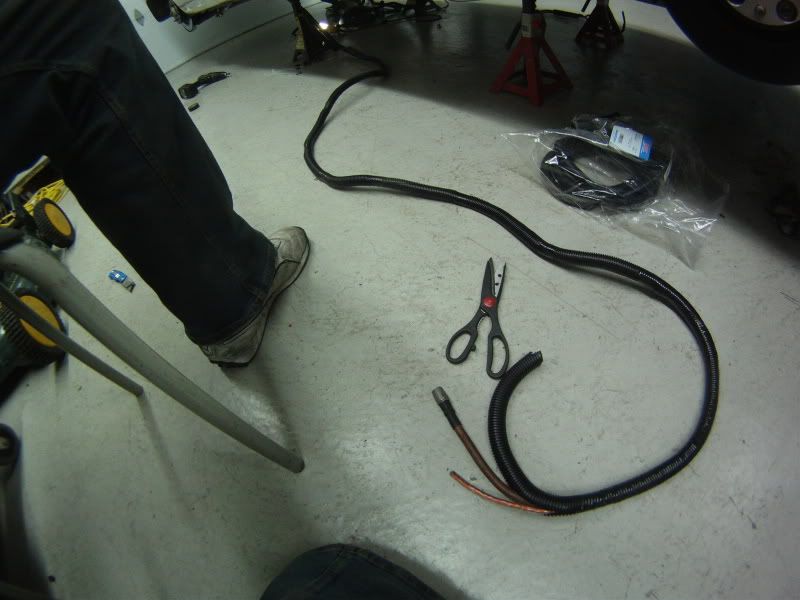
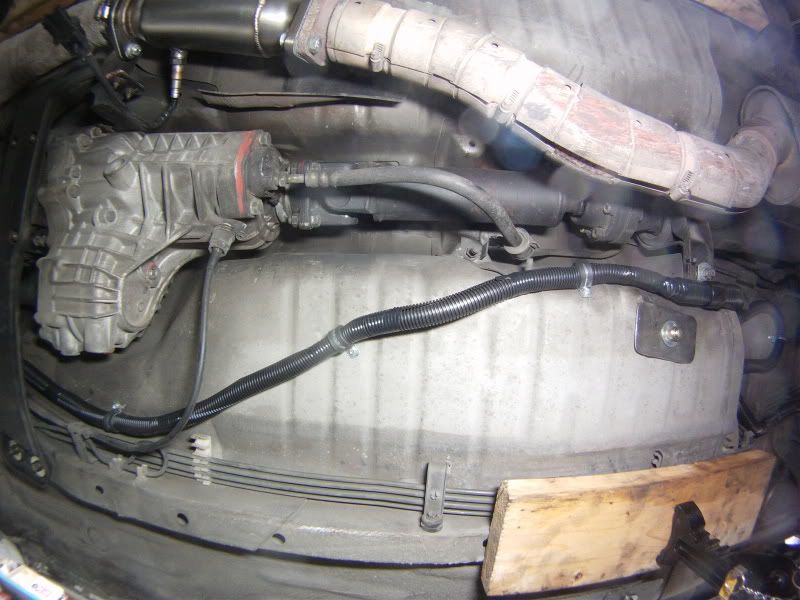
But then I had about two feet too long of loom under the car that I shorten somehow

At that point, I slid under the car to check to possible issues and realized I had forgotten to pass the loom up and under certain things,
So I took it back out, passed the loom exactly where it needed to go, then ran back the loom to the engine bay again,
You know, just another 40 minutes setback�
To hold the loom underneath the car, I used a total of 12 neoprene clamps, some were bolted using existing holes/bolts/supports and the rest were screwed directly into the floor pan using very short self-taping screws
To get rid of the extra 2 feet of loom, I used the big empty space underneath the rear seats on the driver side and simply looped it

That was that,
/day50
------------------------------
Day 51
On Sunday, all I did mess around fabricating stuff, which is very tiring and time consuming
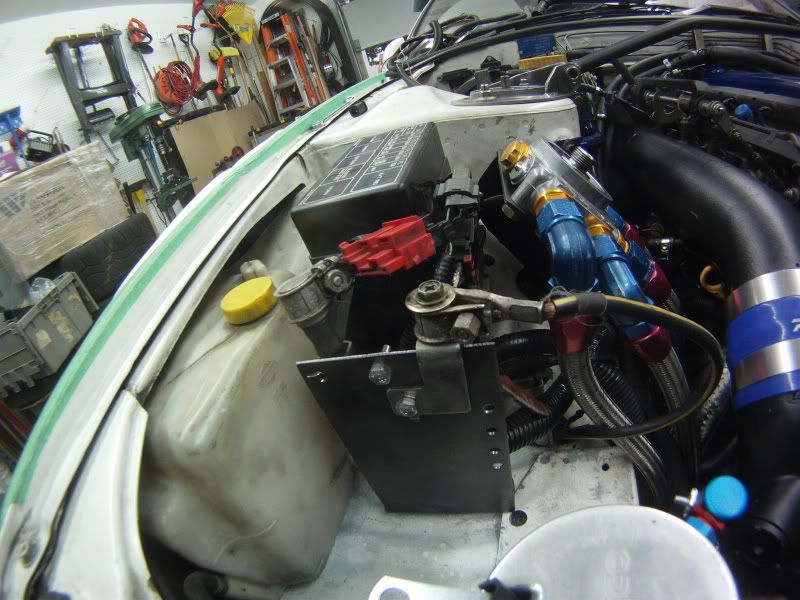
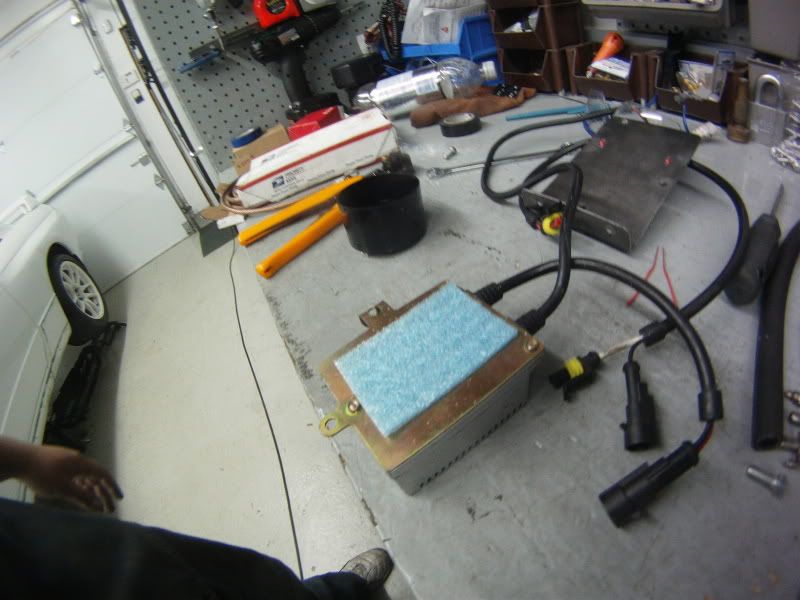
I had to make bracket to hold the battery cables and the HID ballast in the engine bay
So I chose a thick steel plating, the same I used under the car for the racing harness anchors, but that plate ended up being a real PITA to work with
It was just a bit too big to fit in my press drill and it was uber though to grind
After a couple hours to grinding to eyeballing holes and drilling and buffing and measuring and test fitting, I ended up with these 2 supports


The first one being for the battery cable, I drilled the necessary holes in the body, and bolted it down, and attached the cable to it
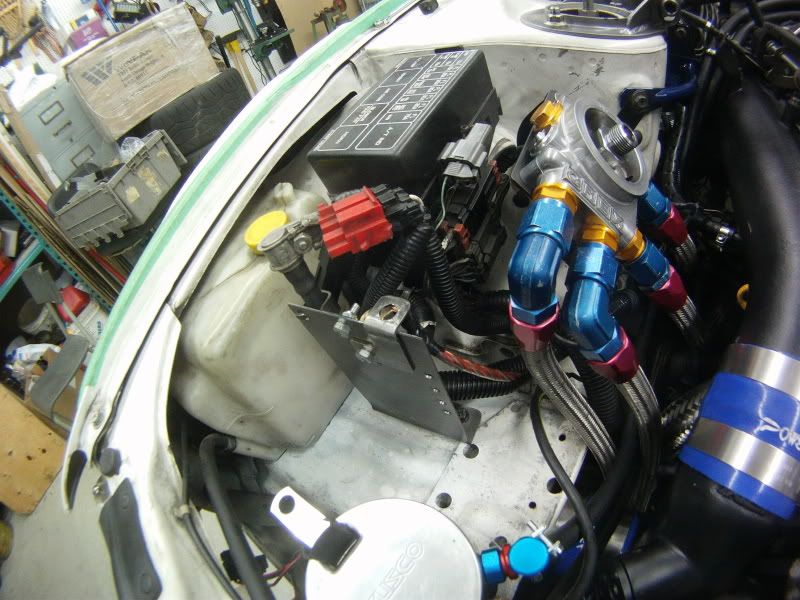
For the negative post, I used a bolt-on battery post, but no matter how I tightened the cable onto it, it kept sliding off,
So I drilled a hole in the center of the post, taped it, and used a short screw with a large washer as a cap to keep the cable coming off

Then I simply put terminal covers on both of them
I had to cut the one for the positive side because it didn�t quite fit and held it with an elastic

Then to mount the HID ballast, I glued a piece a foam to is back and bolted it to the support and also zip tied the other module to the other side of the same support
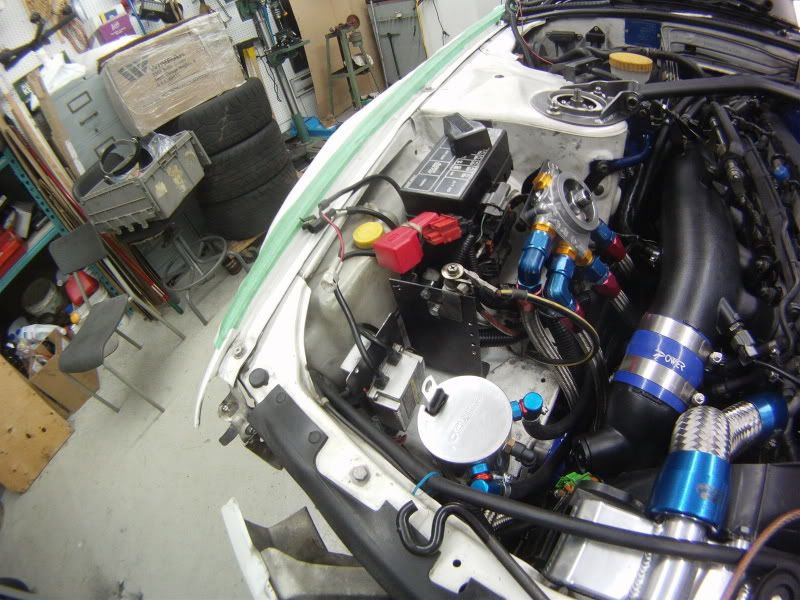
And to finish the day (yeah to support really took a long time to make), I measured and made a couple ground cables
/51Comment
-
Chapter 25 - Bolt-on? not so much, week15, part2
------------------------------
Day 52
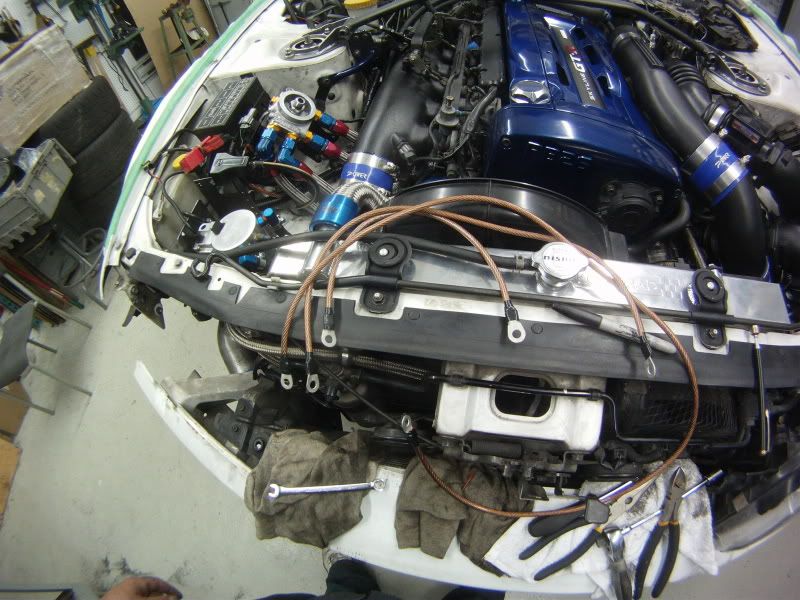
On Monday, I finished the grounding kit and I tried to keep it as subtle as possible since I didn’t have blue/black wires to match the rest of the engine bay


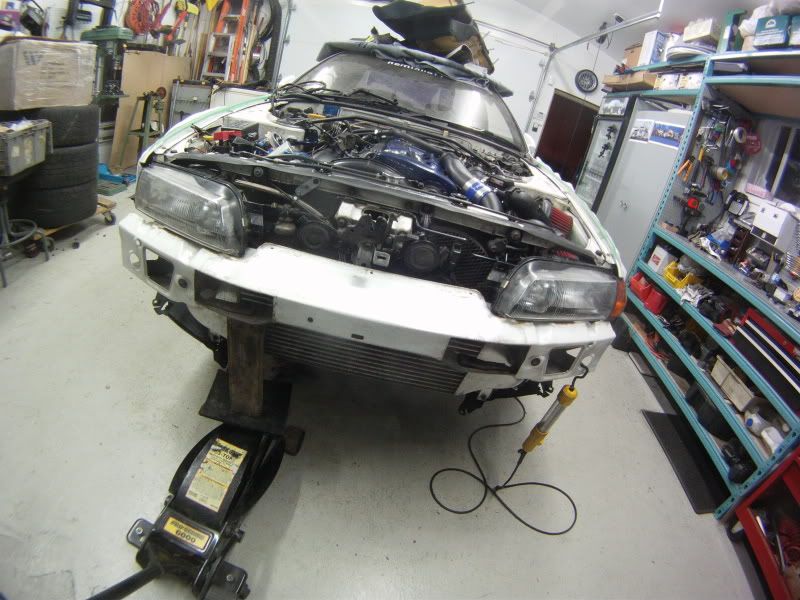
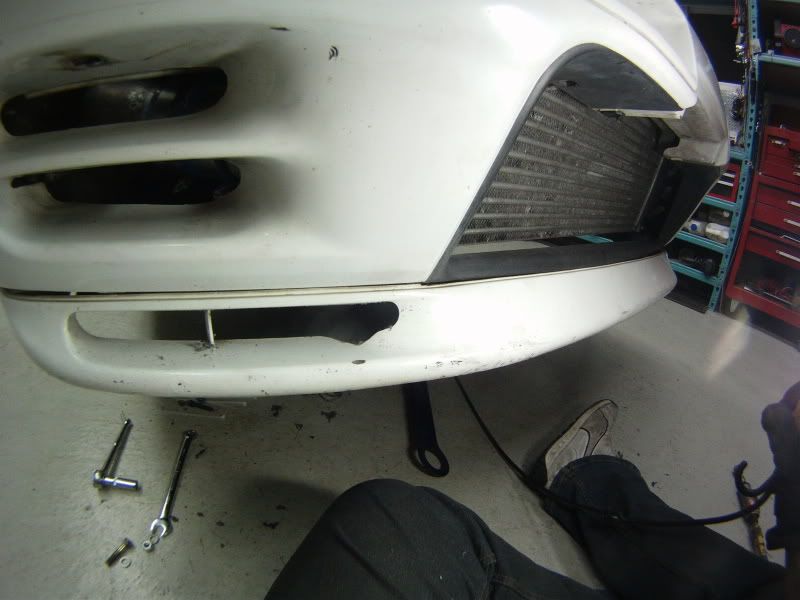
After that, time had to come bolt the bumper frame in its final position,
So I bolted the driver side headlight on, and using a floor jack with a piece of wood I tried to get the exact same spacing on either side between the frame and the headlights
Then torqued the bolt pretty tight to keep it from ever moving again
Then came time to fit my custom tow hook
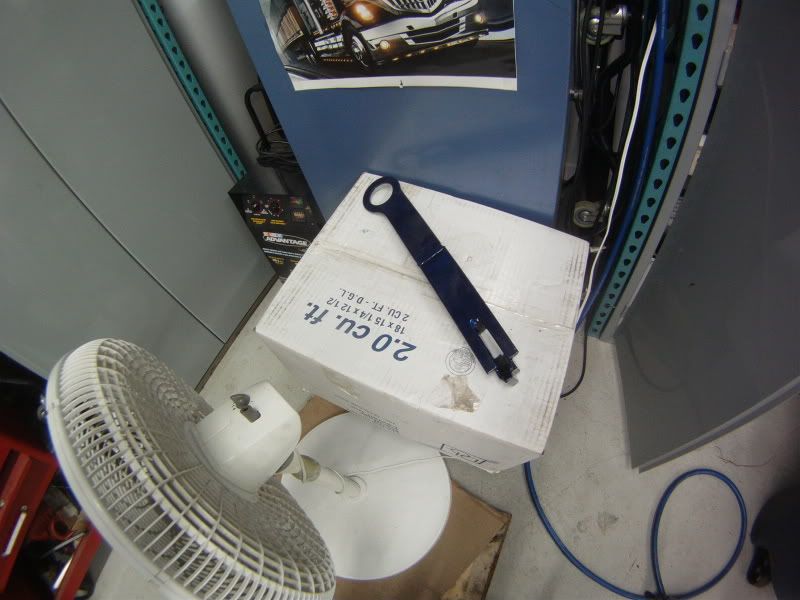
Problem is, the slot you can see on the end, is too narrow
Because when I deigned it out of cartboard, I wrote the thickness of the steel plates needed to fab it up, it was 3/8” and 9/16”
9/16” being the width of the tow hook, which should also have been the thickness of the supporting fin running under the hook and at the same time the width of the slot
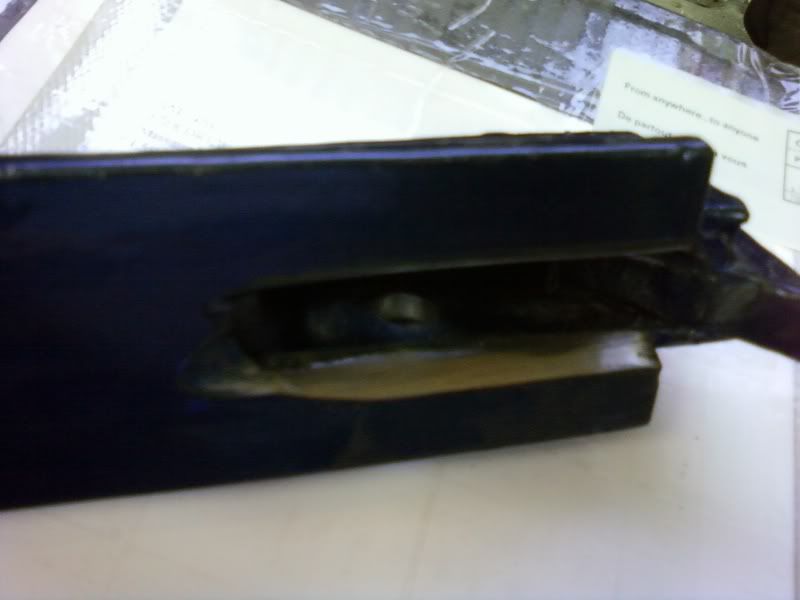
But then my father surprised me when he went to the wedling shop around the corner and cut the metal himself and got it all welded
Problem is, he forget how to read and instead of using 9/16” he used �” plate and got the slot cut also �” wide
It kinda fixed a problem a bit before sending it to paint by breaking a weld and adding a 1/16” plate at the very end and welding it back
But now the slot was larger, but tapered and still didn’t quite fit
But with a couple good hits with a larger hammer had gotten it onto the OEM hook, that was before sending it to paint
So now, I tried it on, and I just didn’t want to slide on at all,
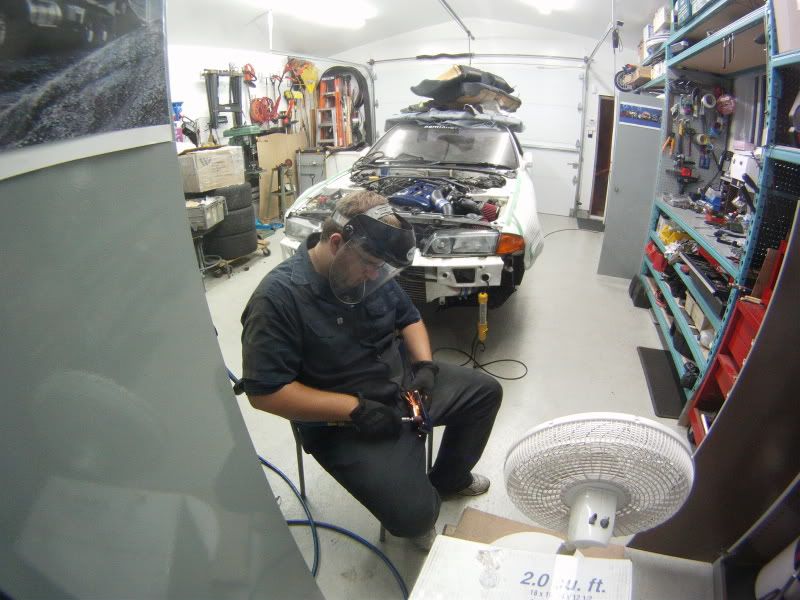
So I had to grind the slot 9/16” wide for its whole length
So I sat down and started grinding away at it slowly
/day52
------------------------------
Day 53
I spent another hour or so grinding the darn tow hook and finally got it wide enough
Then I eyeballed where the hole for the bolt should be, the bolt is just to keep the hook from falling off the OEM hook
Put the hook on the press drill and thought I’d have a very hard time drilling through steel this thick, but turns out the steel was really soft and drilled the 13/32” hole was really easy, didn’t even require any lube
Then I found a nice length M10 bolt with a couple washers and a nylon locking nut to bolt it on solidly
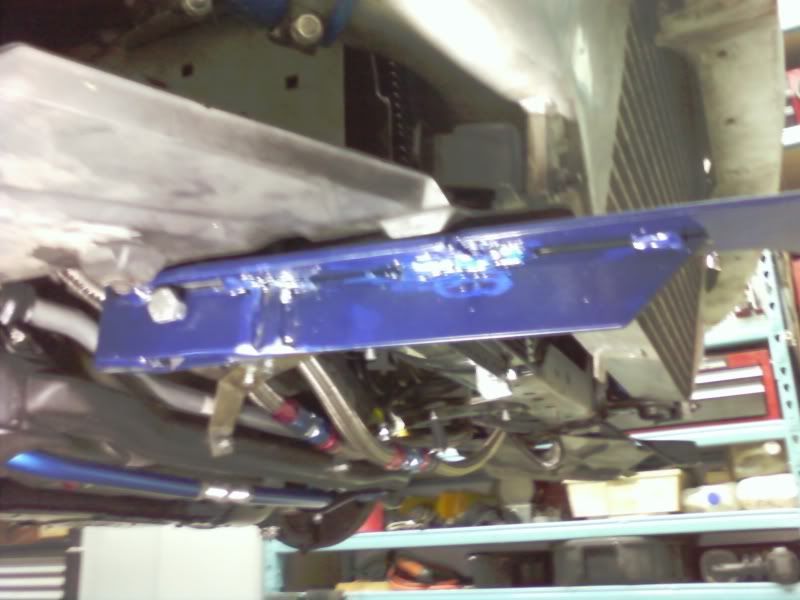
Then took my front bumper off of its shelf and pushed it onto the bumper frame
And using the front lip’s hole, tried to figure out the modifications that would need to be done to make the hook fit perfectly

/day53
------------------------------
Day 54
Fitting the tow hook continued,
I bolted the lip to the bumper, then it was a game of trial and error
I using my dremel, I made the hole in the lip about a full inch larger and it was enough to get the tow hook straight onto the oem hook
Win.

NOW I can finally send the body parts to paint, oh no wait, I still have to cut the side skirts, crap..
After that I moved to the rear of the car, to make the rear callipers fit
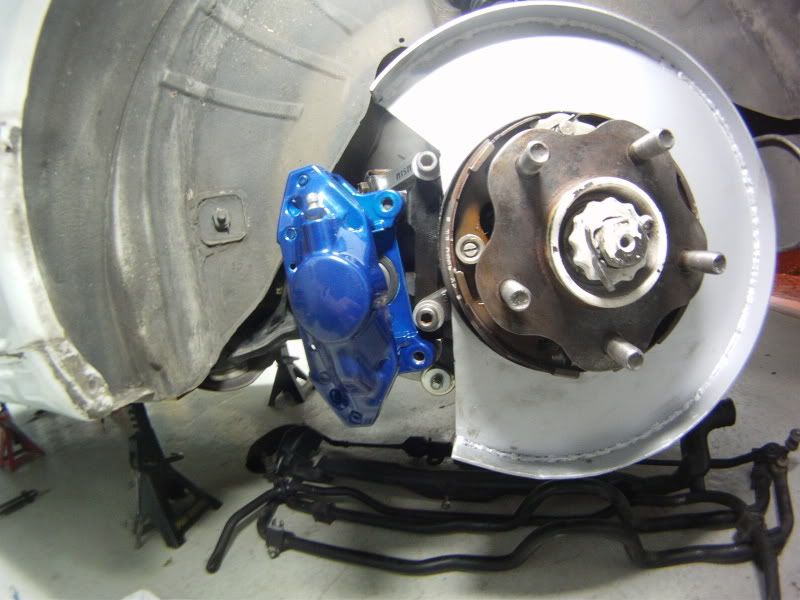
Has you can see, when the top in bolted, the bottom can’t be aligned with the bracket’s hole because it comes into contact with the knuckle
Its was only off by �”
So I grinded both the calliper and the knuckle just enough so it would align

And voila!!
Rinse and repeat on 2nd side

Then I plugged the brakes lines into the hardlines under the car… and fell asleep,
My dad scared the crap out of me when he woke me up, after he saw from the house through the garage’s little window that I hadn’t been moving for 30 minutes…
What can I say, it was 10;30 and I was tired and a concrete floor is not that uncomfortable..
/day54
/week15
I decided I didn’t want to start the car in the garage, because if anything goes wrong (leaks, fire) I’d rather be outside,
So I’m going to fnish up the brakes next, then the clutch lines, drop the car, fill all the fluids and roll it outside then start it
I got my AMS 2-piece rotors in the mail, I’ve been waiting a long time for these since they were B/O for over a month, and sure enough, with my luck, I got the wrong set of rotors (BNR32), so Vuk is sending the right ones (BCNR33) overnight so I can finish this up this weekend
And I’ve started to figure things out for the interior, still don’t know when/where to get my harness bar done, it might just be much easier to buy one for an S13 and modify it… we’ll see, but theres also Agtronic, heh!Last edited by frankiman; 11-17-2010, 11:59 AM.Comment
-
You sir, have the sexiest build going lol'03 Ford MustangOriginally posted by kengerooComment
-
If your planning on tracking the car a lot I would recommend running larger pcv hoses. You may get crankcase pressure issues.
Also, with all your custom stuff why didn't you customize your power steering lines to clear the electric fans?
Btw, did koyo change there thickness? I've fit a few unmodified shrouds to koyos and although tight they fit.Comment
-
even if i use larger hoses for the pcv, i'll still be limited by the catch can's fittings which are 3/8"
to fit the mishimoto shroud, both the power steering and hicas lines would have needed modifications, and those particular lines are an enormous PITA to remove,
overall, it would have been way too time consuming, and the cost of modifiyng the lines (fittings, lines, labor) wouldn't have made it worth while
SKYGTR made his fit by deleting the Hicas lines and customizing the p/s line

but he's on a very different budget/timeline
and not using the mishimoto fan was more for the "bling" factor than anything else
i don't know if the rad thickness has changed, but i can assure you fitting an unmodified OEM shroud in there is like triyng to shove a bowling ball down a toiletComment
-
Just remove the Mishimoto Shroud and mount the fans directly.
Stop modifying stuff and get your car rolling!!! I want to go to the track with you already!!!Comment
-
even the fans alone don't fit, i checked, i could only get one to fit,
anyway, it will work just as well with the stock shroud/fan imo
i don't even know if i'll be able to do some track days,
my goal now is to do the UltraRide10', do the ASELC 3rd time attack, and drive up to my chalet with the car one weekend,
anything else i get to do with it will be icing on the crapcakeComment
-
cool update but the ghetto battery connections by the fuse box are gross.
as for the rad/ fans thing. i had the same prob with an a/m rad so i used the factory one as well but put one of the electric fans on the pass side of the front of the rad to push air.
i put it on a switch so when the car is stationary after a run on the track i just flick the switch on and it keeps it a noticible amount cooler.
idk just an idea if ya already got the fans.RB25 Powered RWD GT-R
Owner for Turtle Garage Hicas Delete SystemsComment
-
from what you are saying, i'm guessing you don't have a/c anymore?Originally posted by ryano1515 View Post
because i still got working a/c, and the oem a/c fan still exactly where you put yours,
i was told i could have it wired directly to a switch for the same reason you postedComment
-
Hopefully nothing bad happened, mano! Excited to hear more news!'03 Ford MustangOriginally posted by kengerooComment
-
Good job starting it.Originally posted by frankiman View Post
I don't understand, your oil cooler doesn't have a thermostat and you found out the hard way? There is no hardway, it anything its better. Either way you should of primed your oiling system before the start the engine. At this point if I was you don't try to manufacture crazy ****, just modify wtvr u need to get it running good. If your electric fans don't fit just mount them wtvr way you can and make it work.
The thing with car projects is its never over, theres always more you want to do. Its hard to find the right place to say "ok, this is the right place to stop". I'm the worst at saying this but I can tell you if your car is running just stop there and modify what you need when you have time (and drive the car in the meantime). Adding fitting and making new brackets is not going to make the car more reliable, faster, or drive better. I have a mont tremblant track day in like 2 weeks, its a full weekend event wanna come?!!?Comment
-
Unless you bought it used and someone pulled it out, the thermostat is located under the flat/nipple looking cover on the side opposite the inlet lines from the motor (on your setup, right beside the gold fitting, facing the driver's fender).Originally posted by frankiman View Post
Greddy even ship this block partially assembled with the thermostat inside, so if yours is missing, then someone purposely removed it.Comment
-
....although, you could have also run the lines from the motor to block backwards....but I don't think that would cause a bypass to occur, even if the thermostat was in place. You should be able to see it clearly if you remove the cooler-side lines and have a look inside. Look for a piston/spring type of setup.Comment

Comment