Announcement

Collapse
No announcement yet.

Caliber's R32 GTR Project

Collapse
X
 
  • Filter
  • Time
  • Show
Clear All
new posts

  • Caliber's R32 GTR Project

    Hey guys, So its been a long time since i've been around the project/build thread, and I decided to delete my old thread and start over fresh.

    A little bit about myself and my background to 'set the mood' lol. After highschool I had been working for a small Reman. Lumber mill along side a Millwright where I learned a lot about fabrication, fixing forklifts (which i HATE) and everything mechanical. I also worked for a bit as a Detailer at Mercedes, I loved it, detailing i find can be an art in aspects. Right now I am currently enrolled in the Automotive Service Tech program at BCIT and also love that as well. Aside from that, I am rather meticulous about everything I do and do not believe in cutting corners where it counts. I also love to custom fab anything, so you may see me doing a lot of different things.

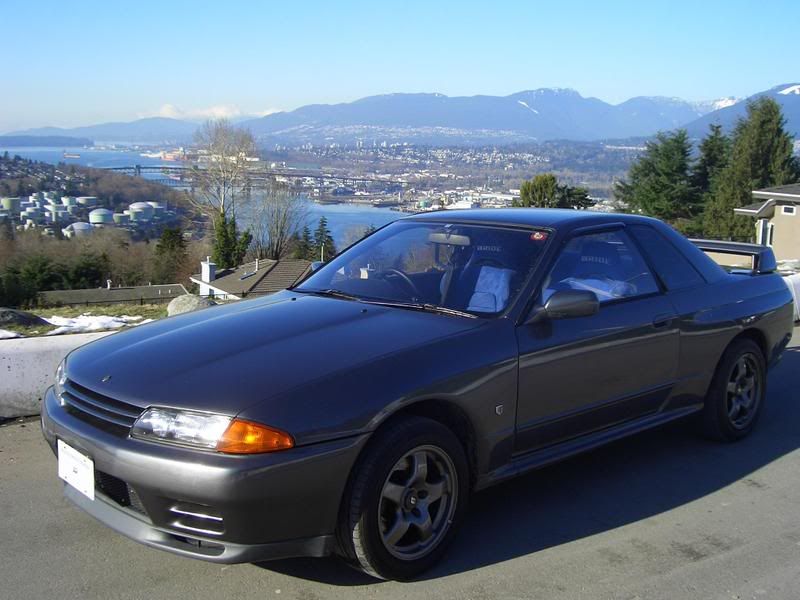
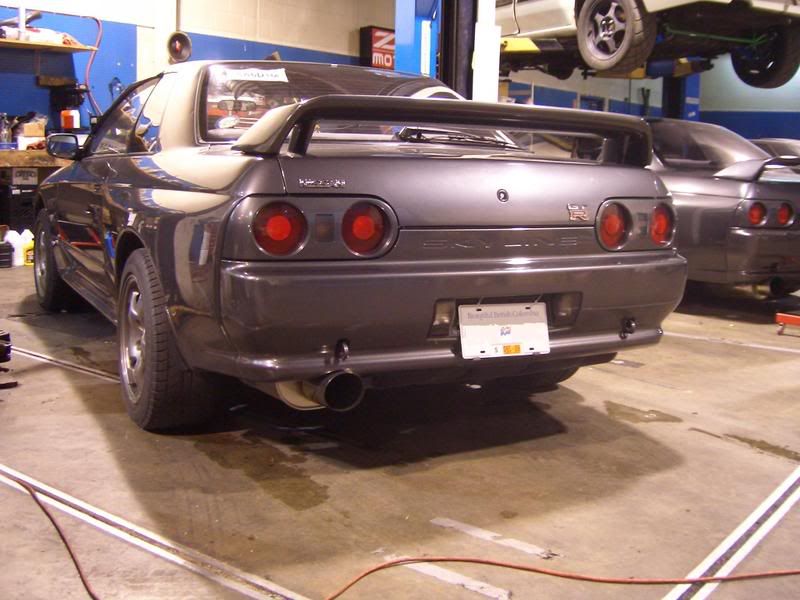
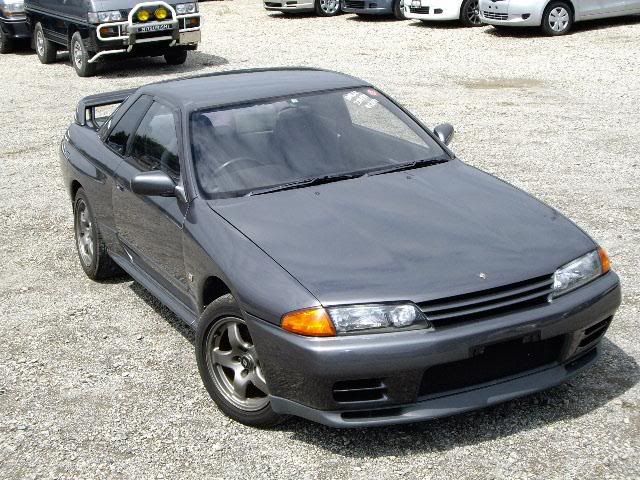
    To start off with my car, I have a 1991 R32 GTR in Gunmetal grey. I purchased this car in November of 2008 from JZGarage (he was a terrible dealer). The car was completely stock aside from N1 headlights and aside from everything negative said about Ed/JZGarage, the car was rather clean and well performing.

    The first things I needed to do when I picked up the car was get a new clutch, as the old one was pooched. I went to ZTune and decided to go with a RPS Single plate 6-puck clutch, I an happy with it so far. Along side some maintenance parts; spark plugs, fluids etc

    Anyways, I use this as my daily driver until the summer of 2009 where it was thrown into the garage and has been my project/build car since.

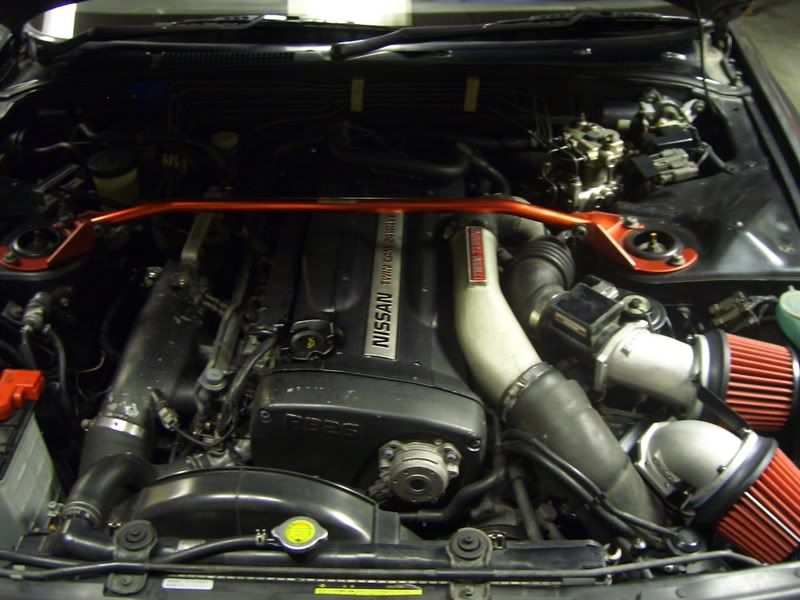
    heres some pictures when I got it:


    I hope you enjoy my project, and I encourage your input!
    “Hey, come on, its a car right? No. It’s a symbol of your history, its a thread of continuity from which you came to where you are. It’s important that you don’t want to forget who you are.” -Dr.Phil in "Love the Beast"

  • #2
    I'm going to be constantly updating this as I have done a bunch of work since I got it, I'm just going through old albums trying to find pictures.

    First off, I should mention I have connections to an Apex'i dealer, so if your ever in need of parts and want a price break, let me know. Anyways, I picked up an Apex'i Power intake kit and threw out that old airbox.


    I also had picked up a GTR dead pedal and Momo steering wheel with a HKB hub, although i'm currently looking into getting a quick release hub with an offset wheel.

    (finding pictures)

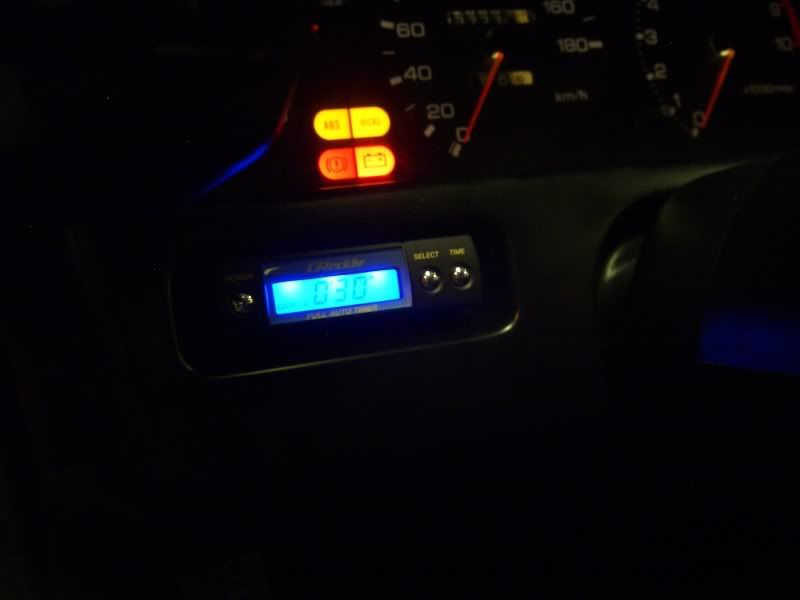
    After that I got a tad bored and picked up a greddy full-auto turbo timer and harness. Of course Greddy had to wire the harness backwards, but its all good now. I never liked people double-sided taping the turbo timers or awkwardly securing them to panels. I decided to mount it where the digital clock is beside the steering wheel. It took a bit of trimming to fit it and a custom bracket to secure it, but I think it gives a much cleaner look. Heres a bad picture, but the idea is there.


    Still finding pictures.......
    “Hey, come on, its a car right? No. It’s a symbol of your history, its a thread of continuity from which you came to where you are. It’s important that you don’t want to forget who you are.” -Dr.Phil in "Love the Beast"

    Comment


    • #3
      Very nice Shane. Hopefully it will be on the road soon.


      Cheers

      Comment


      • #4
        i just got one of those greddy auto timers.. they're awesome soo many features like volt meter, 0-60 time, lap timer, and of course auto timer.
        The SkyLife Community & News Website --> http://www.skylife4ever.com

        Comment


        • #5
          Yeah, I solely use it as a turbo timer, but at least it has the capability if I ever wanted to play around.

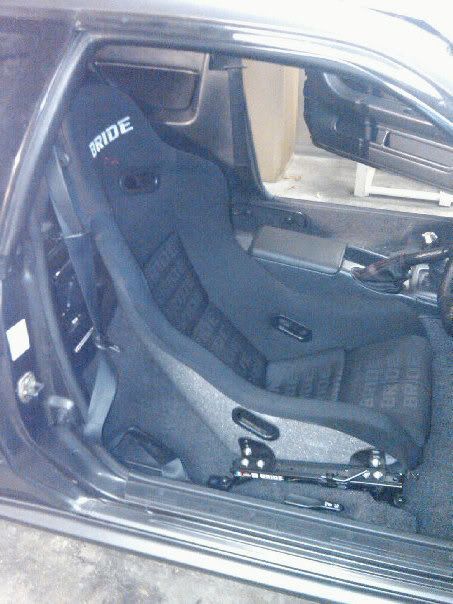
          Anyways, Now I'm getting into the more current things I am doing. I got rid of my OEM seats and had these hideous blue Bride seats that were just garbage. I ditched those and searched for an ACTUAL authorized Bride Japan dealer and picked myself up a Bride Vios3 LowMax in black graduation and FPR (FRP?) backing. $1600 later, I couldn't be happier! I haven't decided yet between a Bride Gias reclinable or an East Bear Sigma for my passenger seat. I want something reclinable for the passenger, but nothing too far off from the Vios3.

          Anyways here it is. Sorry the picture is terrible, I am baring with my Camera phone for the mean time!

          If anyone has the money to blow on one of these, I would highly recommend it!

          Also, while I was surfing the net, I managed to pick up a nice Carbon hood for next to nothing. It needs a good polish on the clear, but as I will talk about later in this thread, the car is going to paint and I will be getting this painted the same color as the rest of the car. I'm a fan more of matching colors than carbon. It has a slight vent and lip in it, but nothing too aggressive like the seibon TT with like 4 side vents and intake scoops etc. Very subtle, yet slightly more aggressive than stock. It fits perfectly, just waiting on some Aerocatch pins that I have ordered and it'll be waiting for paint with the rest of the car!

          (will insert picture asap)
          “Hey, come on, its a car right? No. It’s a symbol of your history, its a thread of continuity from which you came to where you are. It’s important that you don’t want to forget who you are.” -Dr.Phil in "Love the Beast"

          Comment


          • #6
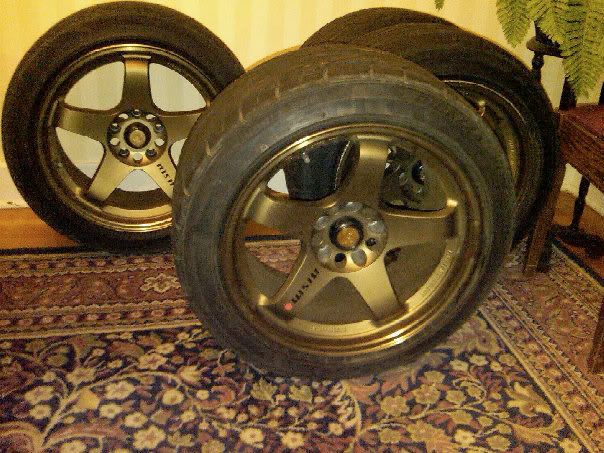
            While I was out on a shopping spree I managed to pick up a set of LMGT4's in the signature Gold colour in a 17x9 +12 offset. The stance is FLUSH, perfectly flush in my opinion, couldn't be happier with these. Also picked up a set of RAYS lug nuts with a set of Locking lugs.


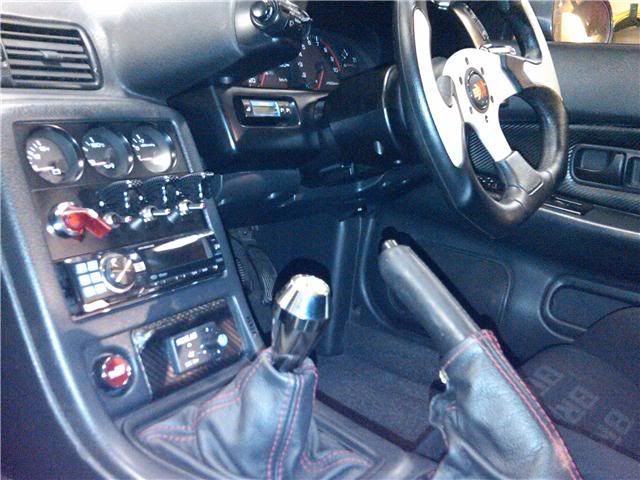
            I also decided I needed to spruce up the interior and especially center console as it was getting rather outdated. I picked up a Toggle/kill switch DIN and spent a good few days getting that all wired up. The kill switch is directly to engine, not a battery or anything. The Carbon safety covered toggle switch are for Rad fan, RWD and AWD and the last one hasn't been assigned anything. I also felt that my cigarette lighter wasn't being used so I'd rather have something slightly more appealing, so I picked up an Engine start button.

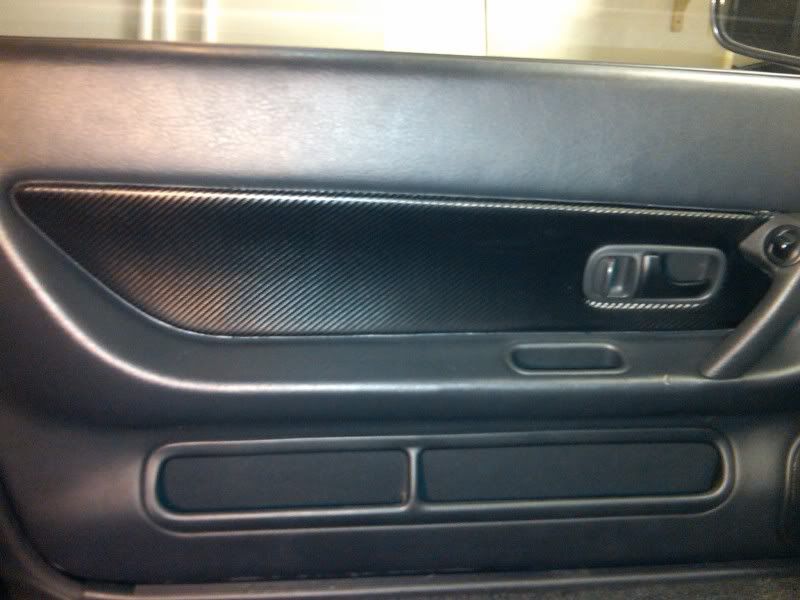
            I also needed to update that worn and faded door card fabric. So i opted for a nice clean dry carbon look. I spent a fair amount of time getting the stencils right and cutting the pieces, fitting them and making sure it was all perfect, and this is how it came out (This is just the left door, although all card fabrics, front and rear, have been done)


            And of course I needed to have some tunes, so I picked up an Solid Alpine deck and a set of Pioneer speakers all around.
            Here it is all together:


            FORGOT TO MENTION! In that picture, i picked up a SKYLAB torque splitter and custom mounted it flush where with the ashtray is with a carbon accent. I haven't had a chance to use the unit, but I am hoping in the spring for AutoX it will help a bit, couple with the option for RWD VIA the toggle switch. I'll get better pictures of this stuff!
            “Hey, come on, its a car right? No. It’s a symbol of your history, its a thread of continuity from which you came to where you are. It’s important that you don’t want to forget who you are.” -Dr.Phil in "Love the Beast"

            Comment


            • #7
              Now this is all current:

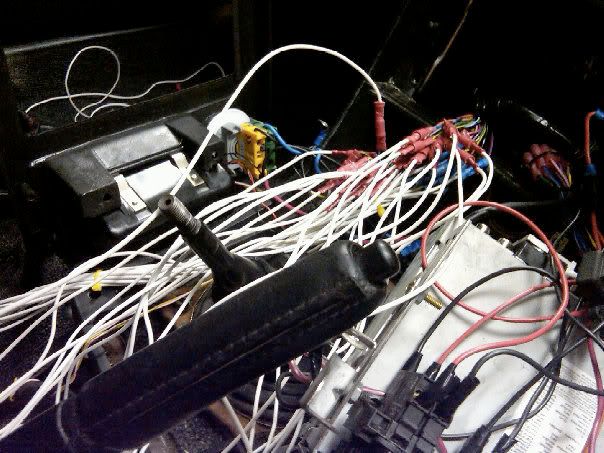
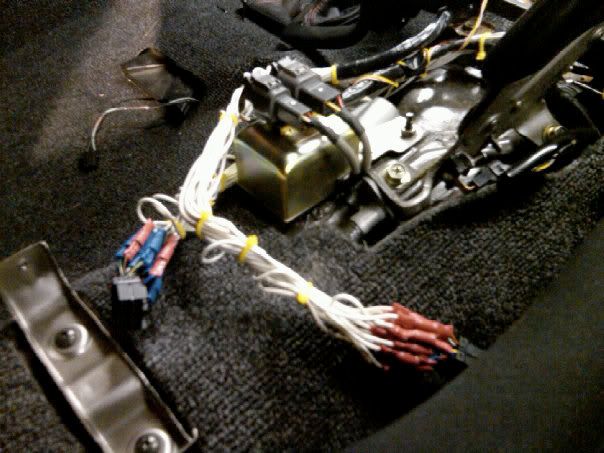
              I needed a place to put my Climate control as my center console was taken up by torque splitters and switches. I decided that I should mount it in the center console compartment, but wanted to make sure I did a nice clean job of it. It was especially difficult because of the off sided shape of its interior. Anyways, That also meant extending the wiring to the unit, which was about 50-60 wires

              I started doing all the connections and once I was done with that it looked something like this MESS!

              That wouldn't do, so I cleaned it all up and make it look a little better.


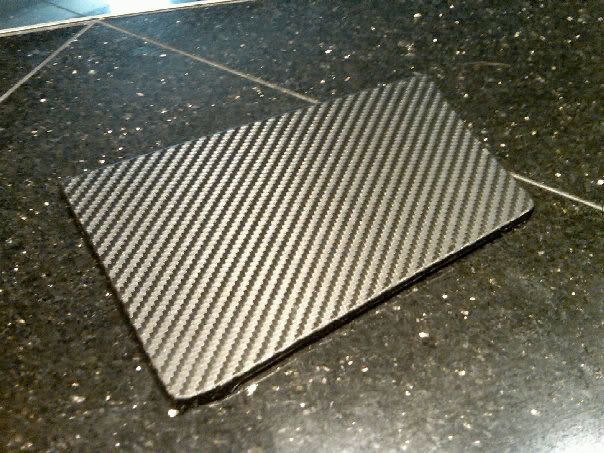
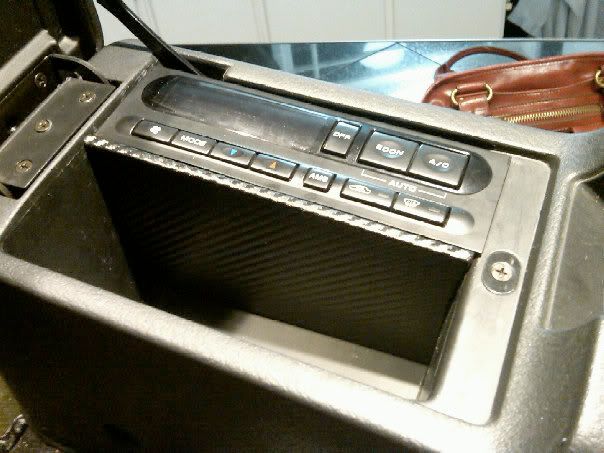
              In the mean time i got caught up with the install that I forgot to take picture of mounting the climate control unit in the compartment. It was rather straight forward with the bolts, as long as you got the right measurements and the bolt holes lined up. Once bolted in, I thought I needed to put a plate between the unit and the other half of the compartment so I could still store items without them falling underneath the climate control unit. So I use sheet plastic, MEASURED MEASURED MEASURED! Made a lot of templates to get the exact dimensions and then cut and adjusted the plastic plate. I then wrapped it in carbon fabric to get a nice clean look and this is the result:


              Once that was cured and ready to rock and roll I fastened it inside the compartment and Viola! The climate control was relocated to the center compartment and still served as a compartment for storing, just a bit smaller! I am very pleased with the results,
              “Hey, come on, its a car right? No. It’s a symbol of your history, its a thread of continuity from which you came to where you are. It’s important that you don’t want to forget who you are.” -Dr.Phil in "Love the Beast"

              Comment


              • #8
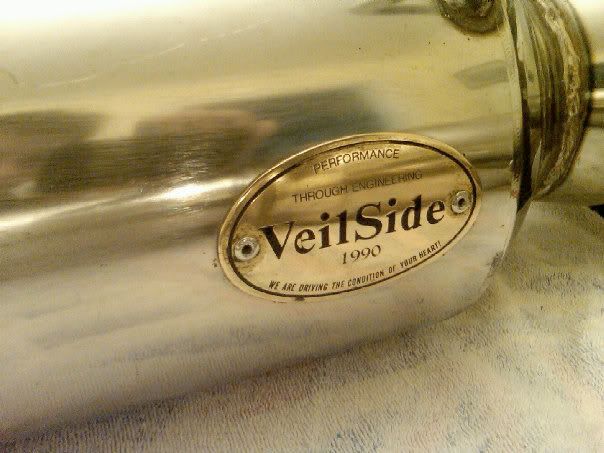
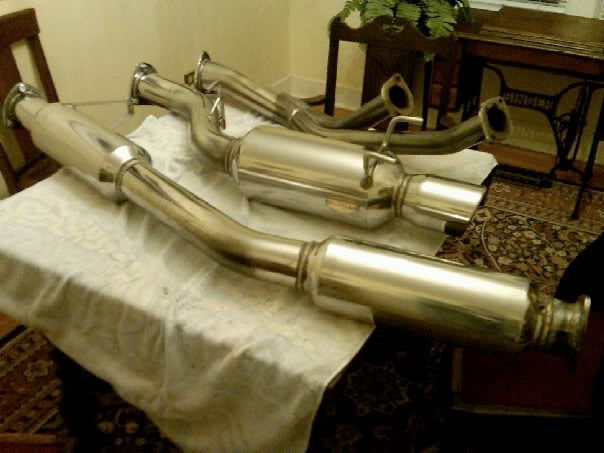
                I also just received my Veilside exhaust from Turbo_CRX, great guy to deal with and an amazing exhaust.

                Its a full exhaust, from downpipes to end. The downpipes flow from a 2.5" to a 3.5" straight out to the tip. There are a few resonators/mufflers, but no place for a cat or anything. Its also made in 1990, so the style and everything fits perfectly with the car. Also why I fell in love with this! I will get a sound clip soon, it should sound mean. In the mean time here is some pics of it!

                “Hey, come on, its a car right? No. It’s a symbol of your history, its a thread of continuity from which you came to where you are. It’s important that you don’t want to forget who you are.” -Dr.Phil in "Love the Beast"

                Comment


                • #9
                  wow... quite the task on extending the wiring.. but good job! and that veilside exhuast has 2 resonators... it must sound pretty awesome. you're doing a lot for comfort and looks which is wicked... any plans for power and handling?
                  The SkyLife Community & News Website --> http://www.skylife4ever.com

                  Comment


                  • #10
                    Yeah, i am mainly focusing my attention on the cosmetic factors of the car. I decided to do this because I saw about a penny sized spot of rust on the inner lip of my rear quarter/fender. I absolutely HATE rust or anything that cosmetically makes my car unappealing, so I went to Ztune and got two brand new quarter panels crated from Nissan. I want to get that fixed asap, and since that would include some body work and paint, I figured I might as well do everything cosmetic first, then get around to engine work. It also works perfectly as now I am starting to finish all that cosmetic stuff and I am picking up with footwork and engines in my Classes, so I can refine my skills before I go at it. With that being said though, it is truly killing me to be leaving the engine alone right now, I am a performance and mechanical man at heart. But soon enough it will be out of the way.

                    On the topic of cosmetics and such. My vehicle is booked into the body shop either this week or next week...I cannot remember. The manager there does a lot of Old domestic vehicles/projects. I felt this was much better than going to a auto body chain.

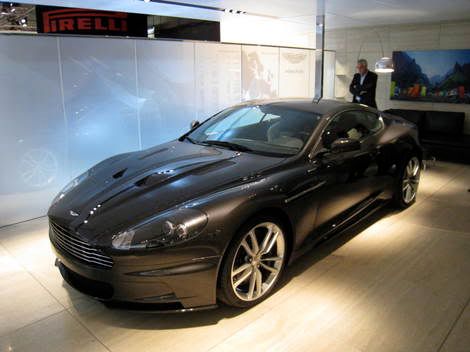
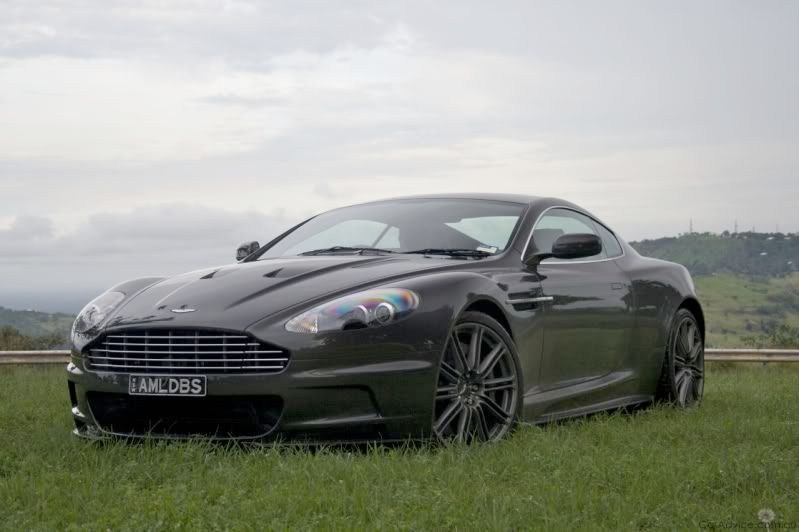
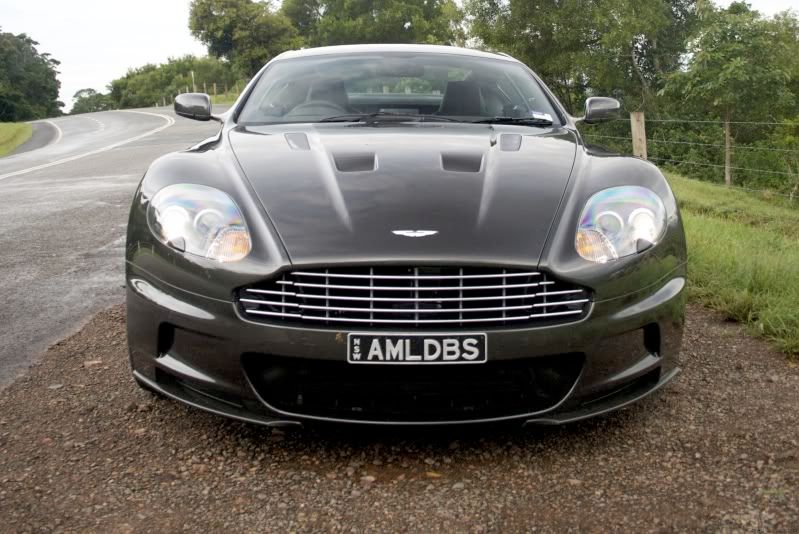
                    I also am getting the car painted as the KH2 gunmetal is a tad too light for my liking. At first I was thinking of a black, but after discussing with Albert at Still creek collision, I chose the "Quantum Silver" from Aston Martin, for the DBS. It is a very dark grey that lightens in the sun but in shade looks almost


                    For power, my basic outline is to completely rebuild the engine from the bottom up. I do not want insane amounts of power and I'm rather impartial to the numbers I get, but im looking for something between 450-500. I don't want anything overly drastic. I will outline the exact specifications of my build once I get a bit more time. (just putting in the exhaust now)
                    “Hey, come on, its a car right? No. It’s a symbol of your history, its a thread of continuity from which you came to where you are. It’s important that you don’t want to forget who you are.” -Dr.Phil in "Love the Beast"

                    Comment


                    • #11
                      beautiful paint color choice, and thats chill man, i totally get that... rust on my car would freak me out... cause if its in one spot.. theres a good chance its in other spots too!... you had a look around the frame rails under neath and all that yet?
                      i find near the 500 hp mark is really safe and realistic for a forged motor... it can crank 500 all day long (assuming its got a good proper tune)

                      im diggin your build thread tho buddy, so many of us have been focusing on performance and power that its actually rare to see someone focus on cosmetics for a change, its actually a breath of fresh air!
                      lol

                      take lots of pics...
                      The SkyLife Community & News Website --> http://www.skylife4ever.com

                      Comment


                      • #12
                        Thanks man. I have looked under the vehicle thoroughly and cannot find any other signs of rust. I told the guy dealing with the body work to give the car a thorough look over and get it dealt with if there is any rust he runs into. I don't mind spending the money, i just want it done right.
                        “Hey, come on, its a car right? No. It’s a symbol of your history, its a thread of continuity from which you came to where you are. It’s important that you don’t want to forget who you are.” -Dr.Phil in "Love the Beast"

                        Comment


                        • #13
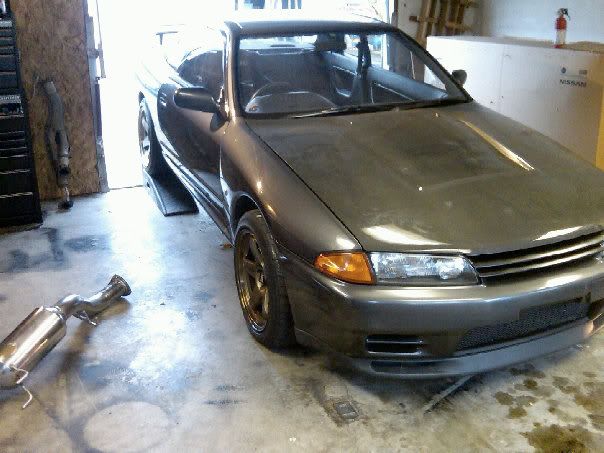
                          Just finished putting in the exhaust, didn't get around to taking a video of it, just took a pic of the car in the middle of it. Just to clarify, the cars exterior is a tad dirty and the black grill is just tempt because the car is going into paint within the next week super excited.
                          “Hey, come on, its a car right? No. It’s a symbol of your history, its a thread of continuity from which you came to where you are. It’s important that you don’t want to forget who you are.” -Dr.Phil in "Love the Beast"

                          Comment


                          • #14
                            Originally posted by archaeic_bloke View Post
                            i find near the 500 hp mark is really safe and realistic for a forged motor... i
                            you can easily do 500bhp on stock internals, as long as you have the matching external supporting mods
                            sigpic

                            [links to all chapters in first post]

                            Comment


                            • #15
                              shane i hate you, and i want your car...


                              that is all.
                              Automotive photos from around the Pacific North West.
                              www. BigBoyMedia.net

                              Comment

                              Working...
                              X