Originally posted by JVizZLe
View Post
-
Checked on FAST, it is the fuel pump ECU. Where was yours relocated to? I was planning on removing the plate behind the seats and extending the wiring through there so I could install it on the shelf above the fuel pump access or thereabouts in the trunk.Originally posted by dsmart View PostLeave a comment:
-
My car had that ecu repositioned when the coilevers were installed but also had modified the ecu with extra ground wires. I think whoever did the work tried to make the fuel pump have 14.4 volts at all times. The reason I think its the fuel pump ecu is that with the ground wires disconnected I had no power to the pump. I looked in fast too but its was hard to come up with anything conclusive. When I get more time im going to have another look at it and probably just remove it all together but thats for another dayOriginally posted by ColinR33 View PostLeave a comment:
-
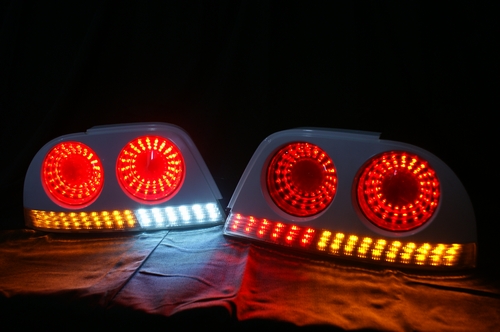
looks awesome, love the engine cover and CF wrap console look sick! If youre still looking to upgrade appearences may I suggest some nice tail lights with LED indicators to improve the aesthetics of the rear?
Leave a comment:
-
I have to find a way around that box as well. My plan is to try and reposition it, maybe make a new bracket. It doesn't have to move very much to get the tool down by so it shouldn't be to hard.
I found this thread on GTROC http://www.gtr.co.uk/forum/112630-attesa-dummies.html its a good read and looks pretty reliable. Anyway at the end of the OP it says the ATTESSA ECU is located in the trunk below the HICAS ECU. Interested to see what you find out on FAST.Leave a comment:
-
Interresting, checked again, half the refs say attesa ecu and half say fuel pump ecu.FAST time! Either way it's gotta be moved if I want to be able to adjust the coils. Gonna have to wait a bit, got the flu and feel like I got hit by a truck right now.Originally posted by dsmart View PostLeave a comment:
-
I thought that the ECU mounted over the rear shock was for the fuel pump...lowers voltage at idle etc etc.?Leave a comment:
-
Ripped out the interior and got her up on stands in preparation for installing Defi-Link, gauges and coilovers - just so much more room with all the seat out! Also need the rear shelf out to access the bolts for the rear shocks, but once I got it out I found the Attesa ECU blocking access to the to the bolts, and will make it very difficult to adjust the coilover settings:

Looks like I'll hav e to extend the harness and install it in the trunk.
Also found adjustable tension rods, another surprise. Have a 4-arm kit coming in, so these will likely be for sale shortly.

Leave a comment:
-
So finally got out to the garage to do a bit of work, decided to overhaul the blitz BOV's, they were looking pretty cruddy and one seemed seized.
This is when I took them off, unfortunately I had already wiped them down a bit, you can't see all the crud and oil on the horns.

Took them off the pipe, lots of oil and dirt in there (catch can and baffles installed now!)


When opening up, watch out for the spring, it will shoot the top across your workroom if you do not hang on to it after undoing all the allen nuts. More oil and dirt...

Here you can see all the scoring on the piston from the dirt...

Cleaned everything up nicely inside and out.

Put back together, pistons move much smoother now, and they look prettier, nice and shiny! Too bad no-one will see .
.

Leave a comment:
-
So, started in on the simple stuff, installing the Mines cam cover baffles. Took the cam covers off, you can see the oil puddling up.

First step is to take the old baffles off and clean everything up...

Get the new baffles ready with some liquid gasket and put the new oil separator foam in


Some more liquid gasket on the mounting shelf, some loctite on the screws and all done!

Leave a comment:
Leave a comment: