Ok so first off I just want to point out that the info I am presenting here is not my own. I have no idea where I found this information, but when I did I thought it was a good idea to copy and paste it into a word file. I recently came across this long lost file and thought everyone here would benefit from the sharing of this info. This is a DIY at your own risk and I am in no way, nor is the original author responsible for anything that happens to you or your parts if you should try to attempt this process.
So now that that is out of the way here goes....
Carbon Fiber interior is becoming more and more mainstream these days, so how do you stick out from all of the kits? Why customize and laminate your own parts. When done right, it can look far better than any of the kits on the market today. Here is how you do it.
The first step, obviously, is to decide what pieces you are going to laminate. The material of the piece to be laminated can also decide what resin you are to use also. A typical polyester resin WON'T stick to plastic. Some regular vinylester resins are more suited for plastics. You need to purchase supplies such as carbon fiber, sand paper, a surface prep wash (such as PrepAll), measuring and mixing containers, a couple of 2 inch wide paintbrushes, and resin. For resin, the easiest to work with while laminating an object is KleerKote from US Composites. It will stick to anything, has a uv protectant, and dries crystal clear.
Now, to prep the piece that you will be laminating. Start off by sanding with a coarse grit paper (I prefer 80). This will give the resin something to bond to. After sanding, wipe the piece down with prep wash. Using a clean towel and more prep wash, go over the entire piece once again to make sure there is no remaining residue. (resin will only stick to the piece, not to dirt or grease on that piece.) Let it dry COMPLETELY.
Mix a little bit of the KleerKote resin. using a brush, apply a layer over the piece. KleerKote has a pot life of 35 minutes, so if you are using a different resin, your times may be a little different. Wait about 15 minutes until the resin becomes tacky like glue. Pot life is also dependent on your mixture ratio, temperature and humidity.

While the resin is beginning to set on the piece, cut a piece of carbon fiber cloth for the project. Use masking tape to outline the area you will be cutting. Cut down the middle of the tape. This will keep the fabric from unraveling.
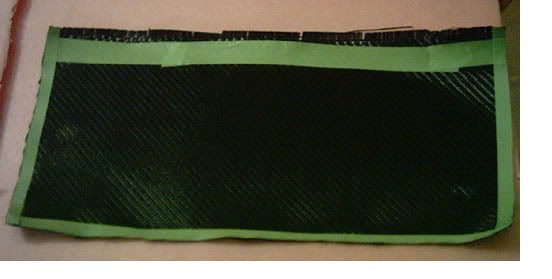
Now, after the resin is tacky to the touch, lay your carbon cloth ofer the piece. You are going to get a little sticky here. Use your fingers to press and form the carbon around all of the contours of the piece you are doing. After it fits satisfactorily, let it cure for about 1 1/2 to 2 hours. (Leave the overhang of cloth until it dries)
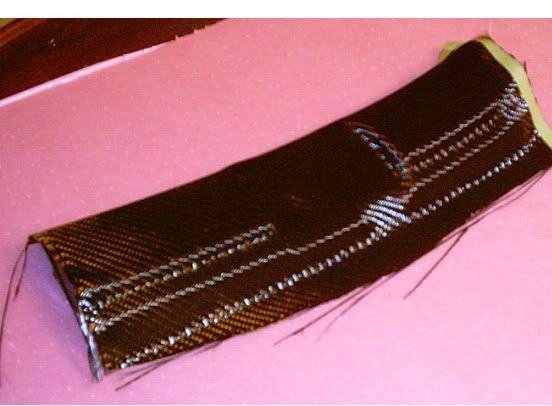
After it is cured to the point that the carbon will not shift when touched, mix enough kleerkote to cover the piece. Use a brush to apply a liberal coat to the piece. This will seal the carbon and greatly reduce the chance of air bubbles in the finished product. After that coat is applied, let it sit for about 40 minutes.
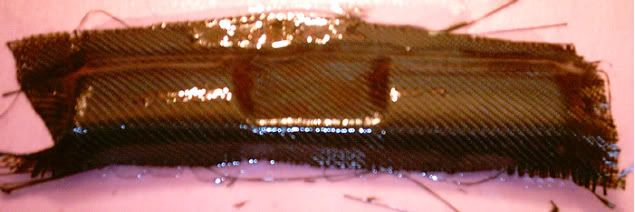
The next step is called a flood coat. You pour the kleerkote resin at the highest point of the piece and let it flow down. This resin is self leveling, so there isn't that much sanding to do later. Repeat this step 90 to 120 minutes apart until there is no surface texture over the weave. If you let the previous layer cure completely, you will need to lightly sand with a light grit paper (600 - 800 grit) so the next layer of resin has something to bond to. The below pic is after 2 flood coats. It will more than likely get 1 or 2 more before final sanding and buffing.
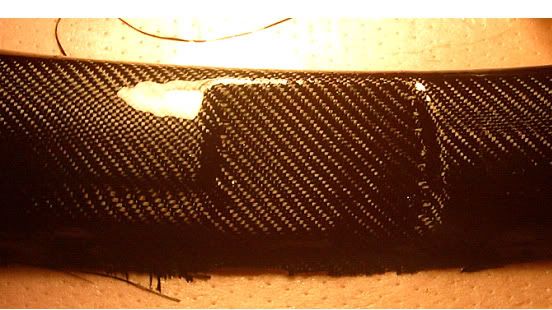
After the piece cures overnight, you can trim the excess off with a pair of fabric shears. (its only one layer of carbon after all. ) Trim the fabric short with shears and use a Dremel to take it even with the plastic around it. One final flood coat helps to seal everything together.
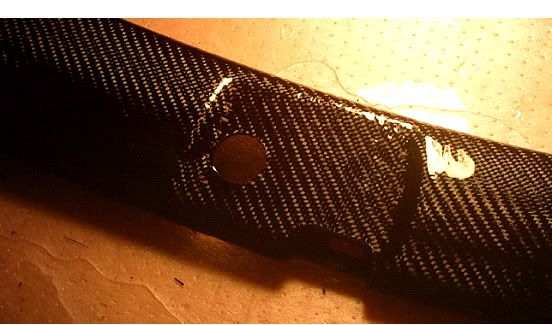
Notice the reflection of the light on the piece. This is before final wetsanding and there are still small waves in the resin.
After the piece is COMPLETELY cured, you can wetsand with 1500 grit, then 2000 grit until the surface is smooth. After that, 3M rubbing compound does a great job of taking off the haze that wetsanding leaves behind. You are now done!!
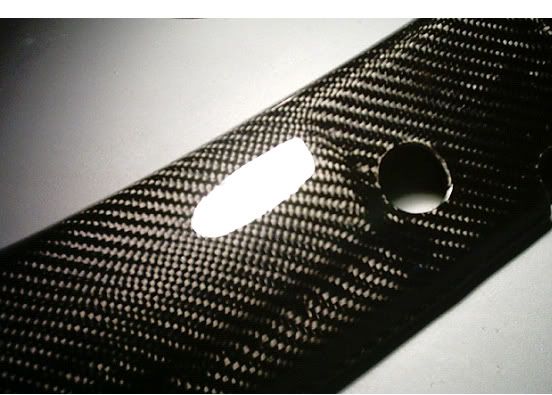
Heres another example of a finished one, this one is a battery cover made with carbon fiber and blue kevlar

So now that that is out of the way here goes....
Carbon Fiber interior is becoming more and more mainstream these days, so how do you stick out from all of the kits? Why customize and laminate your own parts. When done right, it can look far better than any of the kits on the market today. Here is how you do it.
The first step, obviously, is to decide what pieces you are going to laminate. The material of the piece to be laminated can also decide what resin you are to use also. A typical polyester resin WON'T stick to plastic. Some regular vinylester resins are more suited for plastics. You need to purchase supplies such as carbon fiber, sand paper, a surface prep wash (such as PrepAll), measuring and mixing containers, a couple of 2 inch wide paintbrushes, and resin. For resin, the easiest to work with while laminating an object is KleerKote from US Composites. It will stick to anything, has a uv protectant, and dries crystal clear.
Now, to prep the piece that you will be laminating. Start off by sanding with a coarse grit paper (I prefer 80). This will give the resin something to bond to. After sanding, wipe the piece down with prep wash. Using a clean towel and more prep wash, go over the entire piece once again to make sure there is no remaining residue. (resin will only stick to the piece, not to dirt or grease on that piece.) Let it dry COMPLETELY.
Mix a little bit of the KleerKote resin. using a brush, apply a layer over the piece. KleerKote has a pot life of 35 minutes, so if you are using a different resin, your times may be a little different. Wait about 15 minutes until the resin becomes tacky like glue. Pot life is also dependent on your mixture ratio, temperature and humidity.

While the resin is beginning to set on the piece, cut a piece of carbon fiber cloth for the project. Use masking tape to outline the area you will be cutting. Cut down the middle of the tape. This will keep the fabric from unraveling.

Now, after the resin is tacky to the touch, lay your carbon cloth ofer the piece. You are going to get a little sticky here. Use your fingers to press and form the carbon around all of the contours of the piece you are doing. After it fits satisfactorily, let it cure for about 1 1/2 to 2 hours. (Leave the overhang of cloth until it dries)

After it is cured to the point that the carbon will not shift when touched, mix enough kleerkote to cover the piece. Use a brush to apply a liberal coat to the piece. This will seal the carbon and greatly reduce the chance of air bubbles in the finished product. After that coat is applied, let it sit for about 40 minutes.

The next step is called a flood coat. You pour the kleerkote resin at the highest point of the piece and let it flow down. This resin is self leveling, so there isn't that much sanding to do later. Repeat this step 90 to 120 minutes apart until there is no surface texture over the weave. If you let the previous layer cure completely, you will need to lightly sand with a light grit paper (600 - 800 grit) so the next layer of resin has something to bond to. The below pic is after 2 flood coats. It will more than likely get 1 or 2 more before final sanding and buffing.

After the piece cures overnight, you can trim the excess off with a pair of fabric shears. (its only one layer of carbon after all. ) Trim the fabric short with shears and use a Dremel to take it even with the plastic around it. One final flood coat helps to seal everything together.

Notice the reflection of the light on the piece. This is before final wetsanding and there are still small waves in the resin.
After the piece is COMPLETELY cured, you can wetsand with 1500 grit, then 2000 grit until the surface is smooth. After that, 3M rubbing compound does a great job of taking off the haze that wetsanding leaves behind. You are now done!!

Heres another example of a finished one, this one is a battery cover made with carbon fiber and blue kevlar


Comment