Announcement

Collapse
No announcement yet.

Nelsonmxmarc 1993 GTSt Type-M Build / Tips-tricks for HCR32 (Skyleezy!)

Collapse
X
 
  • Filter
  • Time
  • Show
Clear All
new posts

  • Hit a wall..


    Let's discuss.

    ----------------------------------------------------------

    1. I swap out my headgasket, headstuds and timing belt for safety reasons. Again this motor has 130xxx km.
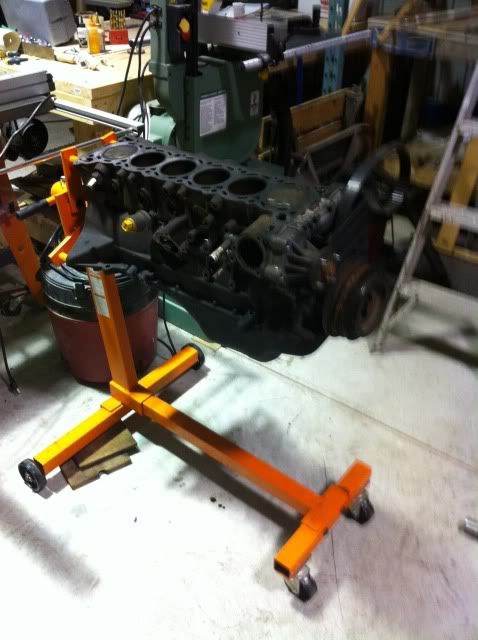
    I leave my cams alone and have Cherry Turbo's build my 25 Hybrid.. I run it this the season (i normally do 15,000 km a season.. i know) and do my 2.4L build over the summer/winter so next year i have a fully refreshed motor. By this time next year, my current motor will have about 150,000 km on it (to my knowledge based on the ODO). Could be a refresh because the compression numbers are quite impressive..

    This would; Allow me to buy all my suspension/brake components, RUCA/FUCA/HSD's/AMS Slotted rotors and HP+ pads

    My transmissions synchros will last all season and i have a backup 32 trans i can use in the mean time- saves money as well..

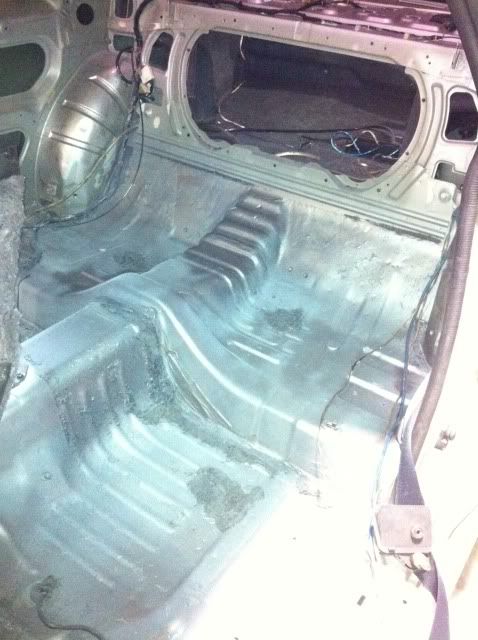
    Do my interior bracing/move my battery and smoke some more weight..


    my other option is this;

    2. Do the remainder of my headwork, cams, valvesprings, timing belt, headstuds, headgasket, turbo.. run 20 psi and hope for the best?
    Could last another 50,000 km.. could last half a day..

    I'm looking at the numbers now and what seems to be the best deal is the former. If i just do the necessities and take the cautious route, i can work on my other block in the mean time and build something that will give me piece of mind next season knowing im starting over from 0 km and a motor that will put out.
    Check out the GTST Projects page and keep up to date with my build!
    www.nelsonmx.wordpress.com
    Like us on Facebook! www.facebook.com/NelsonMX
    Any part inquiries can be forwarded to marc@nelsonmx.com

    Comment


    • Winter build has commenced;

      - Gutted the interior

      - Removed the remaining sound deadening;

      Tips; I've heard dry ice is good as it freezes the sound deadening and makes it easy to smash with a hammer, but if you're not in pharmaceuticals or somehow have a connect for dry ice, the easiest method i have found is with a Pneumatic chissel.
      Last year i did the front with a hammer and chissel, i dont recommend this, but it will work fine - however it's very time consuming.

      As you can see from this video, its rather quick with the pneumatics;

      Store your photos and videos online with secure storage from Photobucket. Available on iOS, Android and desktop. Securely backup your memories and sign up today!


      .. Before


      After..


      Ya, it goes everywhere.. lol

      I neglected to clean the front last time, but this time will be done much prettier..

      Stay tuned!


      ---------

      Engine is still up in the air, however i believe i may have a solid plan..

      For gallery and cylinder wall thickness SAFETY .. RB2.3DET

      2.3 is achieved with;
      RB20 block
      RB26 Rods
      RB26 Crank
      4AGZE pistons (Corolla) @ 81 mil (101 series are forged i BELIEVE)
      Head work to fit the longer stroke, so gutting, new valve seats, porting to match the new CFMS and etc..

      I have the block..
      My stock oil pump should suffice but may go to the N1 from a GTR for the larger orifice --- Opinions?
      Mitch will kindly donate RB26 Crank and rods
      Crank needs to be balanced and collar pressed for oil pump
      RB20 block needs to be bored over - may go nikasil or Sleeve.. Depends on how much meat is going to be left on those thin cylinder walls
      Cams will likely be Tomei Poncams.. Along with Tomei valve springs..

      Planning to get this all done under 1500$.. Yes, 1500$.. The head work i'll be doing myself.. As well as the exhaust manifold porting and gasket matching.. Decking i can't do, nor can i do the boring/honing.. so that is where my biggest expense will be.
      4AGZE from the AE92 levin are forged stock, i just need to find a set of pistons/rings for that application. I believe i'll also need the rb26 rods to be paired to the pistons as well.. I think the piston wrist pin is a different diameter.

      Questions;

      Necessary to use new valves?
      Necessary to change oil pump?
      How is the RB26 crank clearance in the RB20 block?
      Last edited by nelsonmxmarc; 11-12-2010, 09:28 PM.
      Check out the GTST Projects page and keep up to date with my build!
      www.nelsonmx.wordpress.com
      Like us on Facebook! www.facebook.com/NelsonMX
      Any part inquiries can be forwarded to marc@nelsonmx.com

      Comment


      • hey! im on here too on a friday night! although i also happen to be at work too!

        crazy projhect.... do it,... really do it.
        don't forget bearings for the RB26 crank and pistons will be needed $350

        and how will the main thrust journals from the rb26 crank match up against the cradle of the RB 20?


        sounds dope.
        The SkyLife Community & News Website --> http://www.skylife4ever.com

        Comment


        • Need to have that area machined for the new clearances, but itll be okay.

          I don't even wanna think about cars right now..

          I just finished sanding/priming and repainting my floors - in the skyline of course.. Now they're nice n pretty..

          Redid the wiring back and wired the battery in the trunk.. Drawing up plans for a battery box now.

          Josh, what did you use for yours?

          Removed some weight;
          Rear seats/seat belts/1 random metal wire holder? on top of rear speaker deck/remainder of sound deadening/all of the carpet fuzzies underneath the carpet/about 76 feet of audio wiring - apparently the previous owner wanted to double his soundsystem to work in the house as well..

          Total weight removed today; ~64 lbs. Rear belts each were about 6 lbs with all hardware, and the remaining sound deadening from the back seats turned out heavier than i expected, at ~36 (including all the remaining fuzzy **** i took out and maybe a couple bolts/nuts fell into the mix)
          Check out the GTST Projects page and keep up to date with my build!
          www.nelsonmx.wordpress.com
          Like us on Facebook! www.facebook.com/NelsonMX
          Any part inquiries can be forwarded to marc@nelsonmx.com

          Comment


          • what?!


            can you get a scale shot?


            I've gutted the rear interior in a skyline before and no way weighed 50lbs+.

            Rear seats are honestly 10lbs wet. The sound deadening doesn't weight THAT much.

            Comment


            • Most of weight is in doors, 36kg per door for 2door. GTS bonnet weighs alot.

              Also there's sound deadening / protection under main body of car and in wheel arches, etc to protect from rocks, etc. On racecars this protection is removed and gaps between panels under car is sealed with sealant, underbody repainted. Even plastic guard liners are removed.

              With racecars they strip car of everything and dip chassis, treat chassis so it won't rust, strengthen strut towers, seam weld, rollcage, etc, repaint chassis. I had a book that showed the different stages from stock car to racecar.
              Last edited by Skym; 11-13-2010, 06:07 AM.
              RESPONSE MONSTER

              The most epic signature ever "epic".

              Comment


              • Yessss Mike


                Painted floors silver.. Putting carpet back in today and making my measurements for my rear cage.. Also laying up a carbon plate to cover up the trunk area..
                I may blow off the bookshelf idea and just find some thick padded foam like we used to use on the superbike's; lay that up on the bottom there where the original seats used to be just to cover up the body.. Will look too "track" car ish for a daily .. Just my opinion

                Most of weight is in doors, 36kg per door for 2door. GTS bonnet weighs alot.

                Also there's sound deadening / protection under main body of car and in wheel arches, etc to protect from rocks, etc. On racecars this protection is removed and gaps between panels under car is sealed with sealant, underbody repainted. Even plastic guard liners are removed.

                With racecars they strip car of everything and dip chassis, treat chassis so it won't rust, strengthen strut towers, seam weld, rollcage, etc, repaint chassis. I had a book that showed the different stages from stock car to racecar.
                Doors are very heavy.. especially the later models. I'm pulling the door panels off to remove my speakers so i'll be checking to see what can be cut out over the winter to lighten them up..

                I contemplated removing the under coating, but the underbody of my car is in unbelievably good shape, so im kind of hesitant to touch it..
                Check out the GTST Projects page and keep up to date with my build!
                www.nelsonmx.wordpress.com
                Like us on Facebook! www.facebook.com/NelsonMX
                Any part inquiries can be forwarded to marc@nelsonmx.com

                Comment


                • ---------------------------------
                  Forgot my scale 
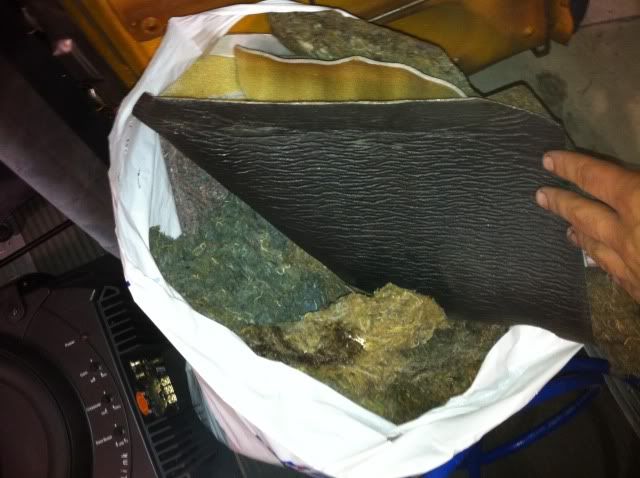
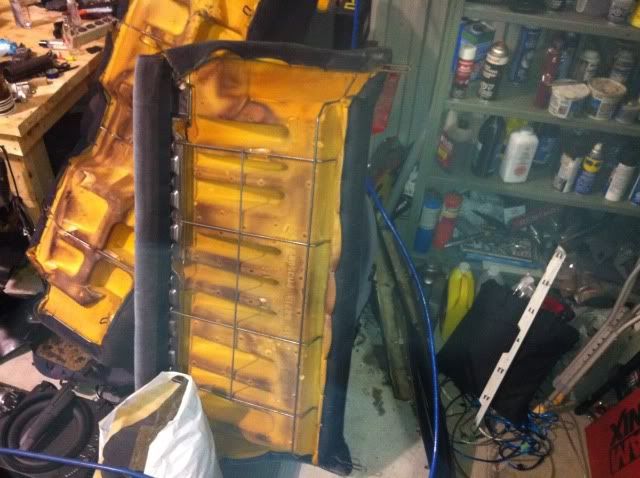
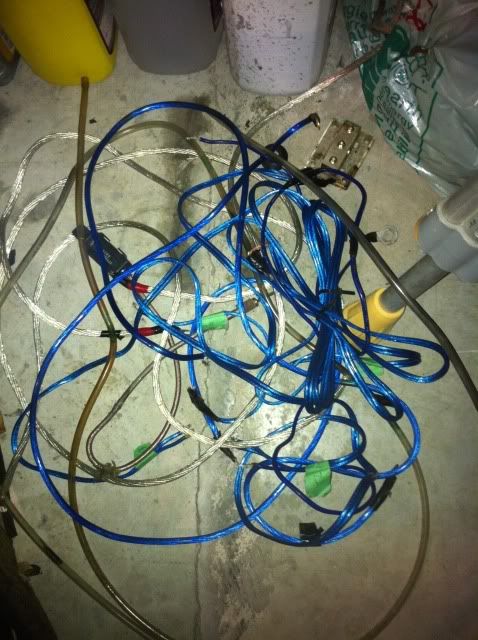
but here is what i've removed;
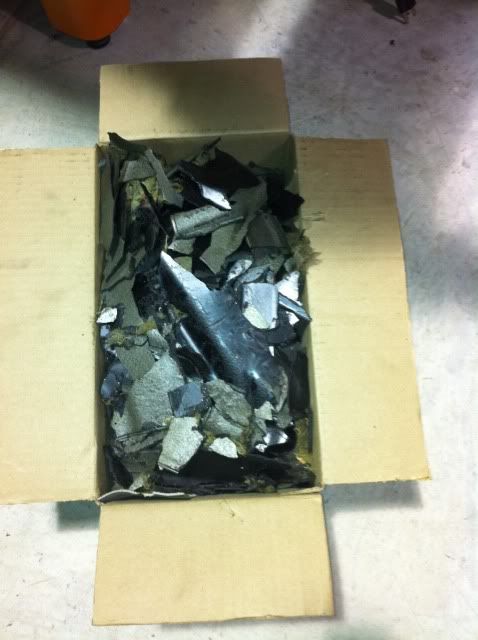
                  2 of these bad boys


                  Randomness - ducting for rear passenger, rear seats etc


                  Fuzzy's;


                  More rear stuff;


                  A batch of wires.. imagine 3 times this.. i still cant phathom why it was necessary to have all these wires.. Plus there were heavy crossover plates for grounds and power.. I took a bunch home last night but you get the jist of it;


                  New project....
                  Check out the GTST Projects page and keep up to date with my build!
                  www.nelsonmx.wordpress.com
                  Like us on Facebook! www.facebook.com/NelsonMX
                  Any part inquiries can be forwarded to marc@nelsonmx.com

                  Comment


                  • jesus the previous owner really liked having rats in the back (ratnest wiring lol)

                    That's the pic I wanted to see. I'm not just stirring the pot, but playing the devil's advocate for whether I should do this or not.


                    When I was checking out C_unit's build, I noticed a GTS that was also being stripped and he had cut off the useless metal shelves in this pic:


                    What I mean are the two 5-6" sections left and right of the trunk firewall hole by the wheel wells. He then had a plate welded on the floor to replace the gap. The cage would provide more than enough support later on. Another easy 20lbs of two-ply steel IMO.

                    Also going back to the floor bar (which you were interested in before). I was too about 6 months ago but after doing some more reading on the matter, the chassis' bracing by the floorpan. (also well shown in the pic above) is very strong and the floor bar would be nothing more than just a fancy show-off piece rather than a functional brace.

                    Comment


                    • i bought a batterry kit from summitt racing online, was around $100... included 0 gauge wiring and everything i needed.
                      i picked up a 200 Amp circuit breaker from lazer auto in mtl for $40
                      The SkyLife Community & News Website --> http://www.skylife4ever.com

                      Comment


                      • jesus the previous owner really liked having rats in the back (ratnest wiring lol)
                        Was unreal, the guy was such a suck for soundsystems.. He had 2 twelves in the back running 1500 watts, and amplifed speakers which i later found out are blown. Lol zero mid/low.. its a shi**y buzz!! But yea, he left quite a mess..

                        What I mean are the two 5-6" sections left and right of the trunk firewall hole by the wheel wells. He then had a plate welded on the floor to replace the gap. The cage would provide more than enough support later on. Another easy 20lbs of two-ply steel IMO.
                        Very true, i completely overlooked that.. I think that might be a good idea actually. In hindsight, the top deck where the speakers are mounted isn't very heavy, and the main structural support is above both wheel wells anyways, meaning that whole center sections (the 2 sections on either side of that big hole in the middle there) can be removed.

                        I'll look into it and see, if the weight savings is good enough it may be worth doing?

                        Plus my idea for the end result was to make a mold from aluminum and have that whole back section covered in carbon fibre; from the top of the firewall to the top of the differential hump. The bottom will be likely covered in a thick foam padding like i mentioned earlier, a lot like superbike seats.

                        Also going back to the floor bar (which you were interested in before). I was too about 6 months ago but after doing some more reading on the matter, the chassis' bracing by the floorpan. (also well shown in the pic above) is very strong and the floor bar would be nothing more than just a fancy show-off piece rather than a functional brace.
                        True, there is sufficient bracing where the driver/passenger seats are to neglect any need for a floor brace..

                        My idea for my rear cage is more or less support and structural rigidity than a cage.. Rather it's going to go from the top of each wheel well diagonally to where the seat belt attachments are..

                        Should hopefuly provide some rigidity but i cant see why not!


                        Anyways ya, i'll check that out soon and let you know how much material we can get away with, might be worth doing.. Might even be worth removing the entire inner portion of the upper deck, leaving only the outer frame intact and making a CF shelf for the speakers... ooooo
                        Check out the GTST Projects page and keep up to date with my build!
                        www.nelsonmx.wordpress.com
                        Like us on Facebook! www.facebook.com/NelsonMX
                        Any part inquiries can be forwarded to marc@nelsonmx.com

                        Comment


                        • If I were you and am covering the rears with CF, I'd paint the rear floor/panels black. That way you only have to put one layer of CF two over two twill therefore not using as much materials and resin. It'd get the same look, just less materials.

                          Rear stereo bracket doesn't weigh much. (8lbs from my memory when I cut one out) but the stupid carpet/paper board weighs 5lbs. (also look pretty out-dated and usually warped from age)

                          CF piece would weigh 1/4lb. and would look pretty boss. I wouldn't do it for the weight but for the statement.

                          Comment


                          • can i haz the blue wiring?

                            need to replace the ugly beige wiring from my grounding kit
                            sigpic

                            [links to all chapters in first post]

                            Comment


                            • We can share lol

                              Theres about 70 feet of it. More than welcome to have some lol.

                              Plan to make a grounding kit with all these bits n' pieces eventually!
                              Check out the GTST Projects page and keep up to date with my build!
                              www.nelsonmx.wordpress.com
                              Like us on Facebook! www.facebook.com/NelsonMX
                              Any part inquiries can be forwarded to marc@nelsonmx.com

                              Comment


                              • Are grounding kits even proven to work?

                                Comment

                                Working...
                                X