^ i dont agree. but i had one where the dump didnt re-enter untill down low. (downpipe and elbow were 1 piece) i had huge high end power gains when i installed it.
Announcement
Collapse
No announcement yet.
Jordies '93 GTST Type M... Progress Thread
Collapse
X
-
First off the Front suspension was taken out and the inside of the wheel wells were seam sealed and painted with chip, rock guard.
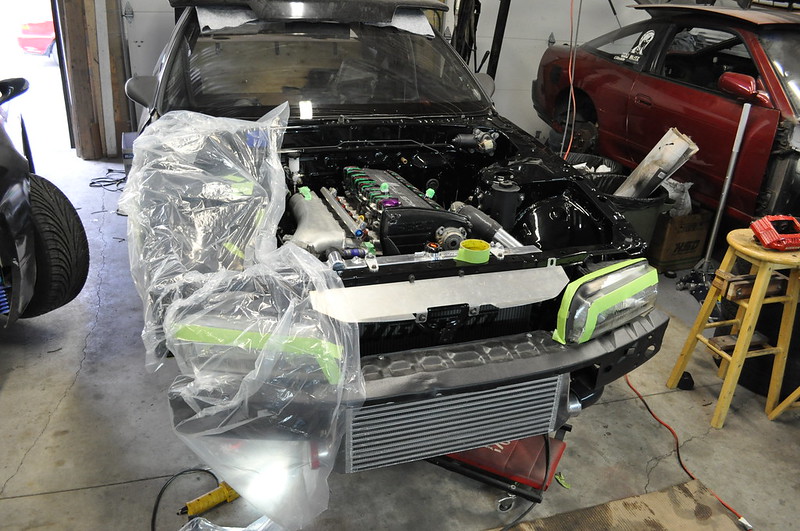
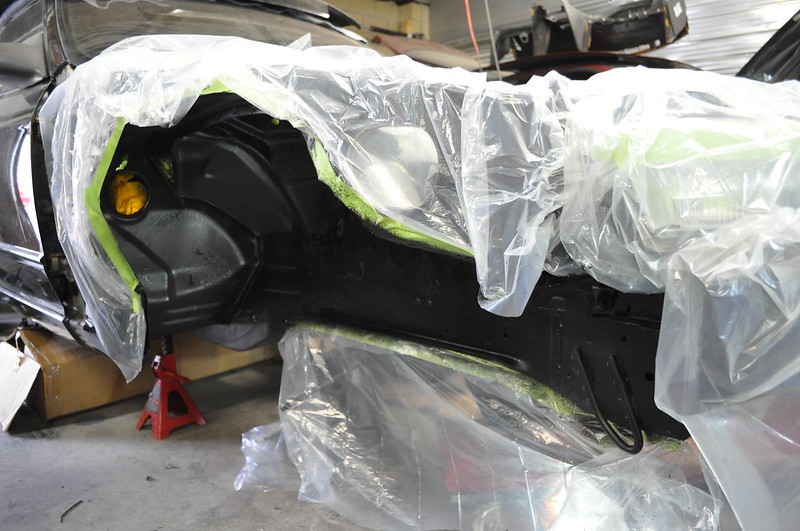
If I was smart I would have done it before the engine bay got painted, but I had to fit in the the painters schedule and there wasn't any time. Masked off all the holes and used some drop sheets to avoid ruining the newly painted bay
I dont really have any pictures (boring and immensely time consuming in my home garage) but every bushing has be replaced with the exception of the bearing between the front arm and knuckle.
For those who are interested, 90% of the S13 energy suspension bushing kit can be used on R32. I properly got rid of Hicas by swapping in an S13 Subframe, removed all the lines and de finned my PS Pump.
Rear BallJoints were replaced with B13 Sentra ones (same as S13)
Front Balljoints are the same as S14
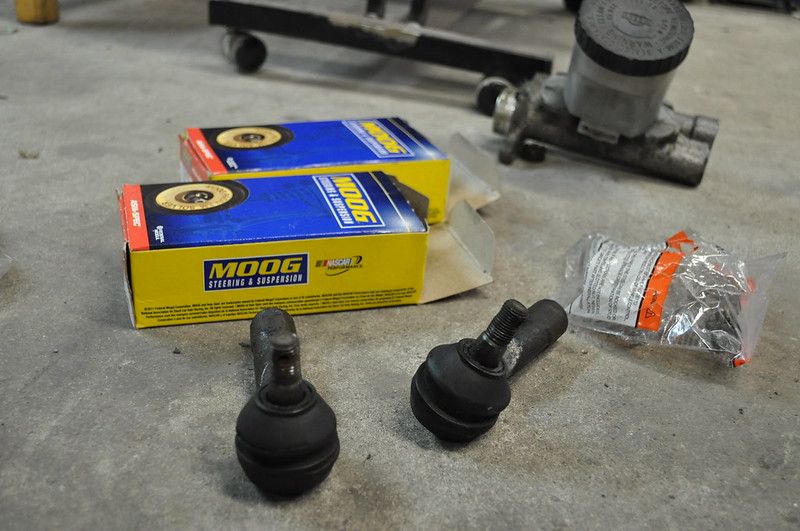
Front Tierod Ends are 95 Maxima
Needless to say im excited to see how this car handles now.
I've been busy over the past couple of weeks assembling, painting and fixing up all the loose ends. As of now, the complete drive line is back in the car and it is back on the ground.
The stock overflow tank was cracked and would stick out like a sore thumb in the newly painted bay so I opted for the new Chasebays Unit. None of the in stock brackets were appropriate so I mounted to the rad support.
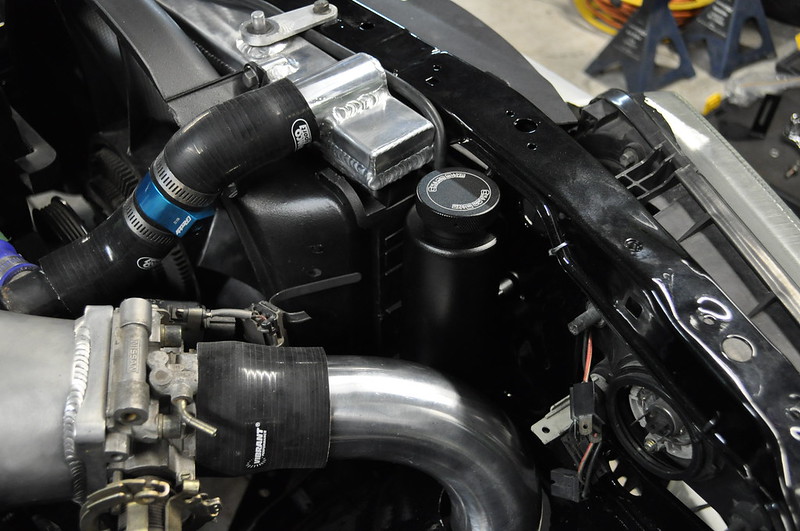
I also installed my Greddy Coolant temp sensor in the Upper Rad Hose. The GKTech Fan also fits 100% and I am excited to see how it preforms over stock. They claim 60% more airflow but we shall see.
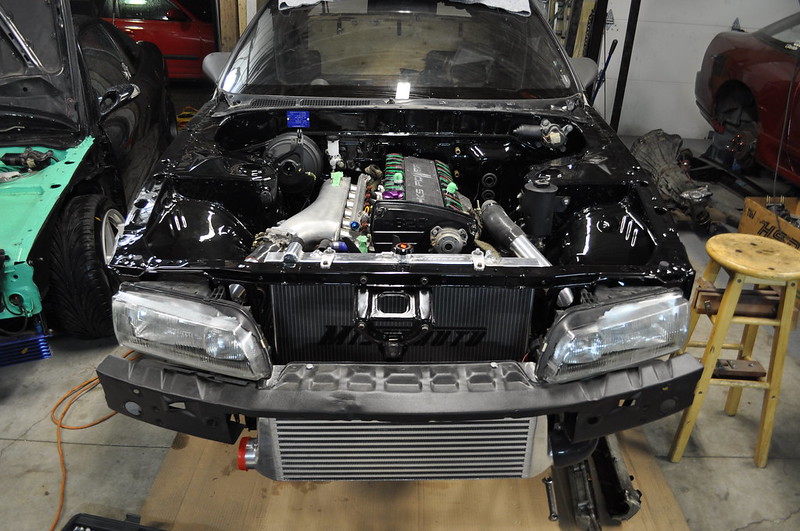
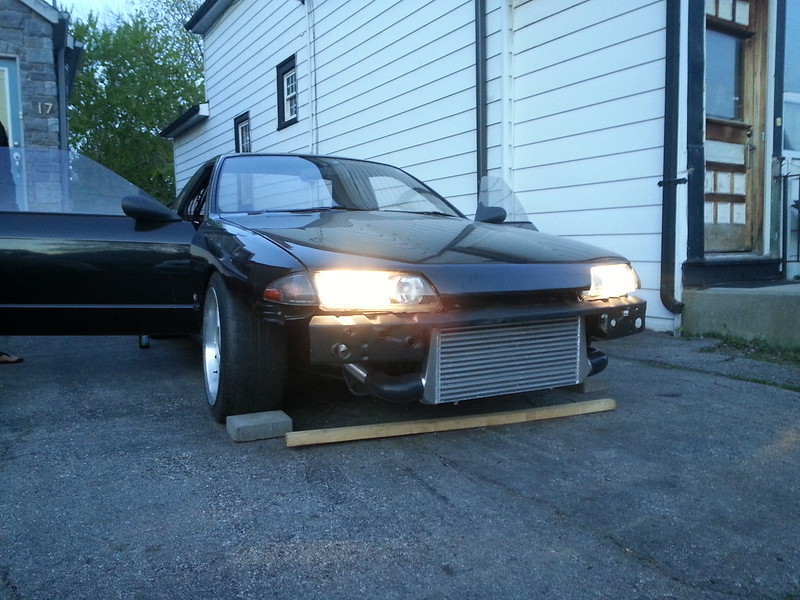
Intercooler was just a universal kit I had previously purchased from Ebay. Ill probably source a brand name one in the future (Likely HKS) but this will do for now
Finally got the car back on the ground and threw on the Tommykaira wheels and Sideskirts for some motivation.
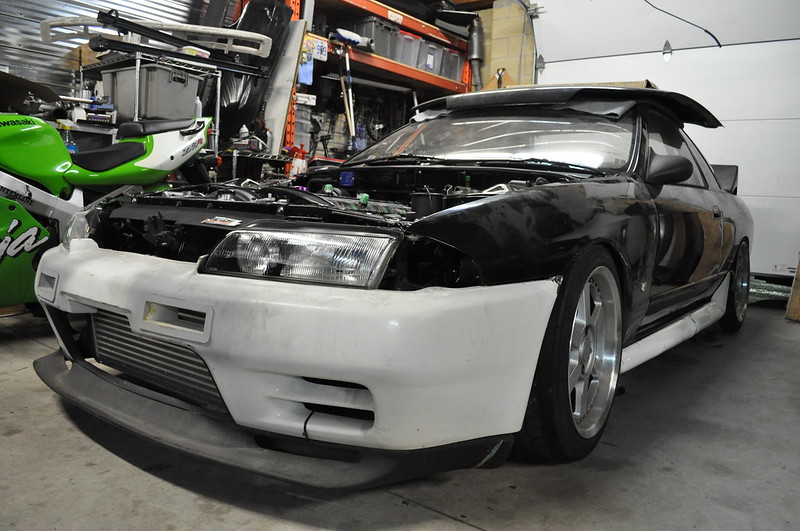
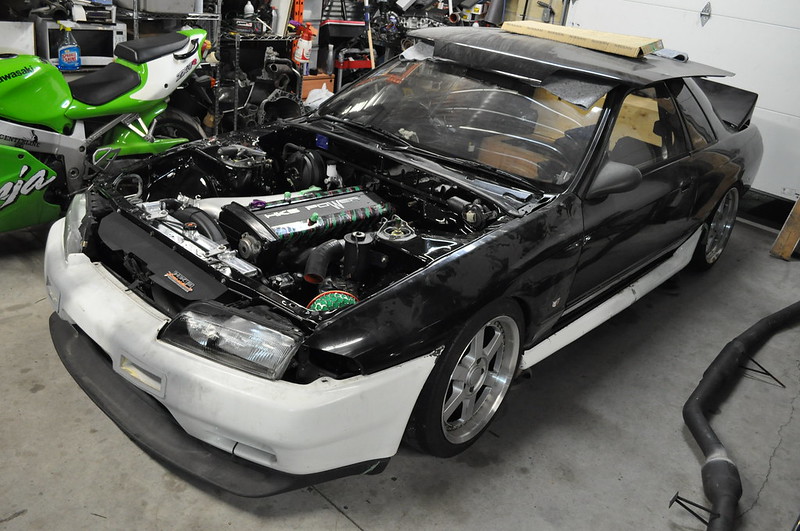
Wire tuck party starts tonight.
-JordieJordie Lewis
1993 Skyline Type M
Comment
-
Had some time to work on the car today and started by installing tierod ends.
As i stated before, 95 Maxima ones are compatible with R32 GTS. I knew the old ones were worn out but I had no idea they were this bad.
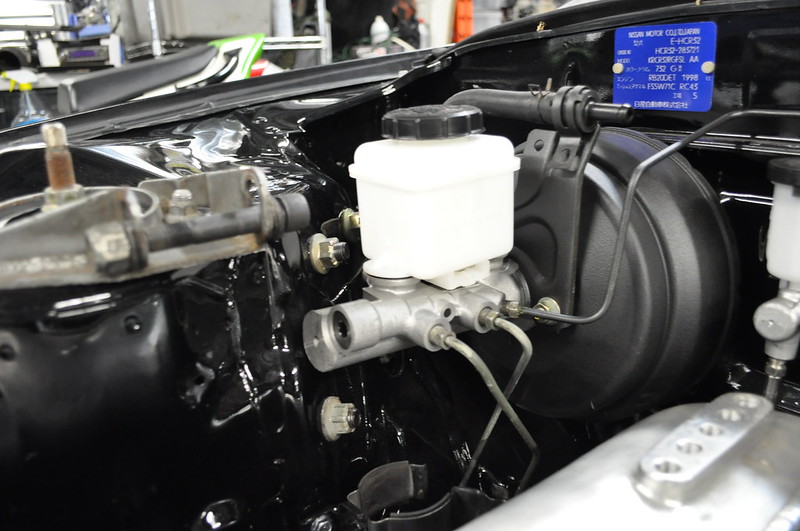
Also, The old brake master was also replaced with one from a 91+ Pathfinder. All the lines were run and the callipers were cleaned and painted ricer red for some extra horsepower. Both fenders were mounted as well as the lights. Some massaging of the front fenders will be needed so the GTR bumper lines up 100%.
I'm stoked that I no longer have 39048230984 feet of intercooler piping. Now its just 2 short pipes and 4 couplers.
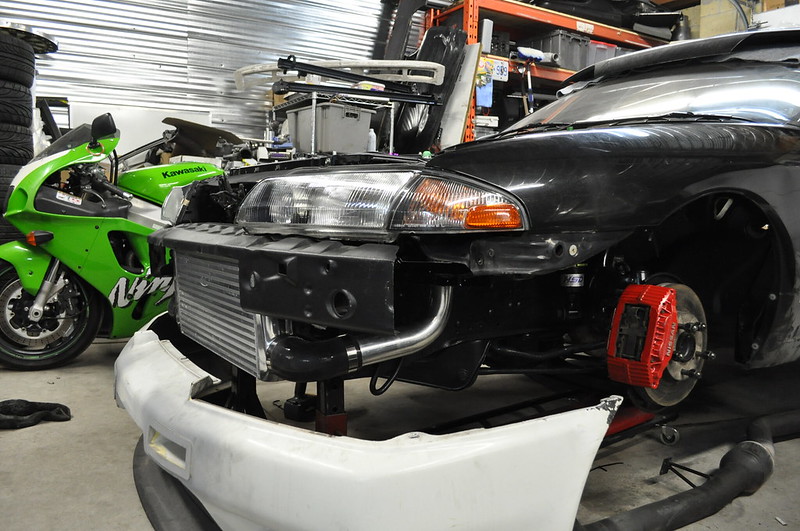
turned out Vibrant didnt have a flange for my Blitz BOV (I Cannot STAND HKS SSQV Sound) As I am tight on time I got a hold of a greddy flange and modified it to fit the BLITZ. Please excuse the sealant, I will clean it up later.
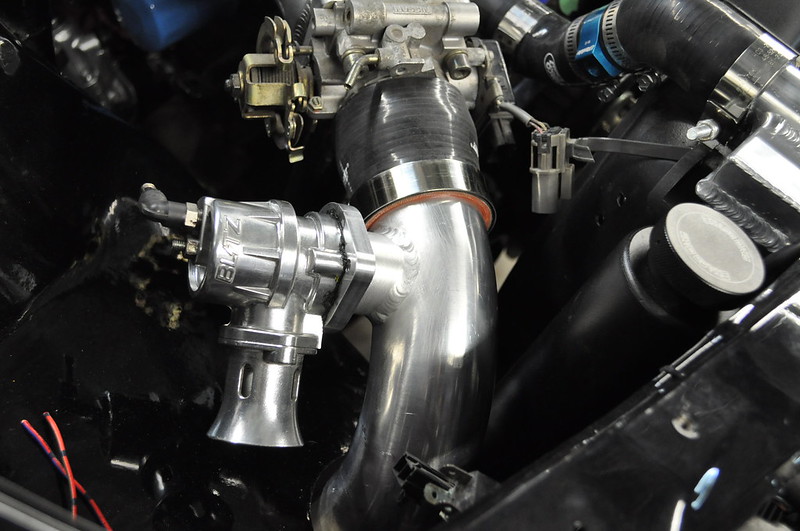
As of now, all the hot side piping is clamped and ready to go. The intake is also in snugged up and in its final resting place. The stock rubber intake was replaced with an aluminum one I made from some scraps I had leftover from the universal Intercooler Kit. I finished it off with a HKS filter, purchased through FRSport.
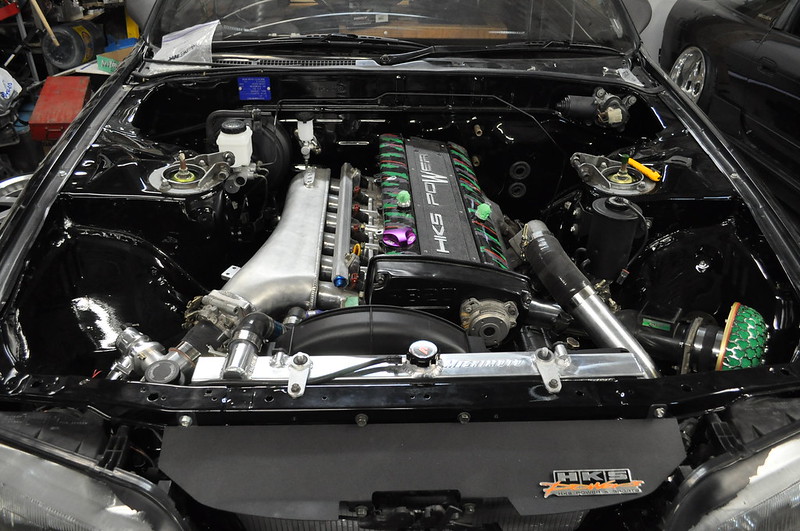
The devil is in the details.
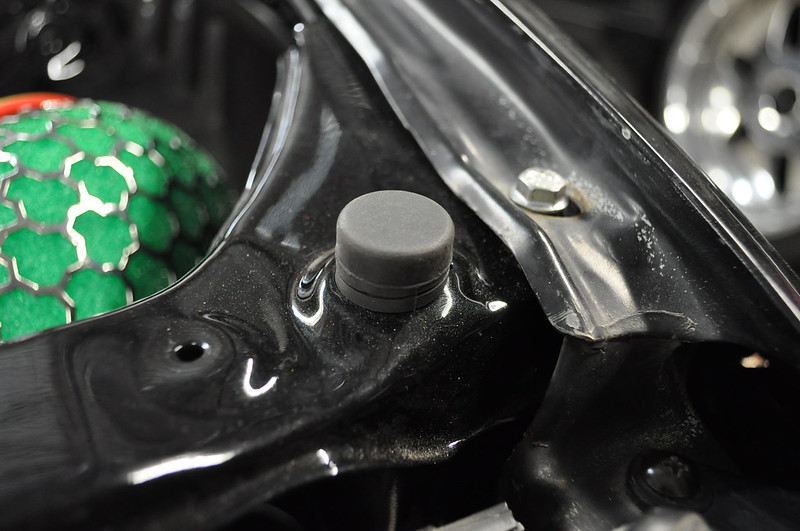
Keeping up with the little details, I've replaced the old hard rubber hood stoppers with brand new ones.
Since all the hicas garbage has been removed, I now only have 1 hardline going across the firewall. The plastic factory clips were brittle , cracked and mostly crumbled away to nothing when I stripped the engine bay. To solve this I inserted #10-24 Riv nuts in the existing holes in the cowl and used Stainless button head cap screws and little "P" clips to hold the brake line in place.
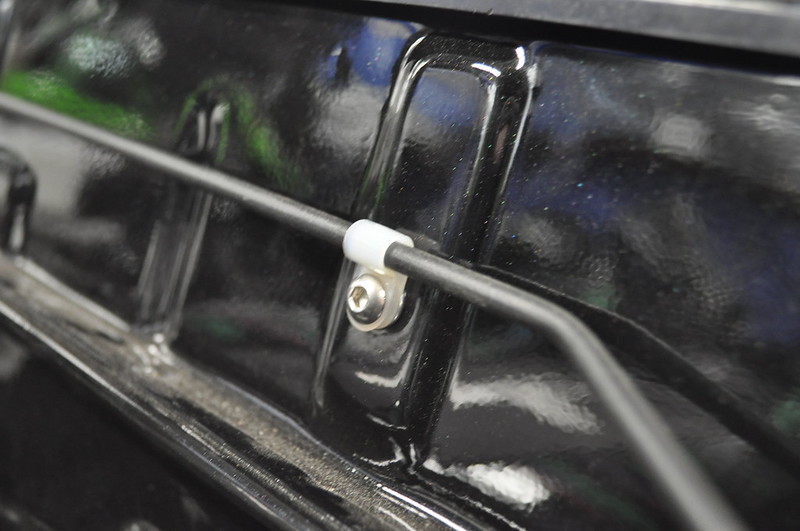
Black clips would be Ideal but these do the trick for the time being
I got the OEM GTR bumper fitting as best as I could with the stock GTS fenders and corner lights. It is about 95% right now. There is a gap of a couple mm where the wheel arch on the bumper meets the wheel arch of the fender. This is unavoidable when putting a GTR bumper on a GTS but I doubt it will be that noticeable once the bumpers are painted.
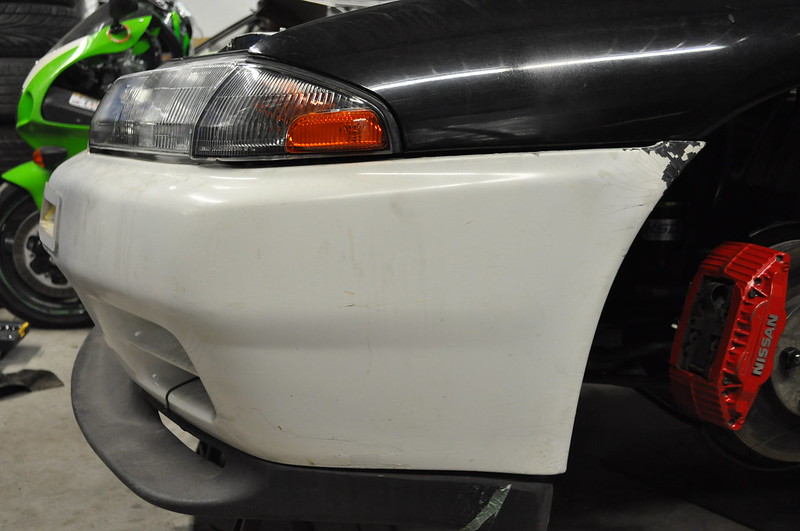
GTR fenders are slightly wider so brackets will have to be to bolt into existing holes under the cornerlights to "suck" the bumper so it meets up with the stock fenders.
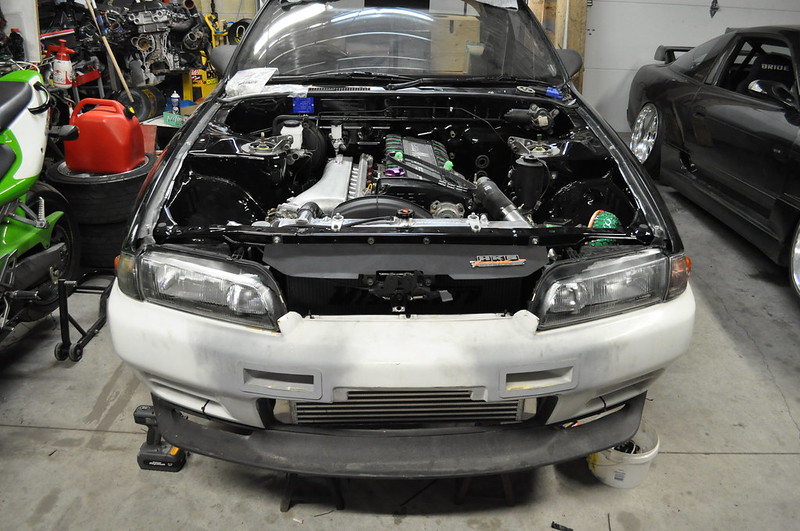
As you can see, I also got new belts. For those who have an RB20 and need belts the Alternator is Pn. 4PK870 and Power Steering is Pn. 4PK0945.
The wiring party kicked off last night as well. The fuse box is getting relocated to the glovebox and the harness is getting simplified to remove all the unnecessary wires that were for AC, retractable lip and other things that have been removed from the car.
As a bonus, The brake fluid level sensor connector is the same on the Pathfinder BMC as the OEM skyline one so that was kept and extended,
The car came with the useless projector headlights from factory and were changed for N1/ early GTS style headlights. Like the A/c all the unused connectors and wires were deleted. As of now the only wires headed to the front of the car are Headlights, Turn signals, Horn and the brake fluid level sensor.
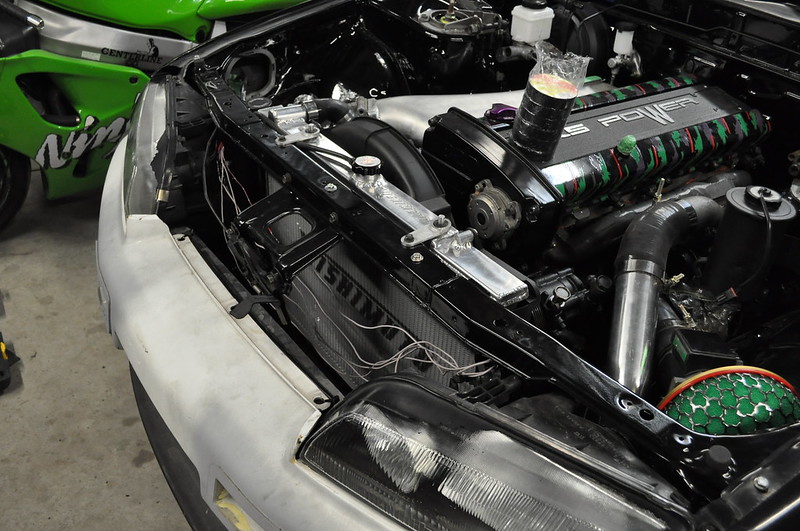
once finally tested, everything will be loomed up and tucked under the top rad support.
The stock boost gauge sensor has been relocated to behind the radio along with the wiper regulator.
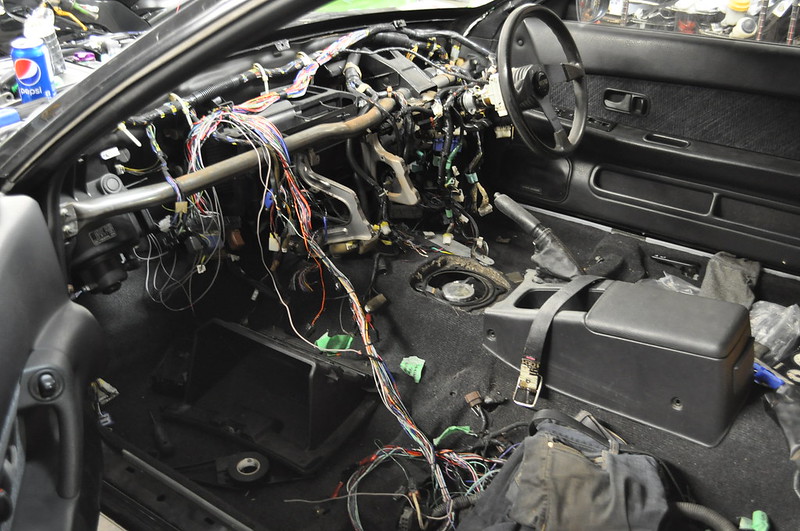
I hope to have a lot of the wiring buttoned up this weekend, I cant wait to get everything back together.Jordie Lewis
1993 Skyline Type M
Comment
-
I got rid of all the Hicas lines and when I bought this car it did not have ABS. Perhaps one of the previous owners deleted it, I'm not sure.Originally posted by craftz View PostHow many lines did you have on the firewall? Get rid of anti-lock brakes also?
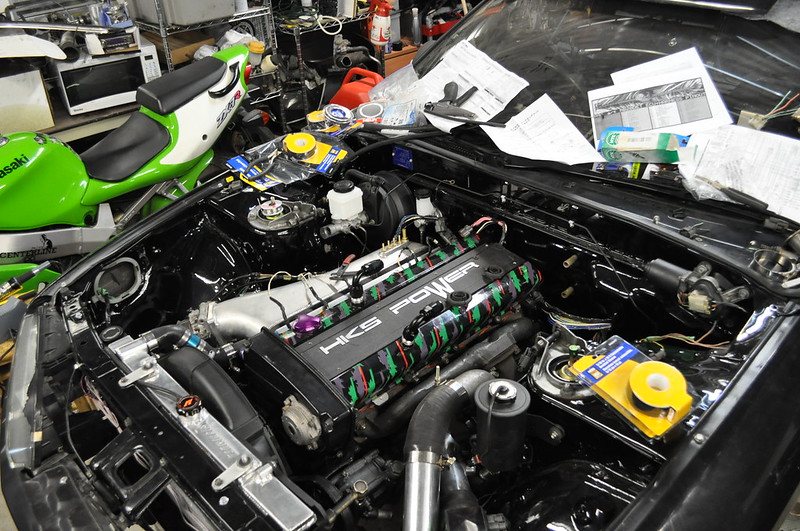
So I'm still in the midst of doing my wiring. This past weekend I neatened up and tucked my engine harness.
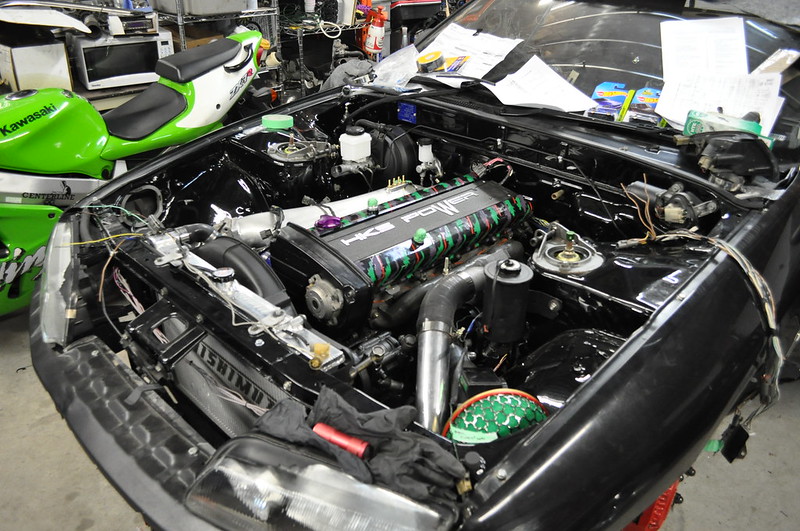
It took a good half hour to de-loom the stock harness. It being my first time wiring had some friends come by and point me in the right direction. started out on the passenger side as it is simpler.
I started out by re-routing the harness through the firewall in one of the old A/c Holes. I routed the silver resistor (?) box and mounted it behind the dash. Running the wires through the firewall seemed like a no brainer because rubbing through harnesses is the worst.

I extended the Wiper harness so it could be hidden along the seam of the firewall/ wheel arch and shortened the MAFS wire. All that is left on the passenger side is the 02 sensor.

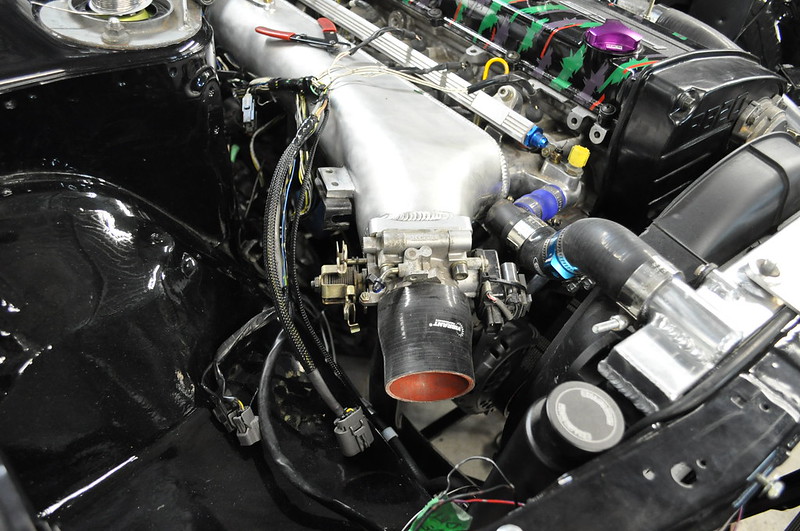
The only things that needed to be adjusted (lengthened / shortened) was the TPS plug, IACV Plug and the connector that goes to the ignitor.

Ratsnest of depression.
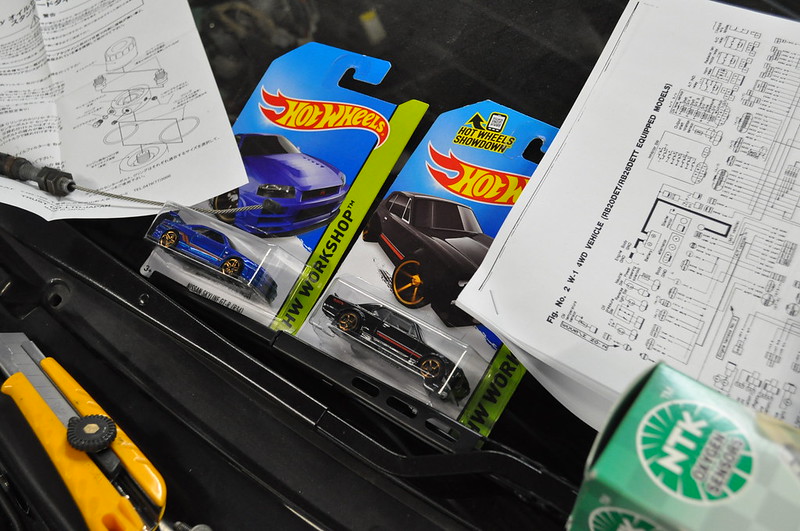
Came in the other day and found these on my windshield. :2f2f:
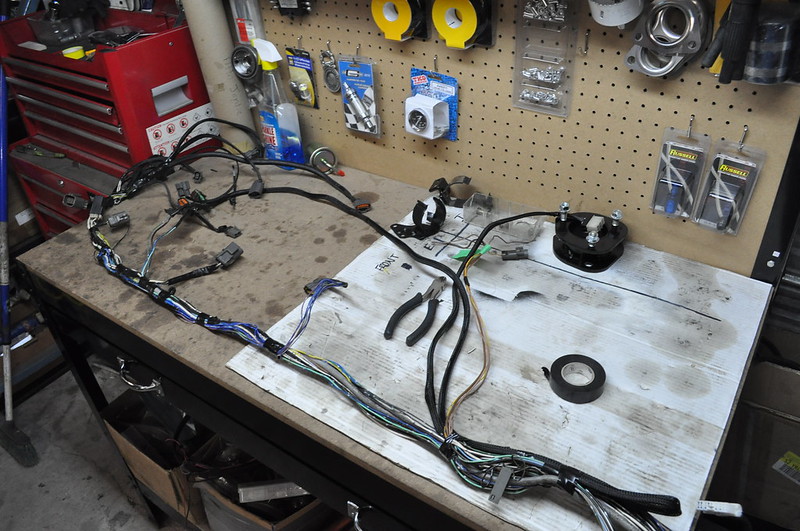
Once I was satisfied with how everything was routed, I pulled it all out and re-loomed everything.
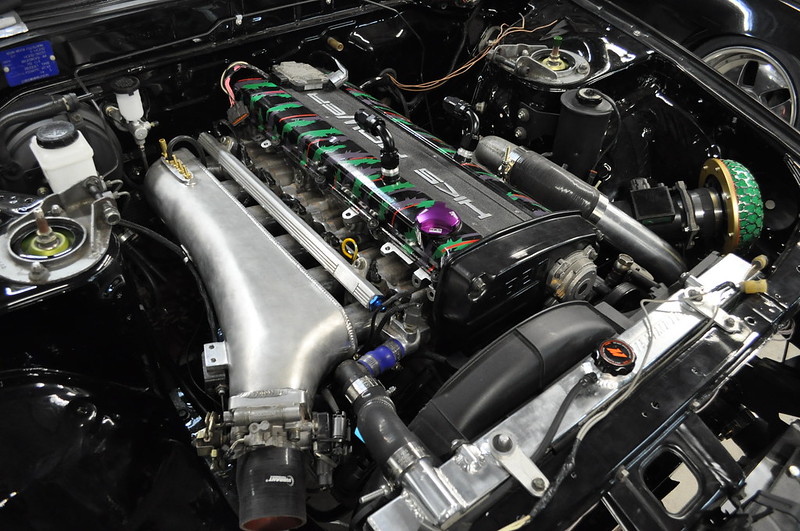
I dont really have a great picture of the finished product, mostly because the unloomed chassis harness and partly exposed coilpack harness makes everything look ugly. The best part of this manifold is that everything can be hidden under it. It does look 9032849023 times better in person.
All my AN fittings and Lines for my fuel setup will be in tomorrow so expect an update on that shortly.
-Jordie[/QUOTE]Jordie Lewis
1993 Skyline Type M
Comment
-
Excuse me?
Mechanically the car is set to go. The fuel system was finished off and all the vacuum lines were ran. Unfortunately, The chassis wiring was not completed on time and my car had to leave the storage unit.
I am pretty upset that it didnt leave 100% running but I did make HUGE progress in the 3 months that it was there. All that is left is to finalize all the connections on the chassis harness and run the cable for the battery relocation and paint the aero and it should be on the road in the spring time.
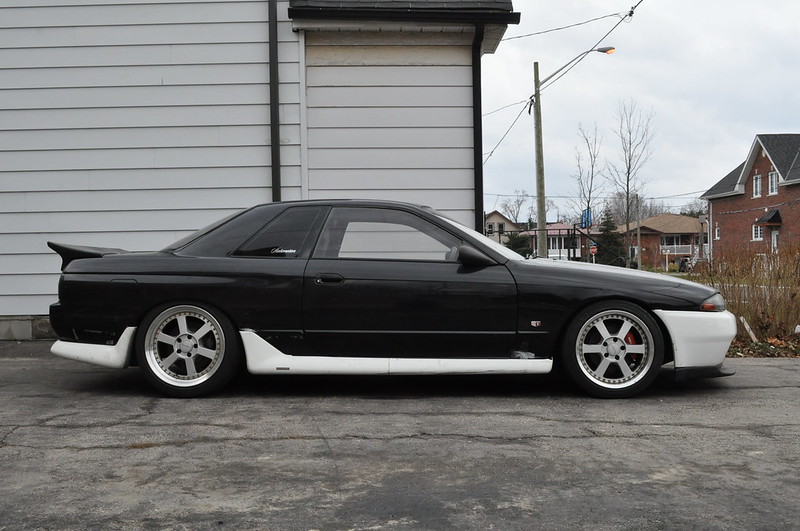
Before I put the car on jackstands and covered it up I threw on the aero for a little motivation to get me though winter. I just wish it was nicer out today so I could see what The engine bay paint looks like in the sun.
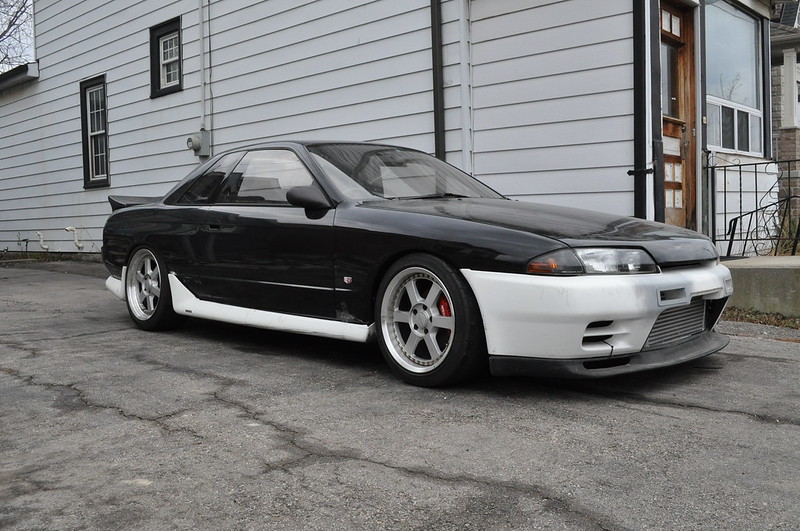

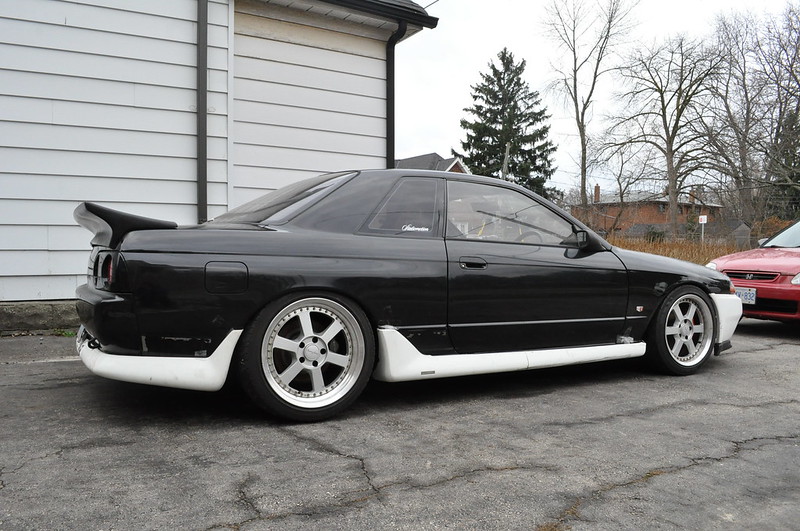 Jordie Lewis
1993 Skyline Type M
Comment
-
Haven't updated for some obvious reasons.

I do not have a garage which makes for very slow progress during the winter. If any.
I spent most of the winter browsing for parts but had a tough time pulling the trigger on anything as the canadian dollar was (still is) very weak.
 [/url]
The above picture has been my wallpaper at work over the course of the winter and I found myself absolutely hating how the car looked with 18's in the rear lowered with stock arms.
Adjustable arms were needed next. I managed to locally source (CDN dollars) new driftworks toe arms and ISIS Pro RUCA's. Being a brand whore im kinda bummed I couldn't source some brand name parts but it is what it is.
This past weekend was the first nice weekend we have had so far so it was time for a little driveway tuning.
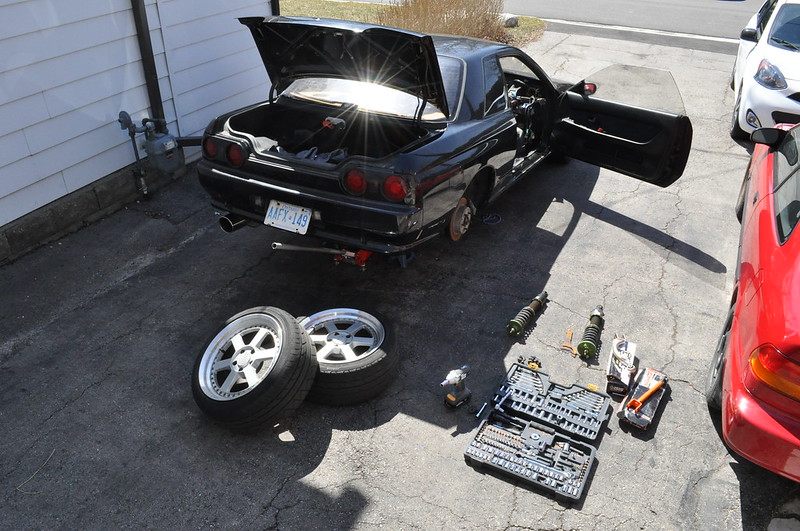
Out with the old and in with the gold

No more silly camber and toe. I wanted to make some final adjustments this today after work but its absolutely pouring.
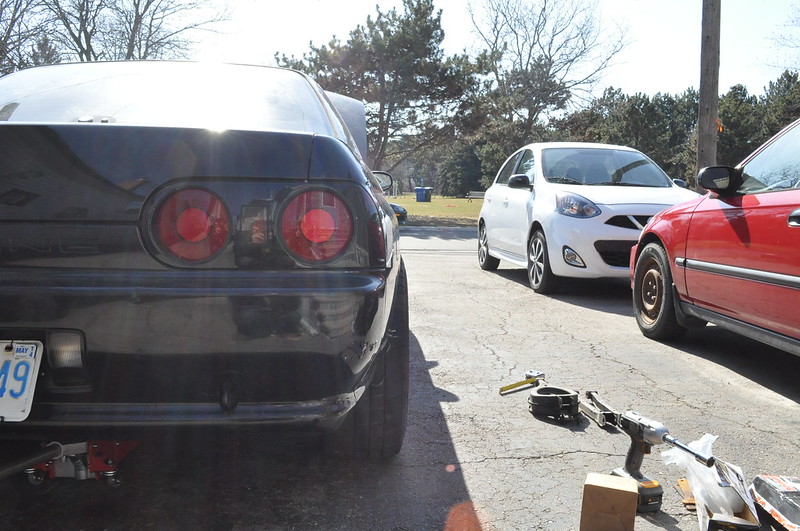
Bay paint looks amazing in the sun, hard to tell in pictures as it is so dusty.
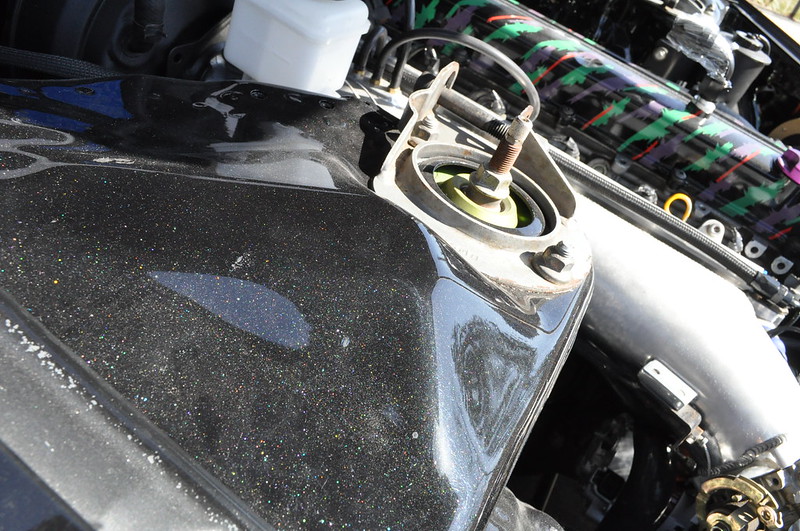
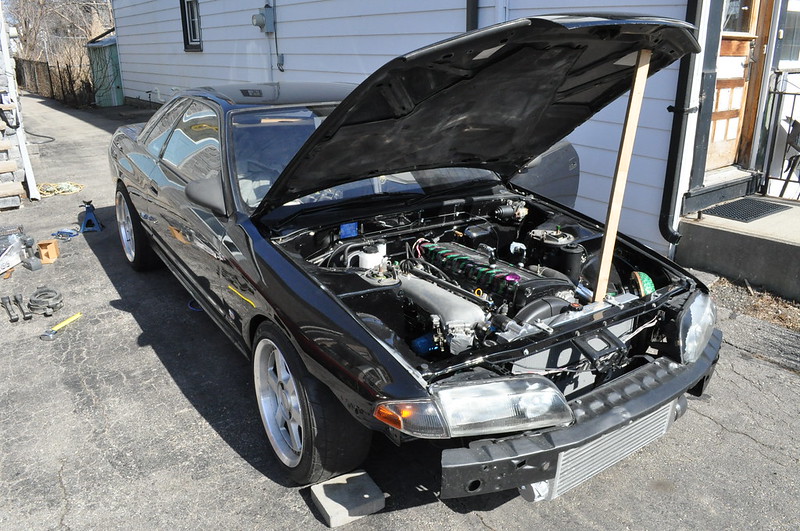
I still need to finish the wiring, thats next on the list as it didnt get completely done last fall.
Oh and I bought a new daily. My 98 civic was on its last legs and this came up for the right price. I've wanted one forever.
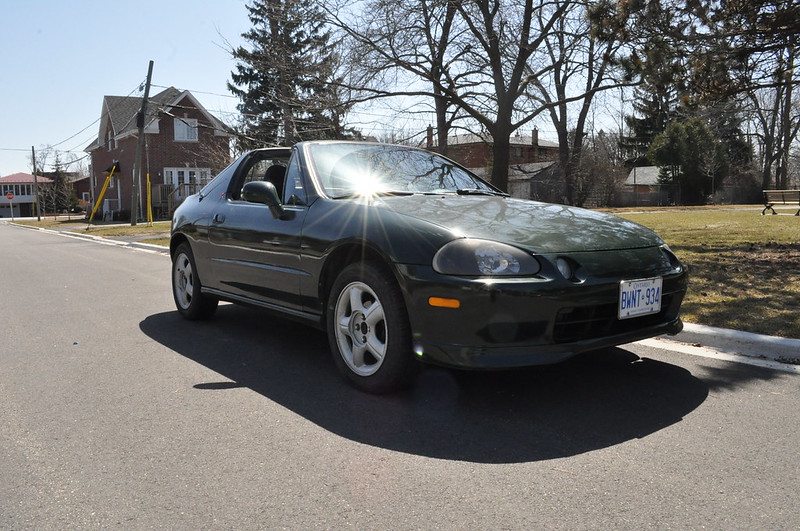
More updates to come, Im currently designing my catch can setup which should be laser cut in the next couple of weeks.
Thanks for reading.Jordie Lewis
1993 Skyline Type M
Comment
-
Hokey So. Last year I thought it would be an awesome idea to do a wire tuck on my chassis harness and started racing against the clock to get it done whist the car was at my friends shop. Long story short I ran out of time, got discouraged and left the car looking like this:
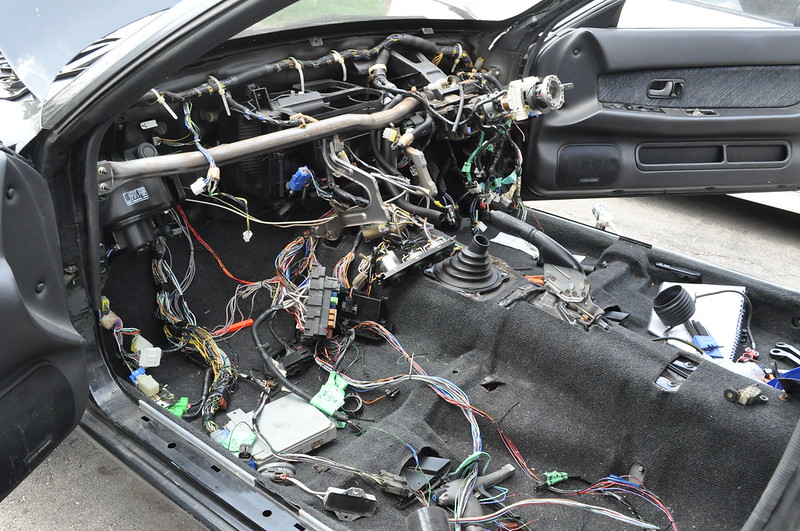
Awesome.:ugh:
Having ZERO automotive wiring knowledge meant I had no idea where to begin. Eventually I knew it had to be completed and I am too cheap to take it to a shop to complete it so I had to do it myself.
So naturally I started with something completely different. My remote battery terminals. I have relocated my battery to behind the passenger seat. With the 4 pt (soon the be 5pt) cage in the back, having seats back there is completely useless.
Enter the rear seat delete (mockup)
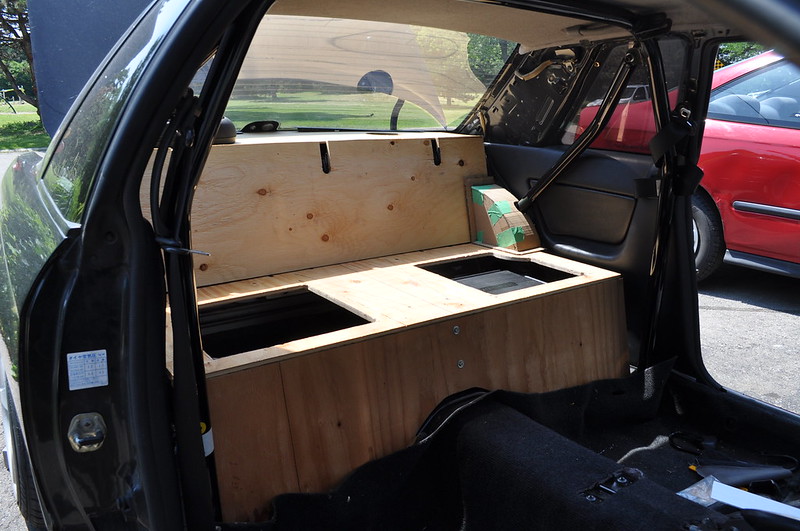
Streetcar > Budget wannabe racecar. I hate the stripped out caged look so I took it upon myself to make a rear "shelf" / Storage unit for the back. My Del Sol has little lock boxes so no one thieves your stuff when the roof is off and I thought something similar would work well in the R32. I am undecided on what material to make this from. Plywood was cheap and serves as a great material for mocking everything up.
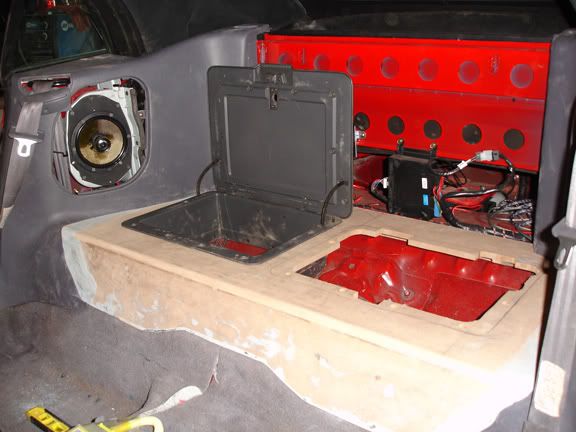
The intention is to use FC RX-7 Storage bins; One for the battery and the other to store a small emergency toolkit. Similar to this:
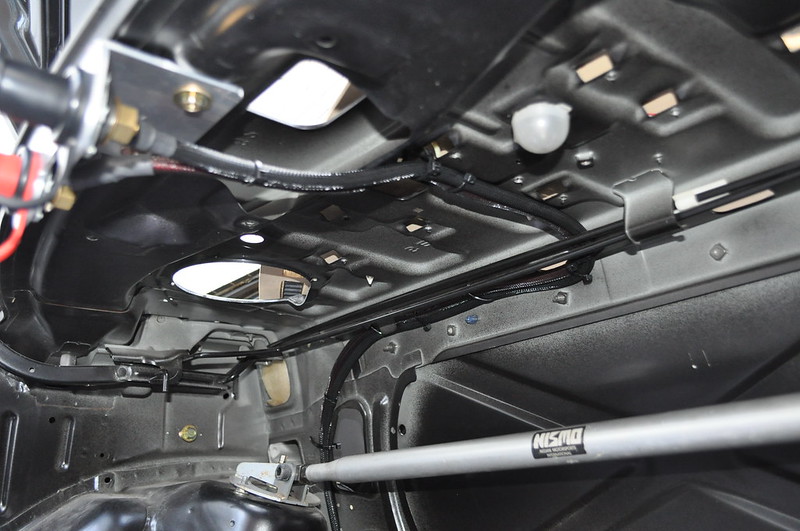
Back to the remote terminals. Relocating the battery to what is essentially the middle of the car would make accessing the battery a pain. I machined out a bracket to utilize the mounting points for the rear wiper (which was deleted)
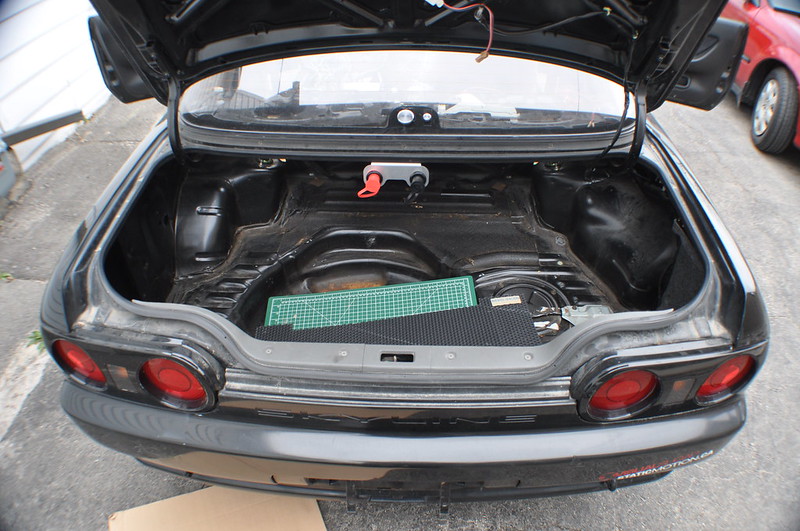
and ran the battery leads to the passenger side rear seat.
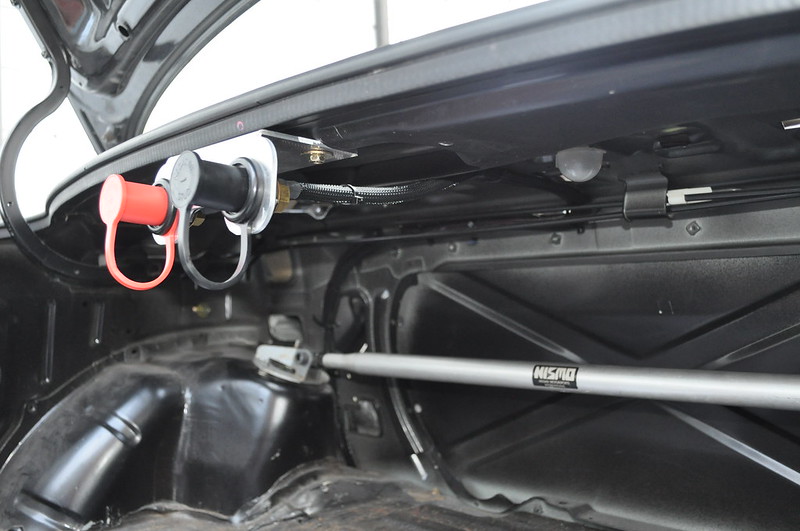
Oh and if you're planning on doing any extensive wiring, do yourself a favour and get one of these:
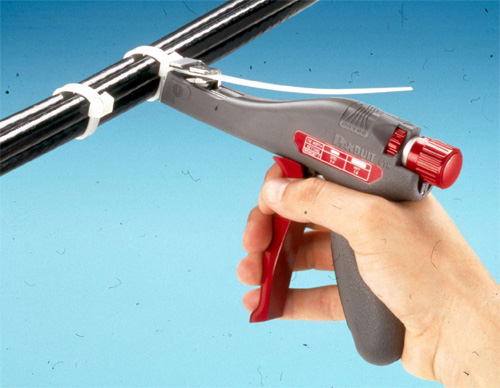
You can adjust the tension and they cut perfectly smooth. No more sharp jagged zipties. your hands and arms will thank you later.
Back to the task at hand. I slowly started making sense of the wiring harness, the online diagrams were terrible and super pixelated. By breaking it down into smaller sections everything became manageable.
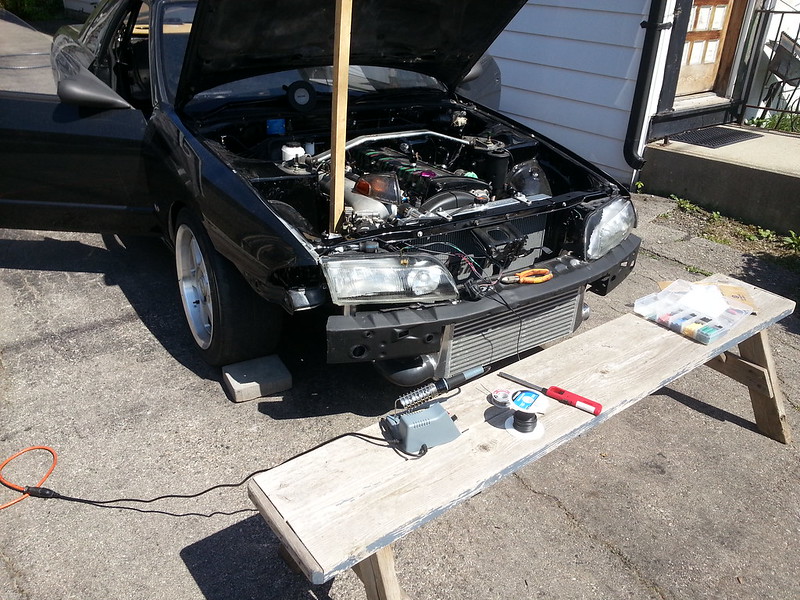
being Garage/ Shopless meant working outside.
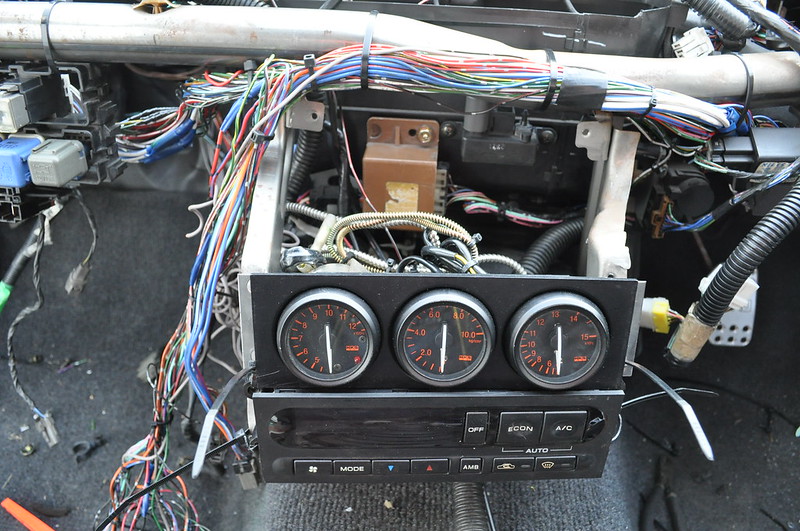
Many of the components that were located on the firewall were relocated behind the centre stack. Heres the wiper regulator and stock boost gauge sensor.
All electrical systems go! (First time in oh.... 4 years)
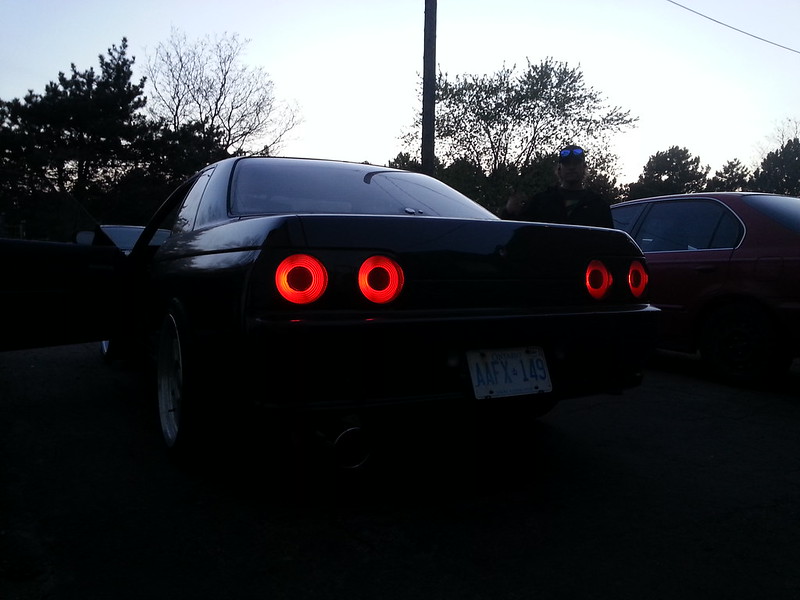
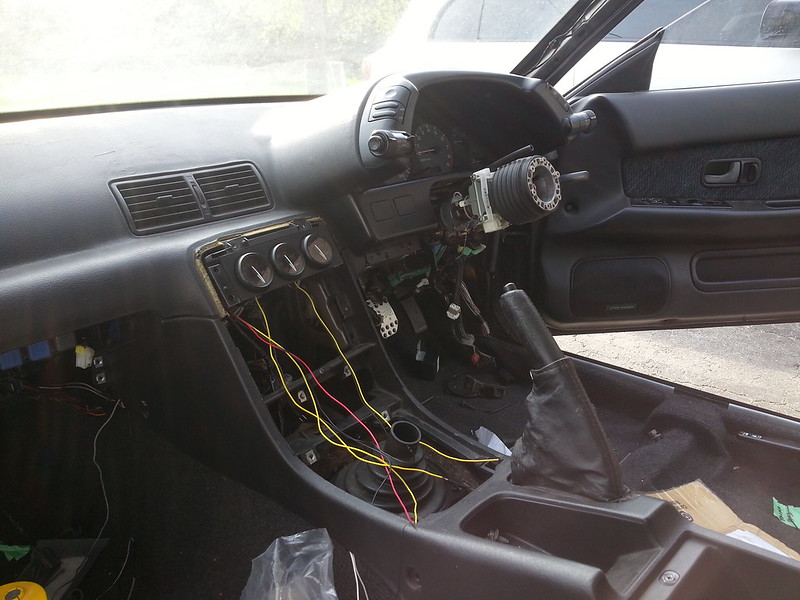
I put my interior back together as all that is left is to wire up the gauges. The plan is it have a fused terminal block for constant and switched power to allow me to easily add accessories in the future.
Im so stoked that this is behind me. It was such a huge hurdle but didnt end out being that difficult.
My catch can should be done this week. The parts have been laser cut and just need to be bent and welded up. Hopefully Ill be adding fluids this week and starting it up in the near future.Last edited by S13Jordie; 05-24-2015, 09:26 AM.Jordie Lewis
1993 Skyline Type M
Comment
-
Hokey So. Busy month or so, the really big news is that I am now engaged. I designed the ring myself in solidworks and with the help of the jeweller had it made up. Super excited about this

It has also been super rainy for the past couple of weeks so not much could be done.
In the spirit of Le Mans
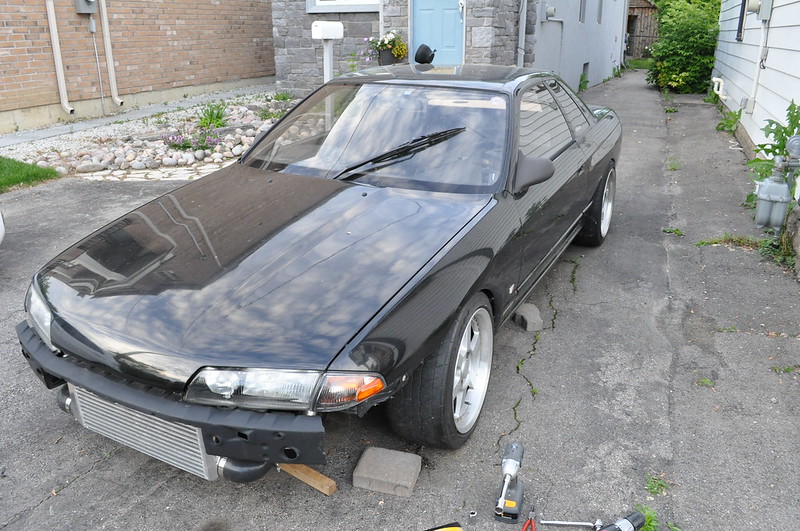
As a recap, Nothing off the shelf would fit anywhere neatly in the bay. I had an old rectangular Greddy unit but the fittings were the wrong size for the -10 Raw Brokerage fittings I had pressed into my valvecovers.
I quickly made up a cardboard template to fit behind the passenger shock tower
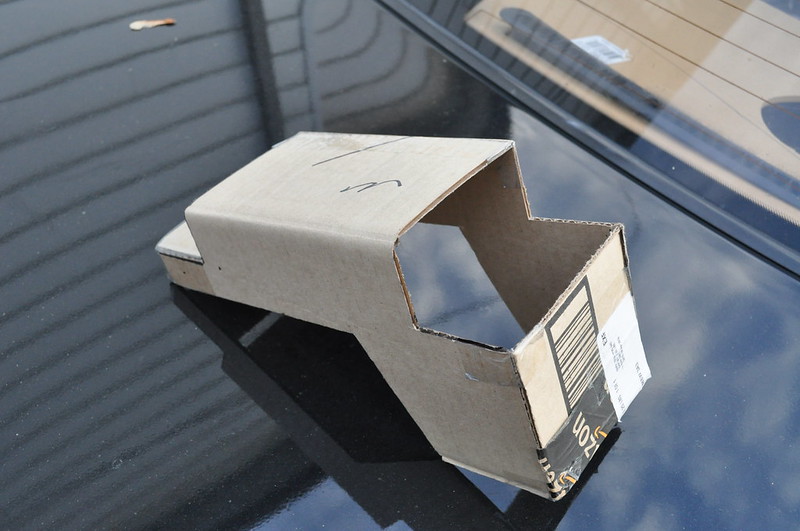
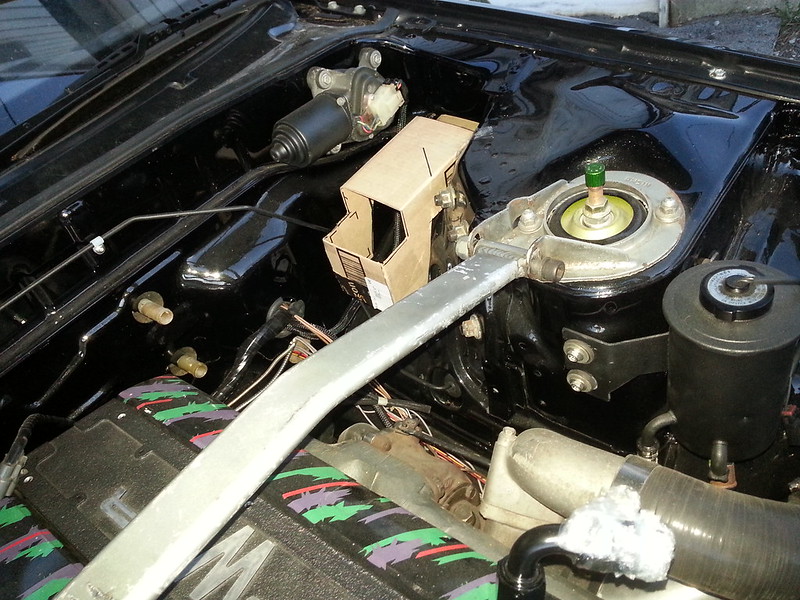
Clearance to the wiper motor was extremely tight. I then designed it out of sheetmetal in solidworks and had the flat pattern waterjet cut.
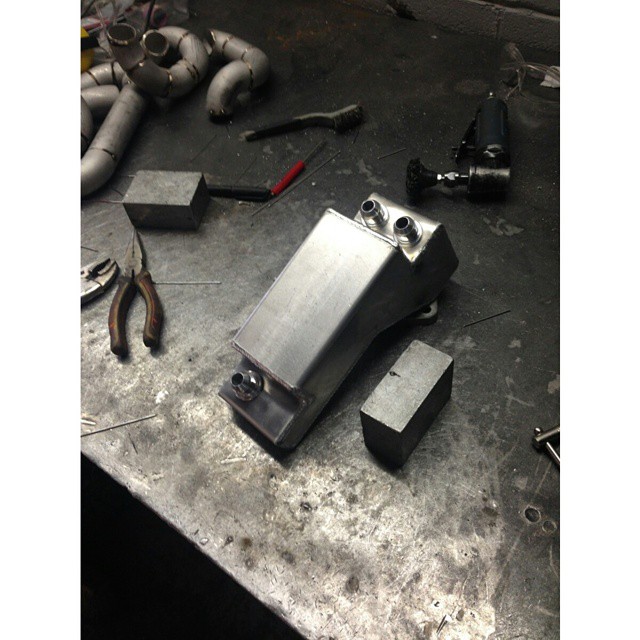
Rene @ Centerline Motorsports bent and welded it up for me. Luckily he had an R32 in his shop for some work so we were able to mock up the brackets using threaded holes in the engine bay.
I hit it with a quick coat of Duplicolor Bedliner to match My brake booster and wiper motor.
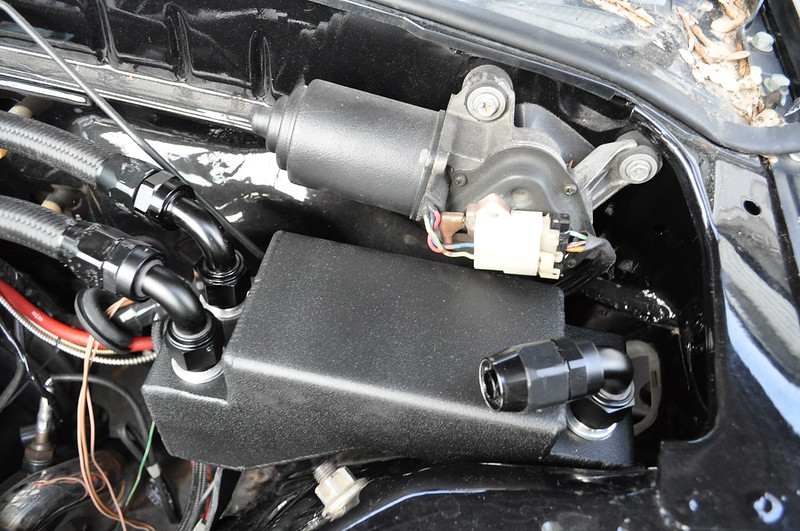
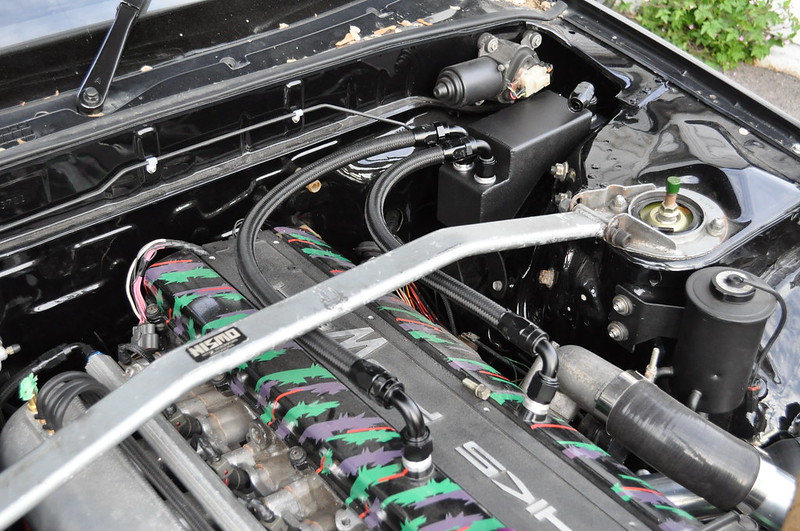
Fitment is 100% on point. There is just under an 8th clearance between the wiper motor and the catchcan. I still have to make the line which goes from the catch can to the intake but making AN lines gets old really quickly so I will finish that up in the next little while.
Apart from that, My interior still looks like a disaster and I have to take the dash out again to finish looming everything up
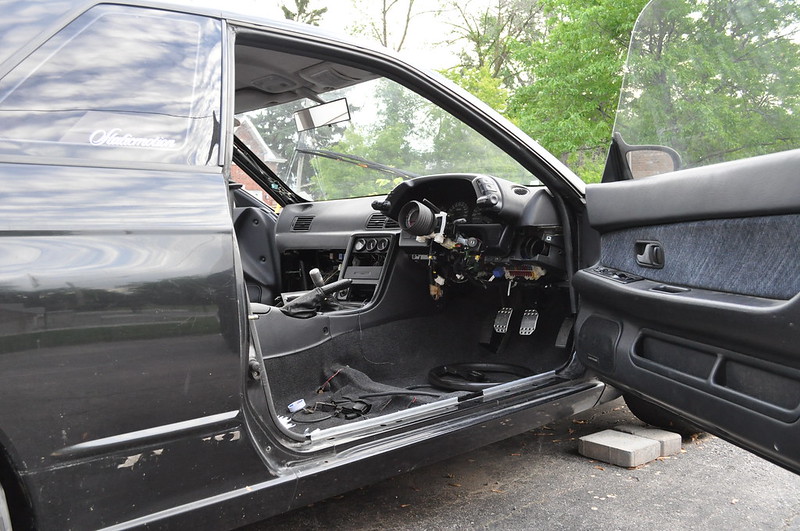
But I did finally manage to find a set of RX7 storage bins for cheap.
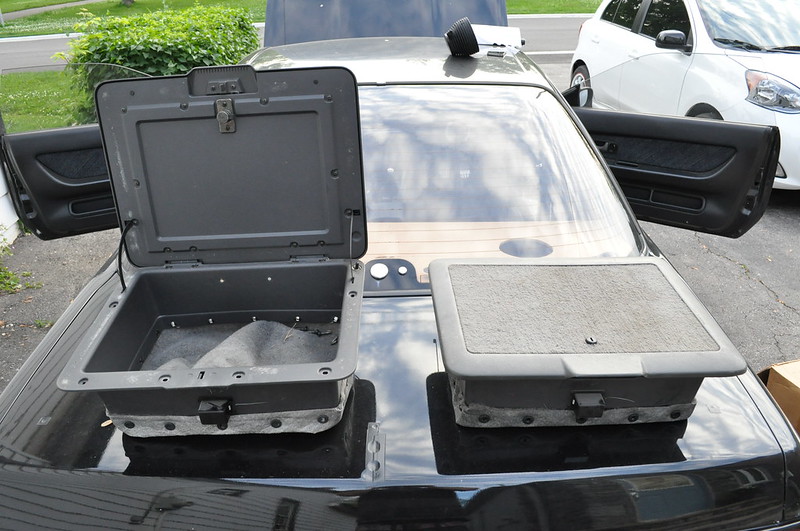
Not a big update I know but I have most of the parts to finish up many aspects of the build. Clear weather this weekend means I can actually get some stuff done.
Thats all for now.
-JordieJordie Lewis
1993 Skyline Type M
Comment
-
It Runs!.
So I just started the 2nd week of my 2 week vacation ( My company shuts down for 2 weeks in the summer)
The first week started off well. Filled the car up with fluids, primed it, and it started right up. One of the lines to the turbo was leaking slightly as was the coolant temp sensor on the intake manifold.
Some new crush washers fixed the oil leak on the turbo side. I went to tighten the temp sensor and disaster.
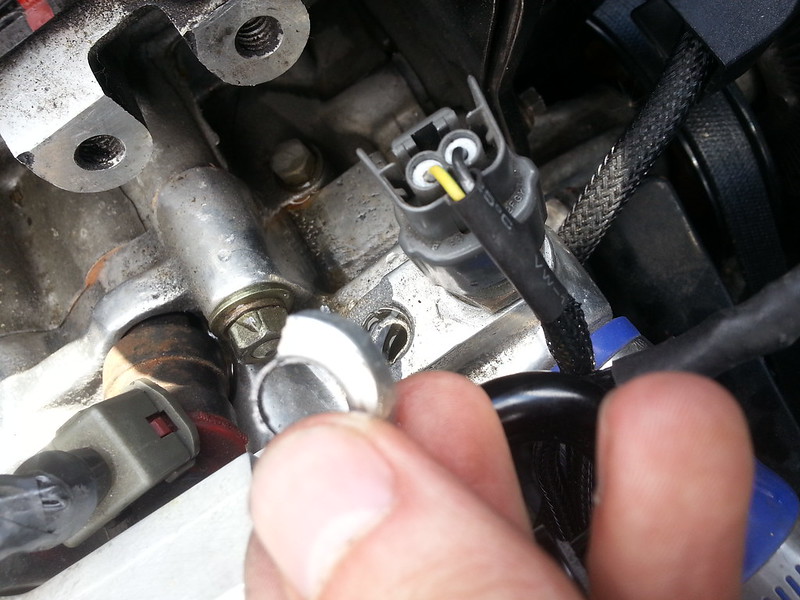
the hole for the sensor probe was slightly too small and the sensor bottomed out and cracked the manifold. Many swear words were said.
Depression was real.
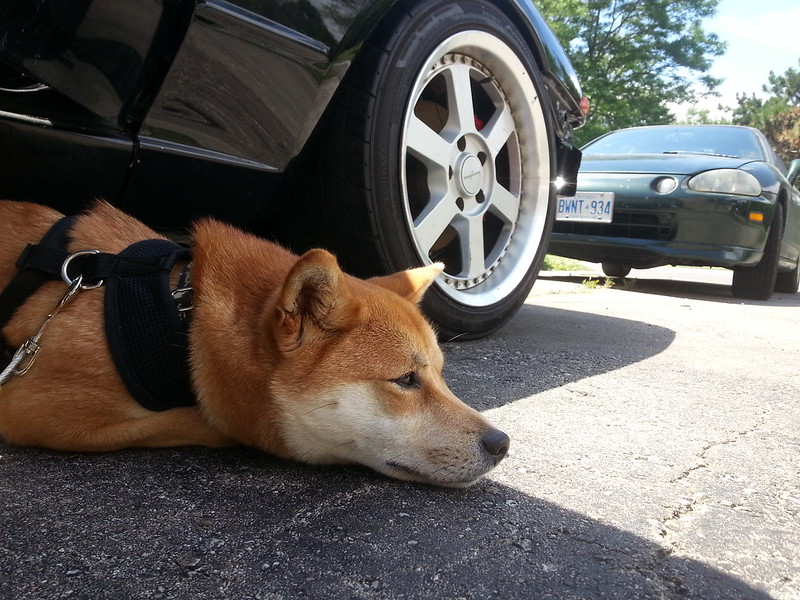
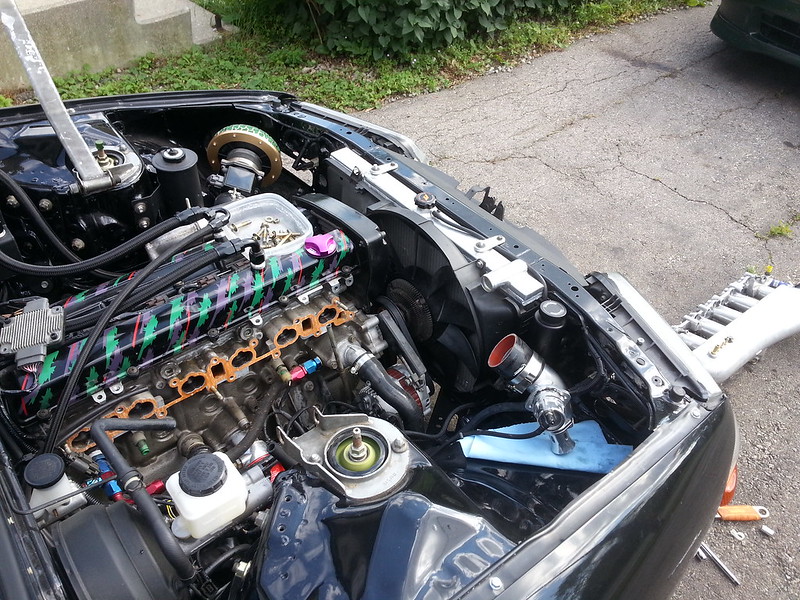
I made a few calls and pulled the manifold. It was super difficult to do without scratching the bay paint. Pat Cyr and Cyrious Garageworks had the manifold repaired and back in my hand a couple days later.
Whilst the manifold was off getting repaired, I put my interior back in.
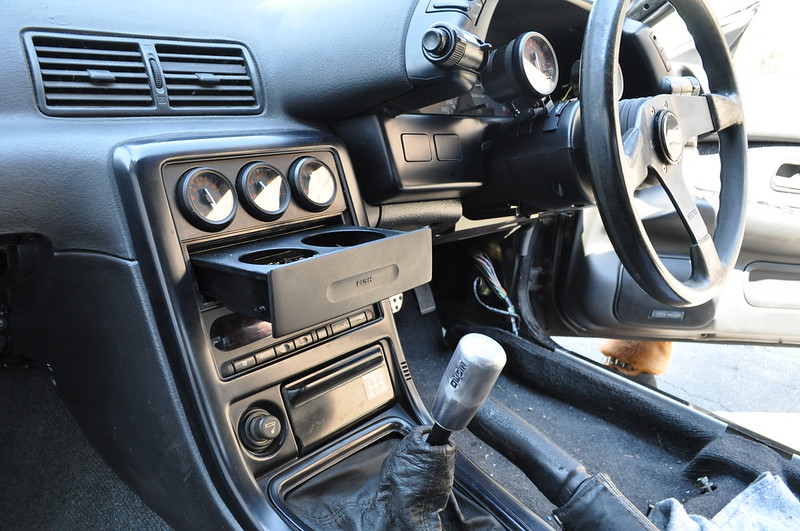
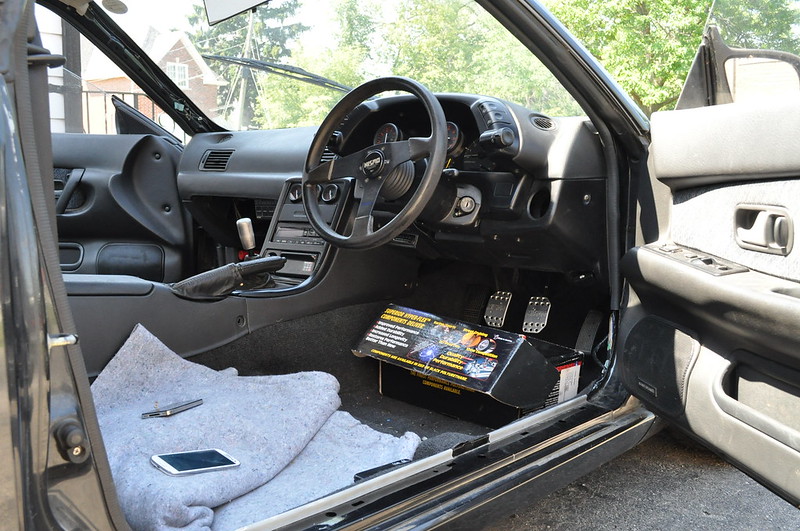
Ran into an issue with the glove box. The fuse box was clearly in the way which then snowballed into another mini project.
This wasnt going to cut it for me
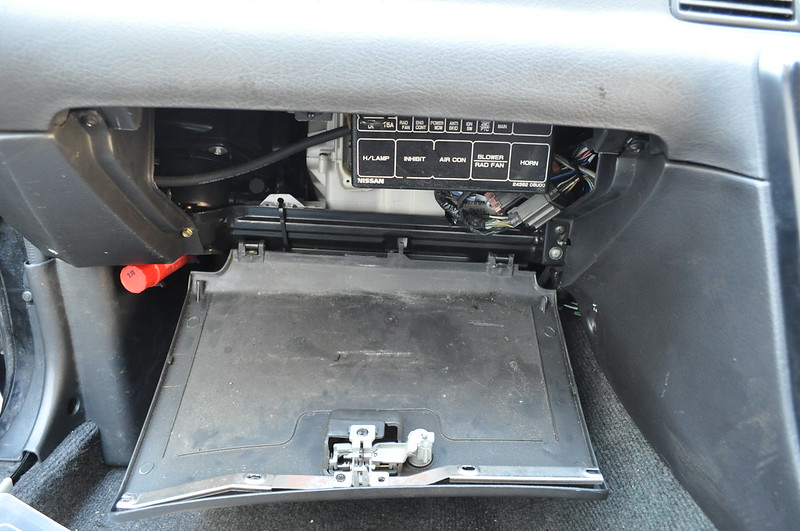
So I removed the inner skin and sectioned the glove box to fit.
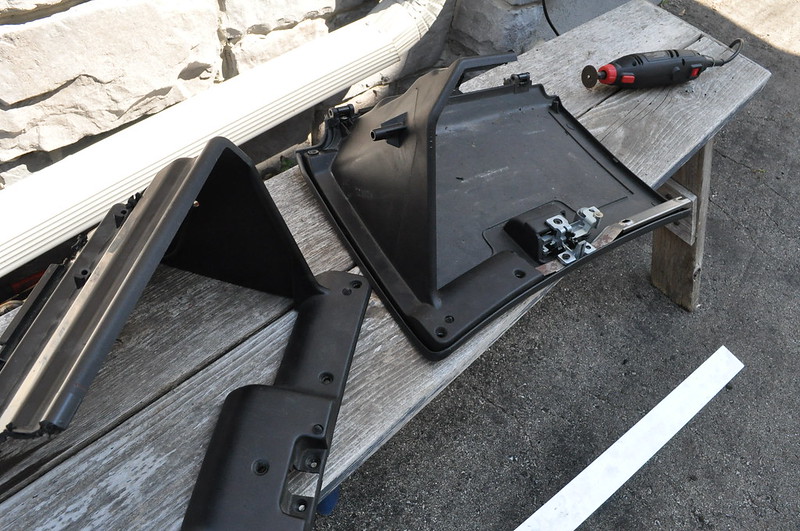
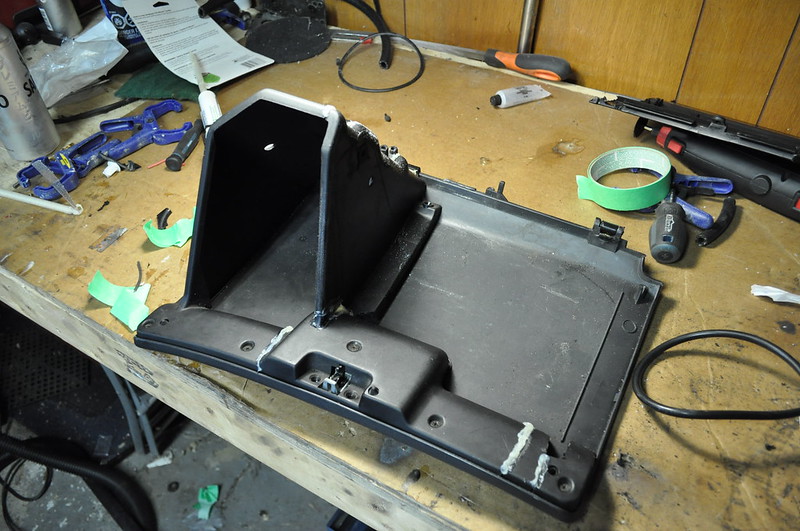
Test fit. It clearly needs to be filled, sanded and painted for that OEM look. This is an extremely important mod due to the fact I finally found decent insurance


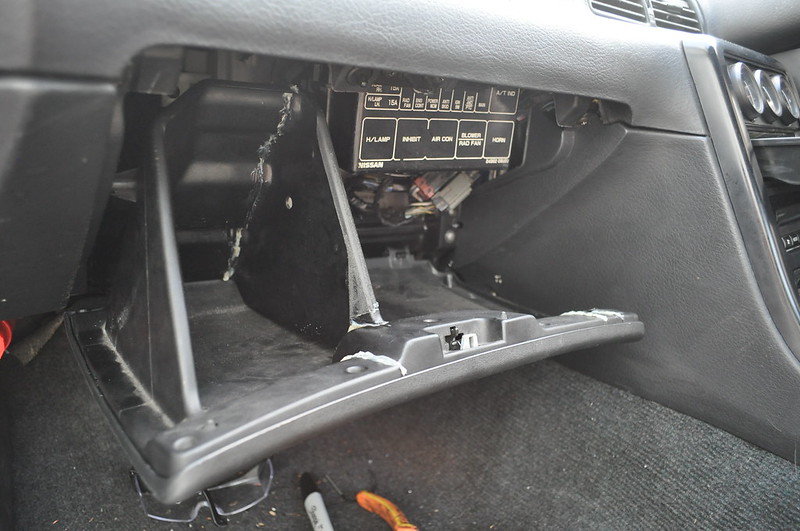
I am still waiting on a clutch line then I can take it for its maiden voyage.
More updates by the end of the week. Gonna start sanding the aero tomorrow.
Thanks for reading.
-JordieJordie Lewis
1993 Skyline Type M
Comment

Comment