-
yo frank jaimerais tellement ca avoir le back seat faite dememe moe ake ake ma cage omg -
the cage itself would probably be legal, but i scrapped the homologation sticker off when i painted it,Originally posted by NismoS-tune View Post
but the harness bar for sure wouldn't be legal, but could still pass inspection
but anyway, i don't think i'll ever enter an event where those things are required, its mostly club racing thats requires that, i do lapping and time attack
and you'll see when that back seat is done
good, go write some!Originally posted by Willis View Post
and thxLeave a comment:
-
Just read this thread start to finish. Nice thread man! I never thought to use my gopro in the garage, might have to start. Beats using my iphone.
Reading your thread actually gave me some motivation to update my own thread.
Sexy car
Leave a comment:
-
Will that cage be track legal (like the nhra or whatever) Who do you get to approve it being homemade?
Heh, nice "picnic" table for a back seat
Leave a comment:
-
Great job Frank. Keep up the good work. I was thinking I need a harness bar as well..... You got me thinking...... LOL.
The Smoke detector is going off.... Stupid Brain.....
Leave a comment:
-
Chapter 42 - Interior works
week5 - 2011, part 2/2
disclaimer :
the following story depicts actions that occured between May 27 and june 4 2011
information is recalled purely from memory, endure with me
the work on the new back seat area continued,
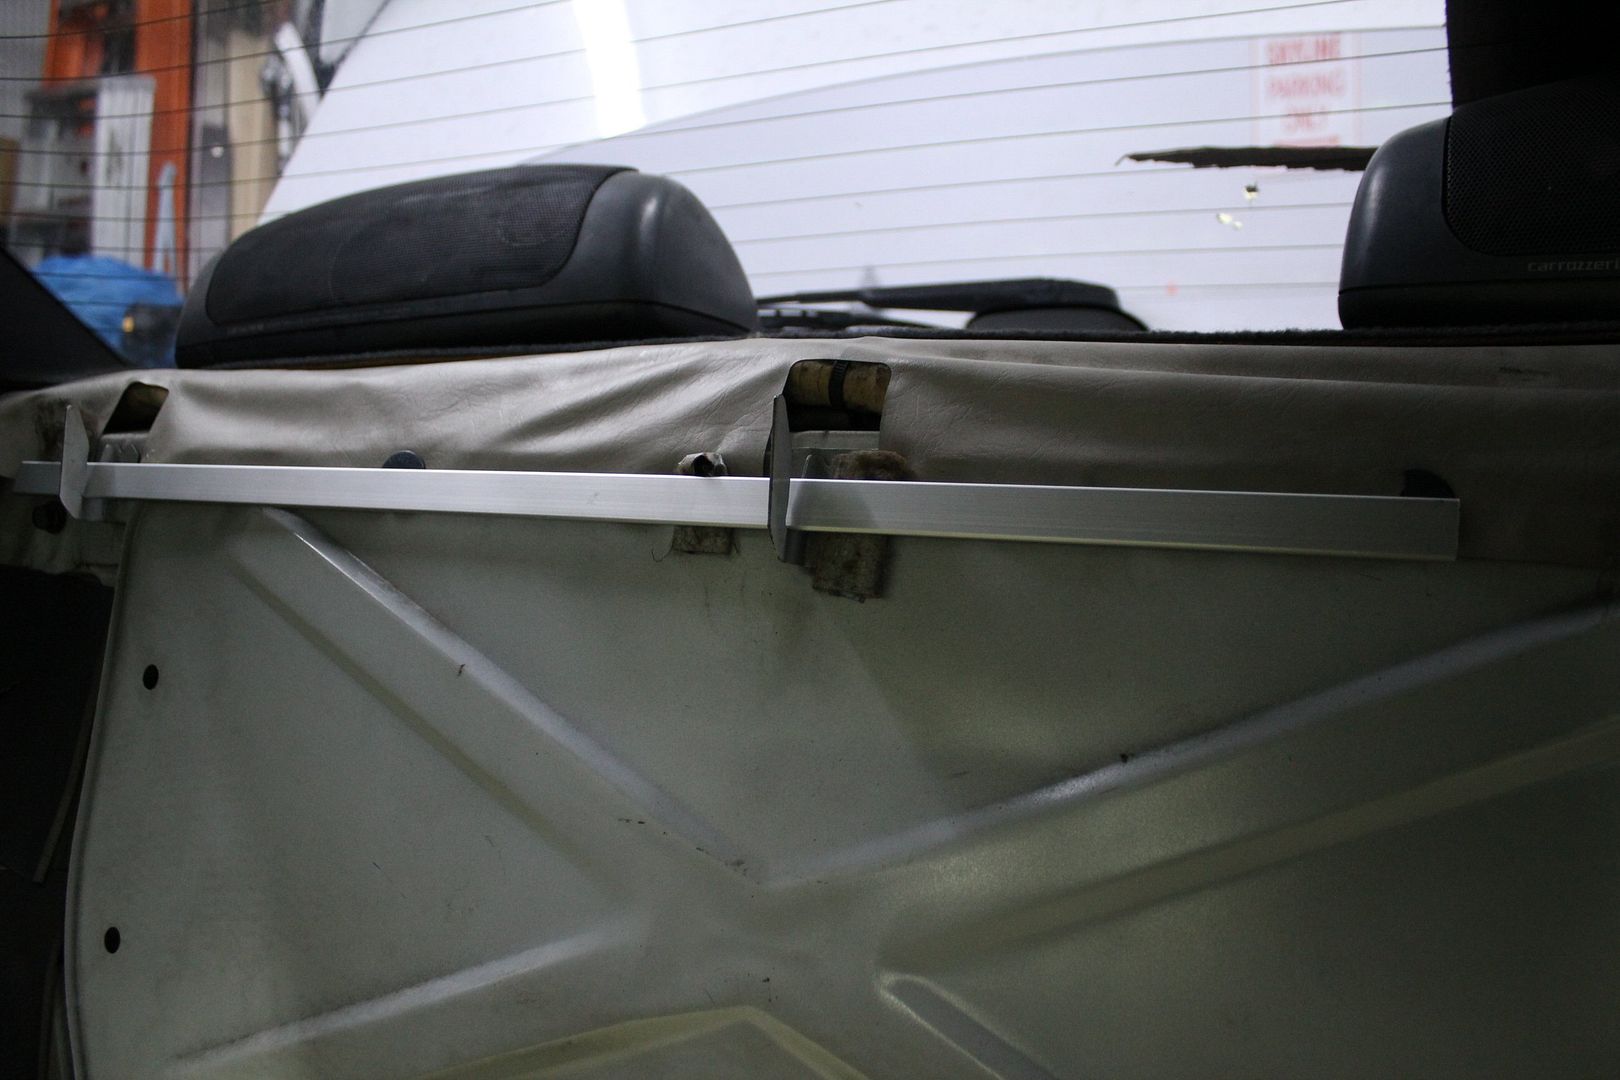
while messing around inside the car, i found out that a 1/8" bar would fit perfectly in the hooks that usually hold the back seat in place,
this would be a defining discovery for my design;
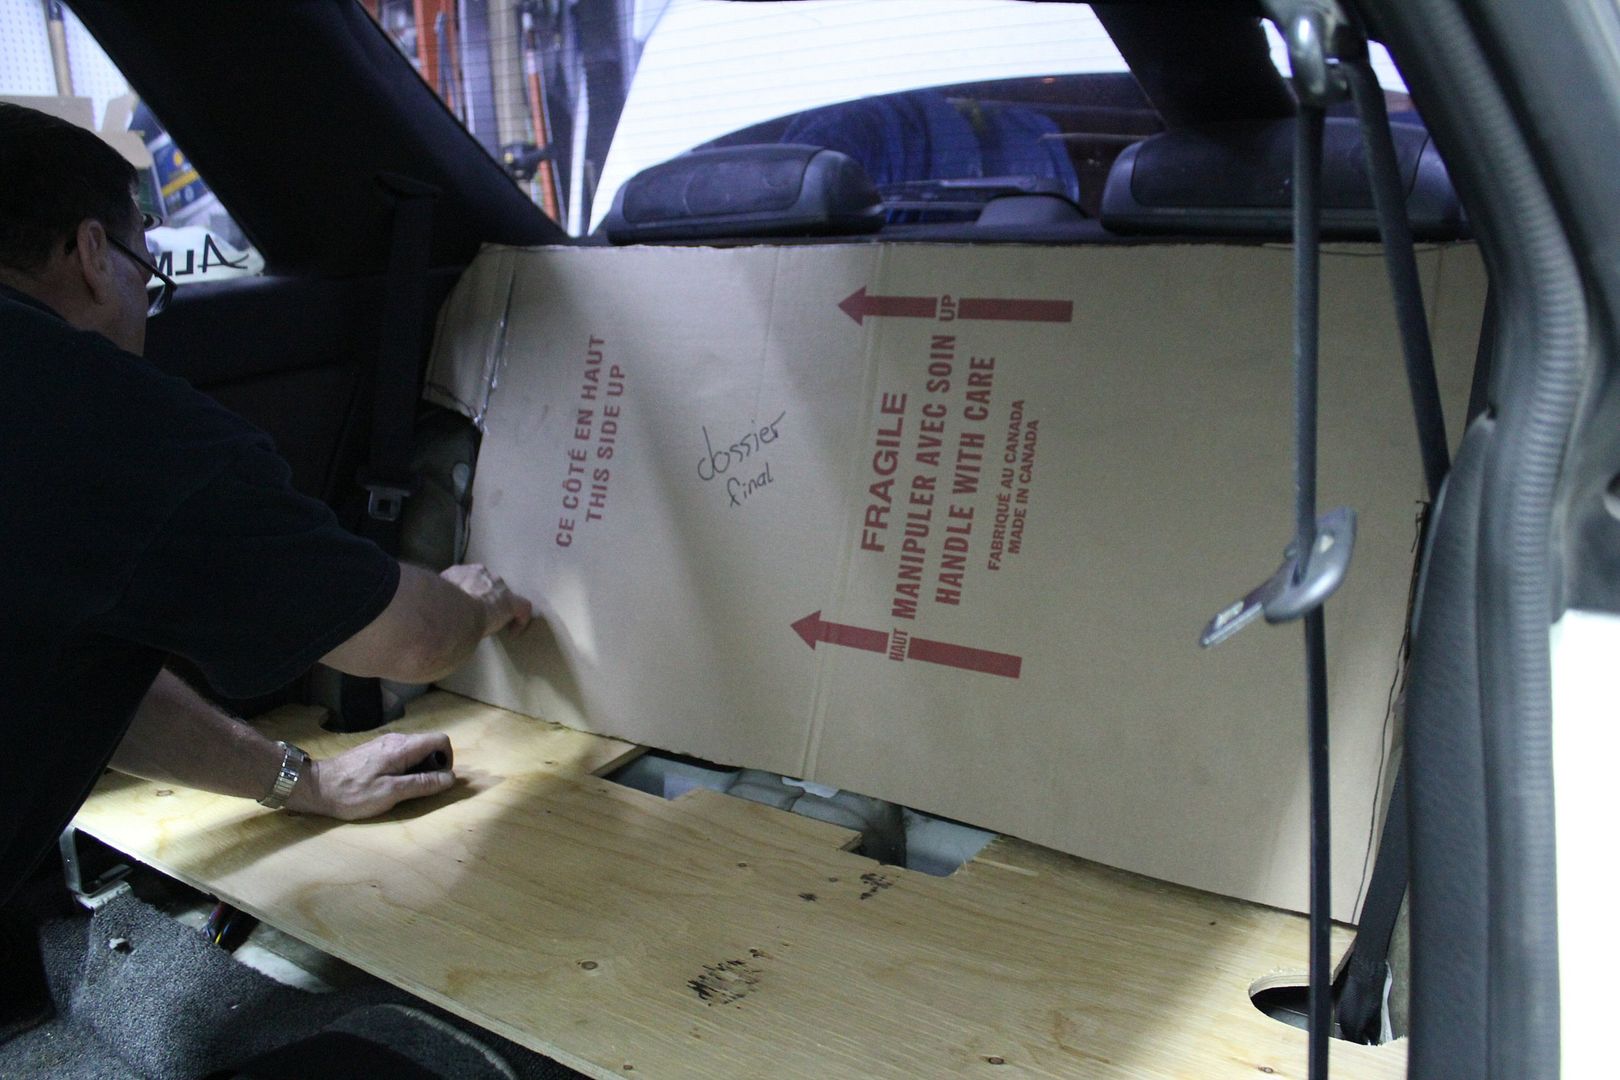
using yet another piece of cartboard, i conituned mocking up the boards i'd make for the back seat area,
whilst considering the roll cage and racing harness;

then i called upon yet again the help of my father, since his original trade was carpentry,
he was very skillful with saws, mostly circular saws,
i bought a 4x8 panel of 1/2" plywood at home depot, which would be plenty;

using the cartboard mock-ups, i traced the outline on the plywood;

then simply watched my father work his magic,
i test fitted the panel after the first raw cut, then many adjustments were done ;

when the deck was finalized, my dad made me realize i didn't consider the thickness of the wood whilst cutting the mock-ups,
so other adjustments had to be done prior to cutting;
we reapeted the same steps for the back rest;
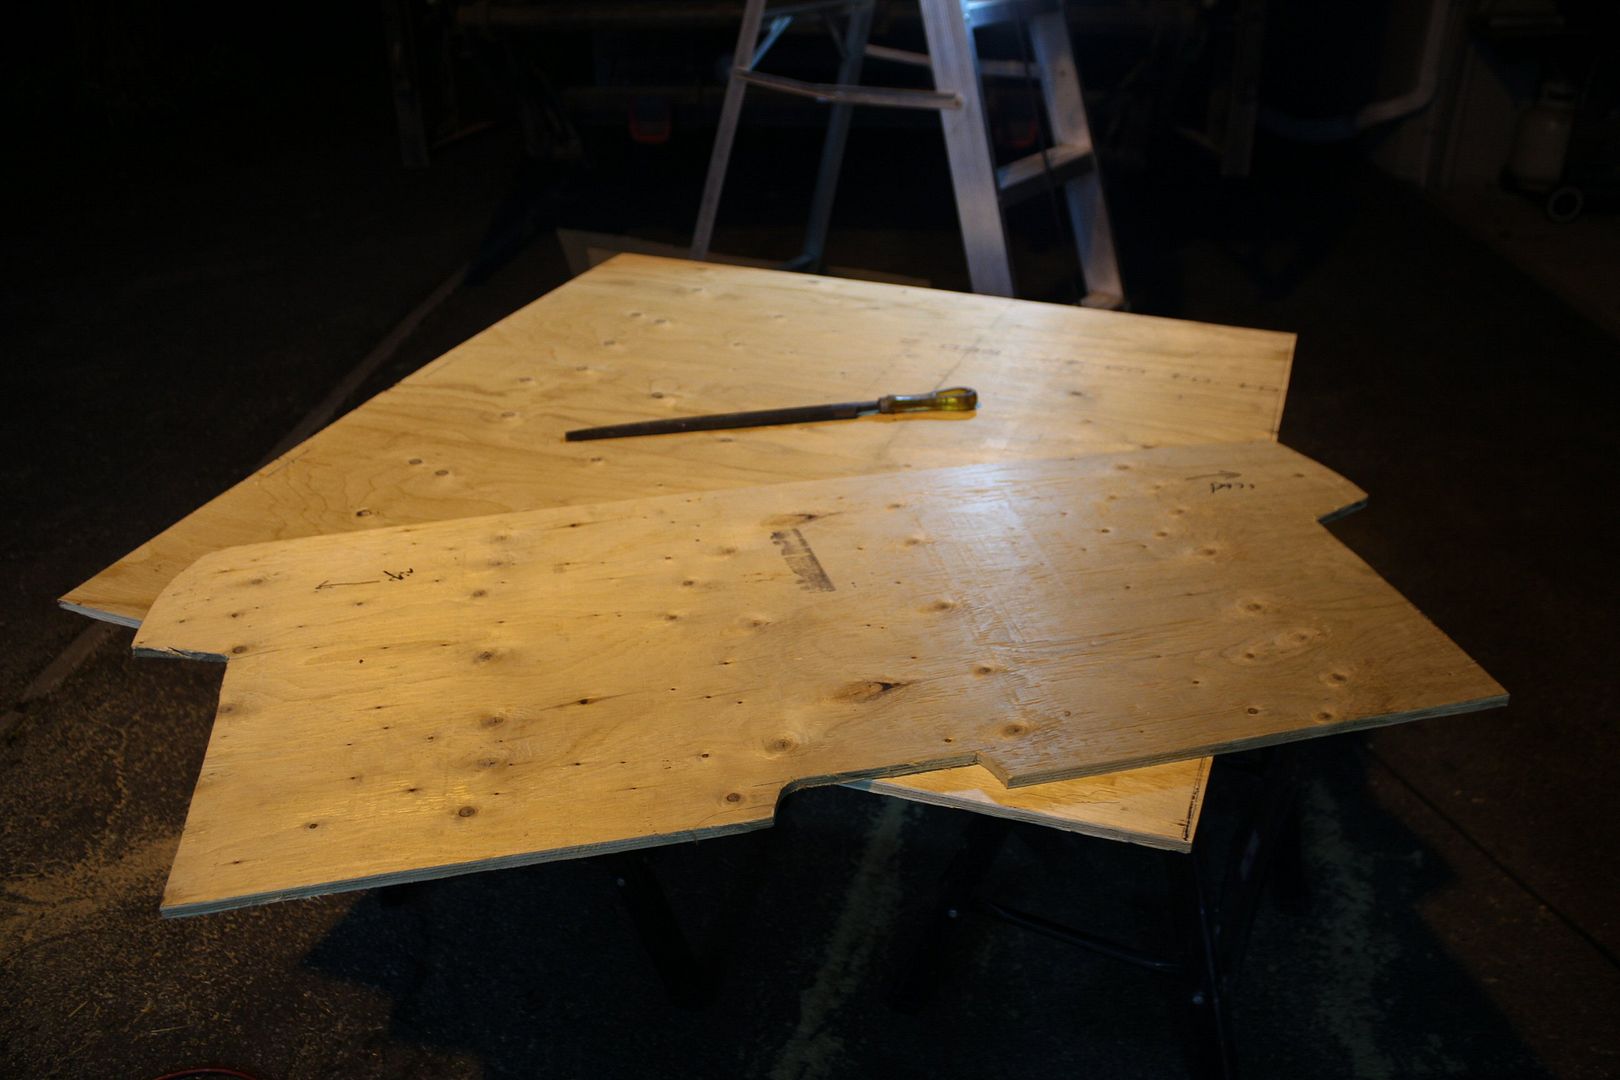
this was the end result;
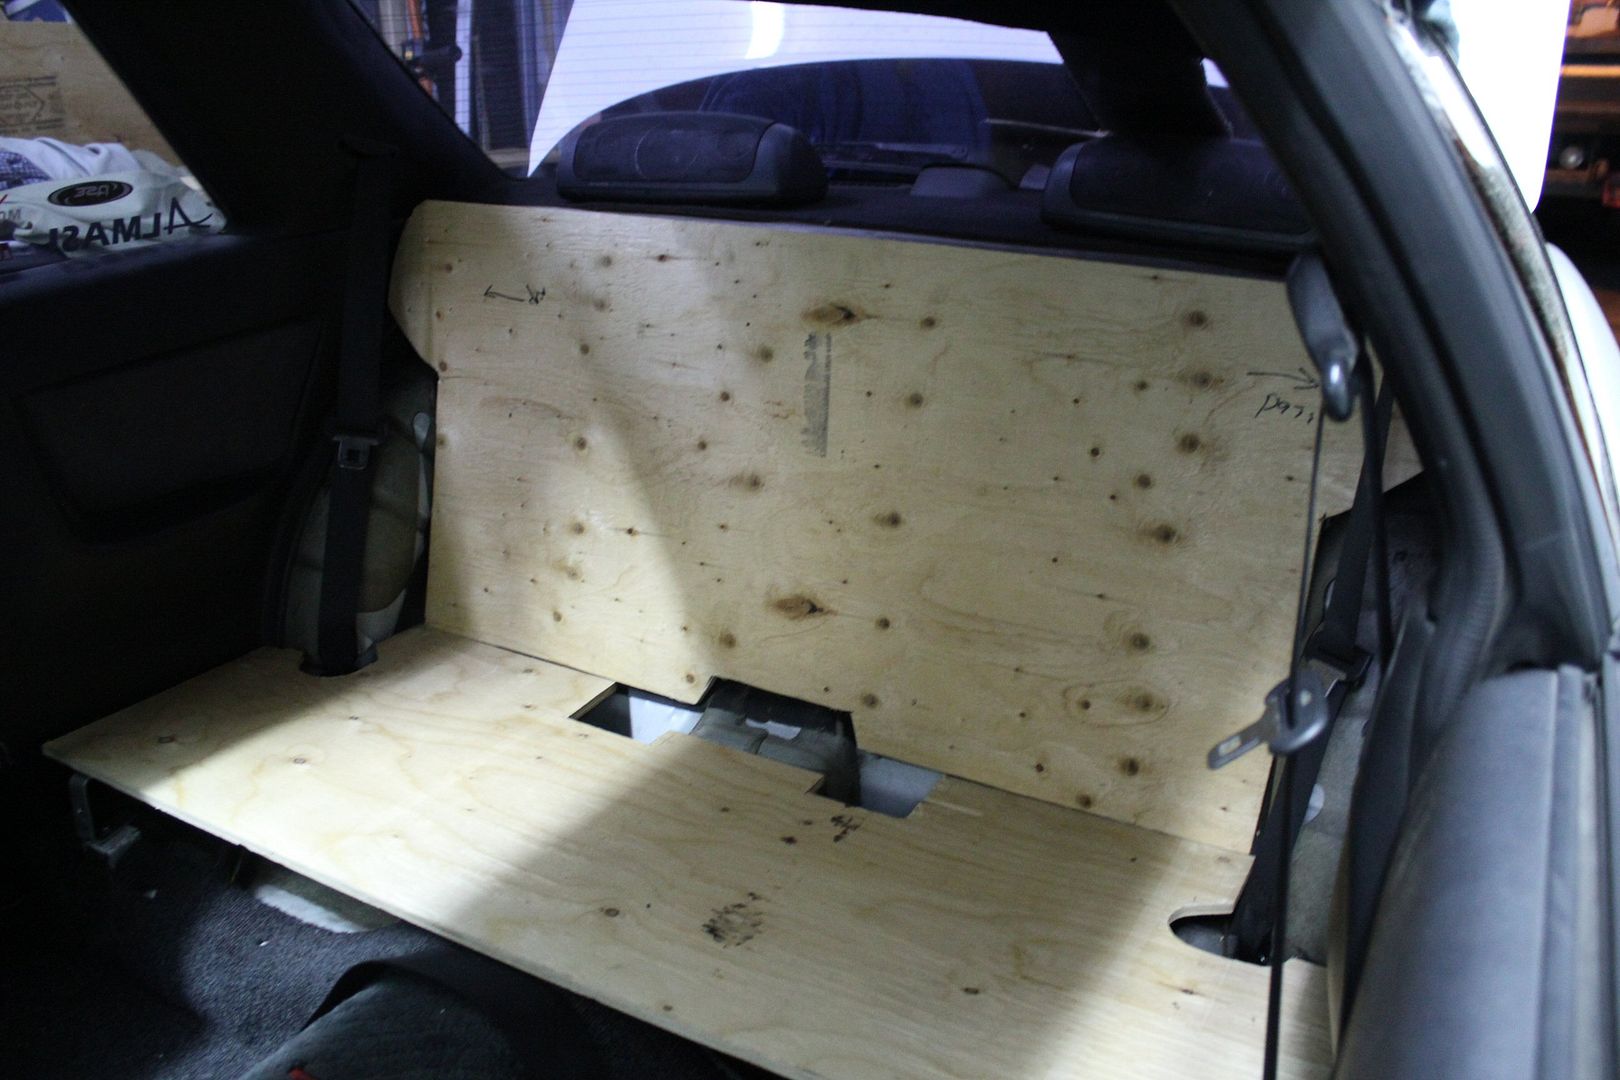
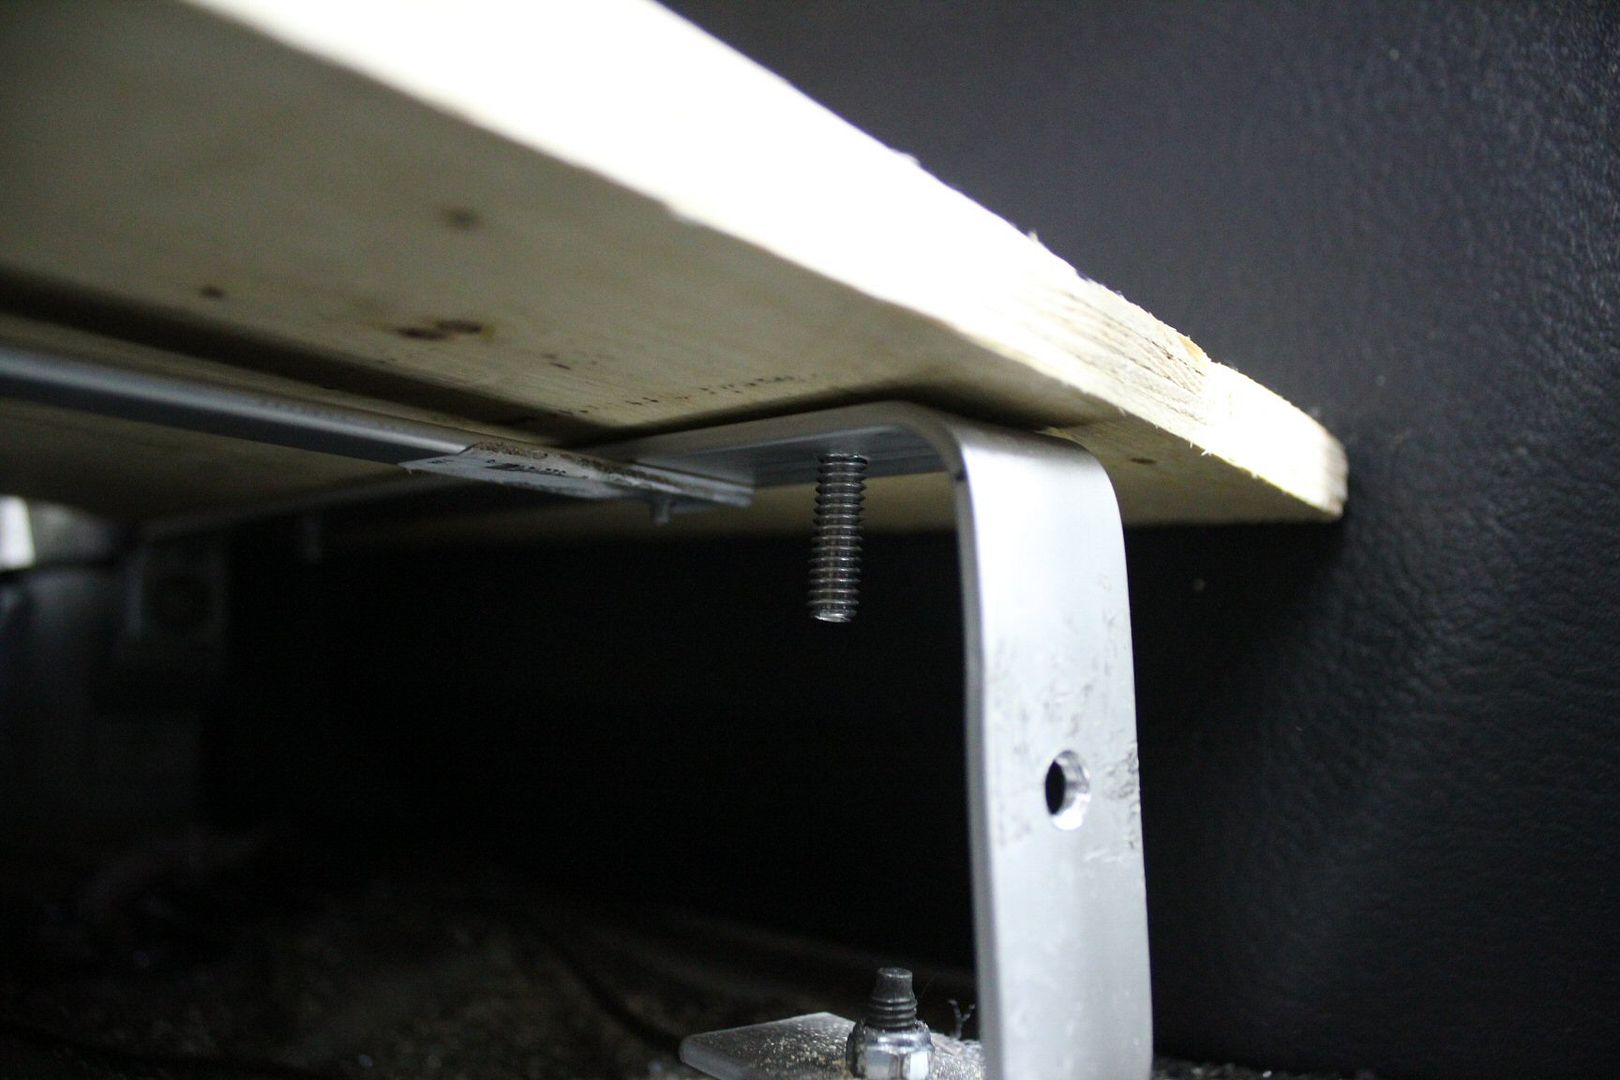
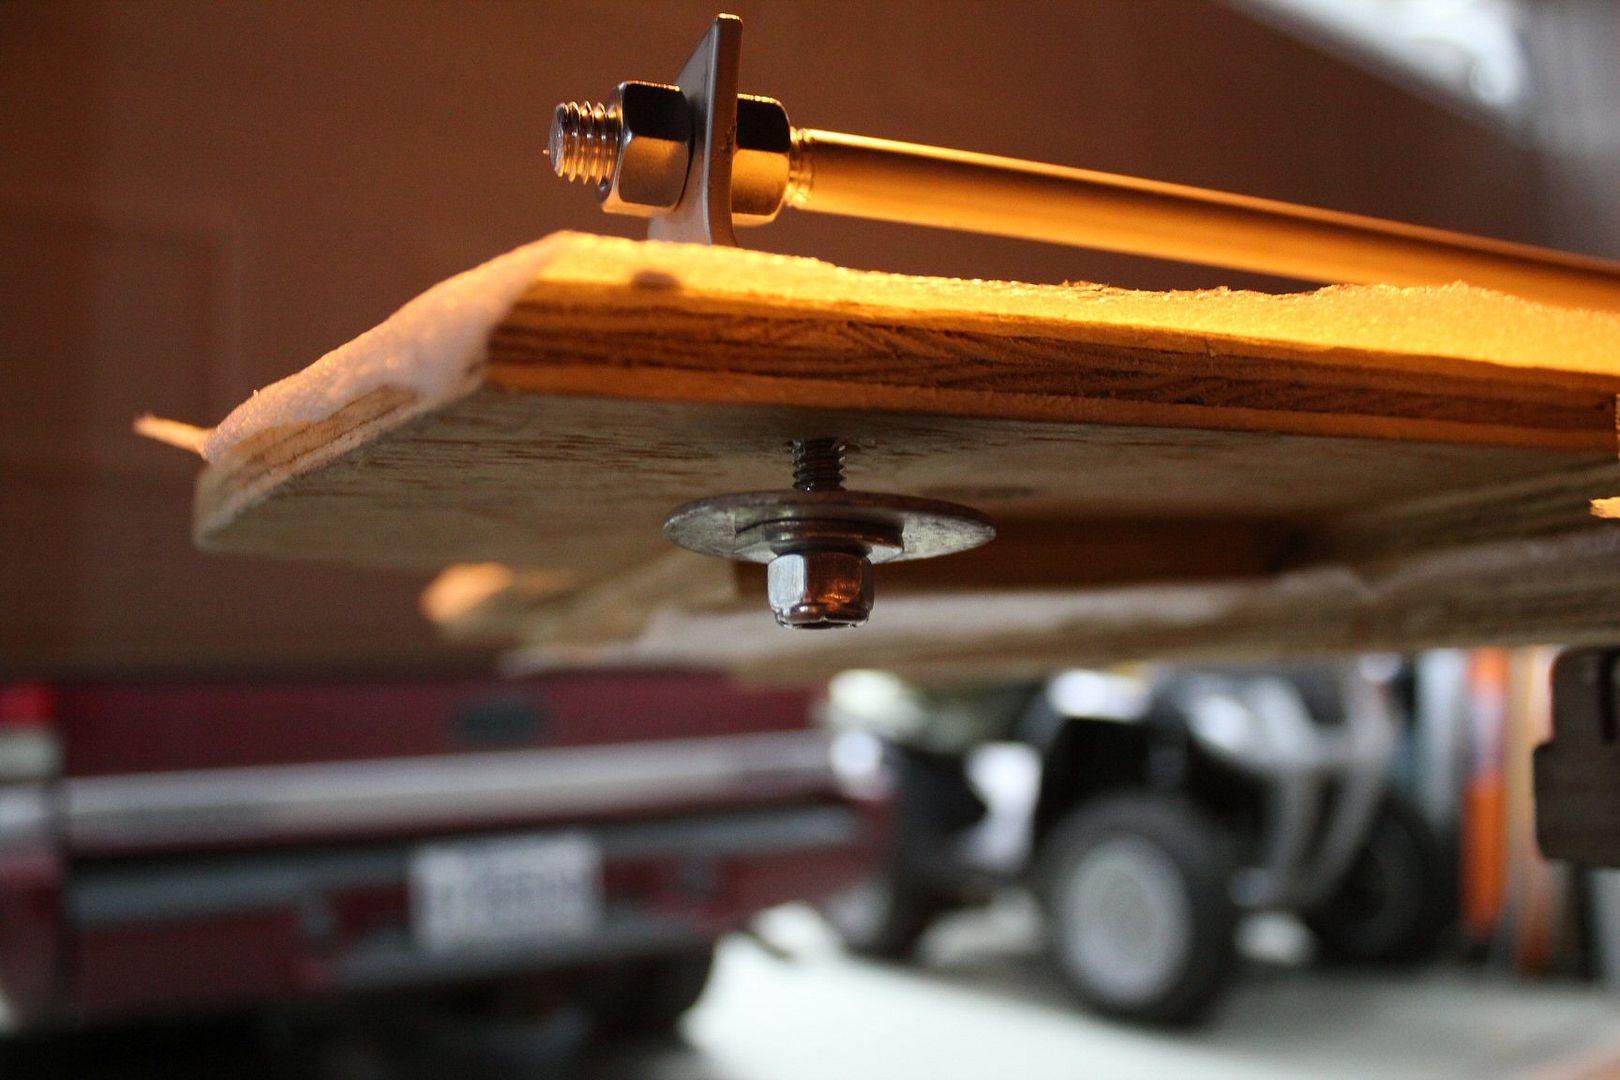
with the deck in place, i traced lines collinear to the supports undeneath, to drill some holes

i drilled and tapped the supports to yet again avoid the use of nuts;
i did the same with the back rest, but using masking tape, collinear to the bar behind it;

then drilled and tapped the bar;
to cover up the ugly plywood i wanted a nice tough dark-ish textured fabric,
but to avoid having the fabric getting ripped by some splitters of the plywood,
i glue a layer of wrapping foam on both the deck and the back;
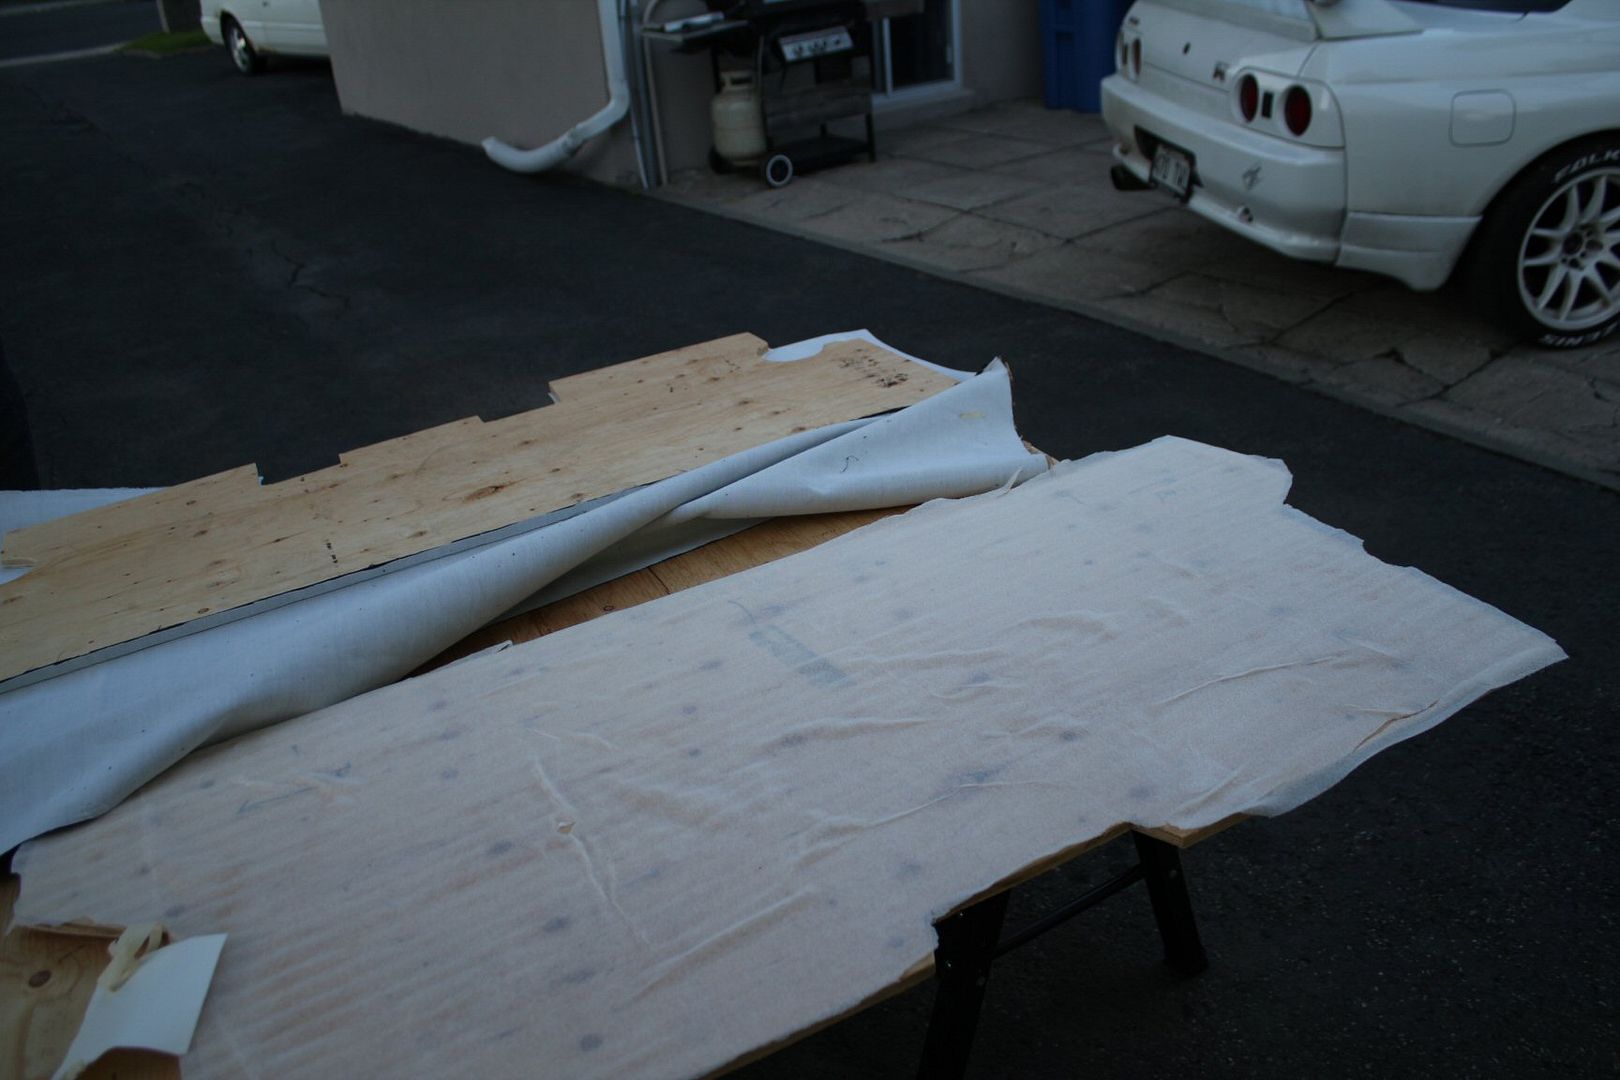
then i called upon the help of my mother, who is an outstanding seamstress in her free time,
she had found the exact fabric i wanted,
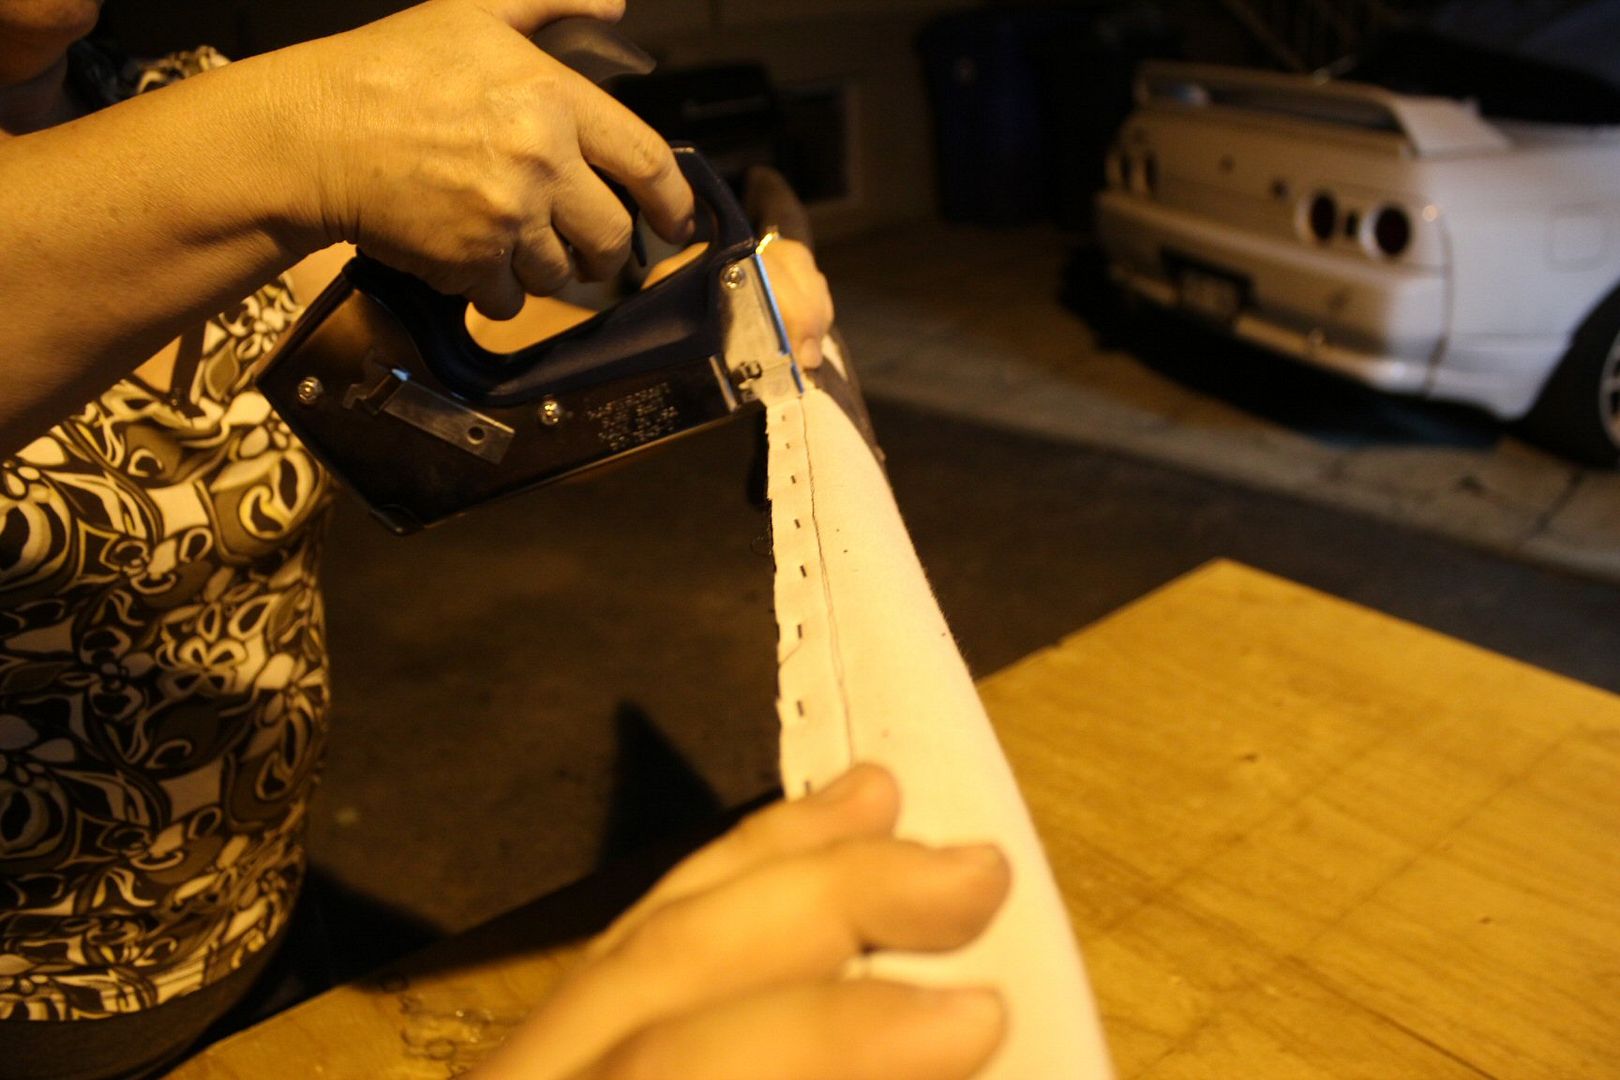
she cut the fabric in the shape of the panel, with a bit more extra, and sewed the edges;

the rest of the fabric was wrapped around and stapled behind,
the end result looked awesome!
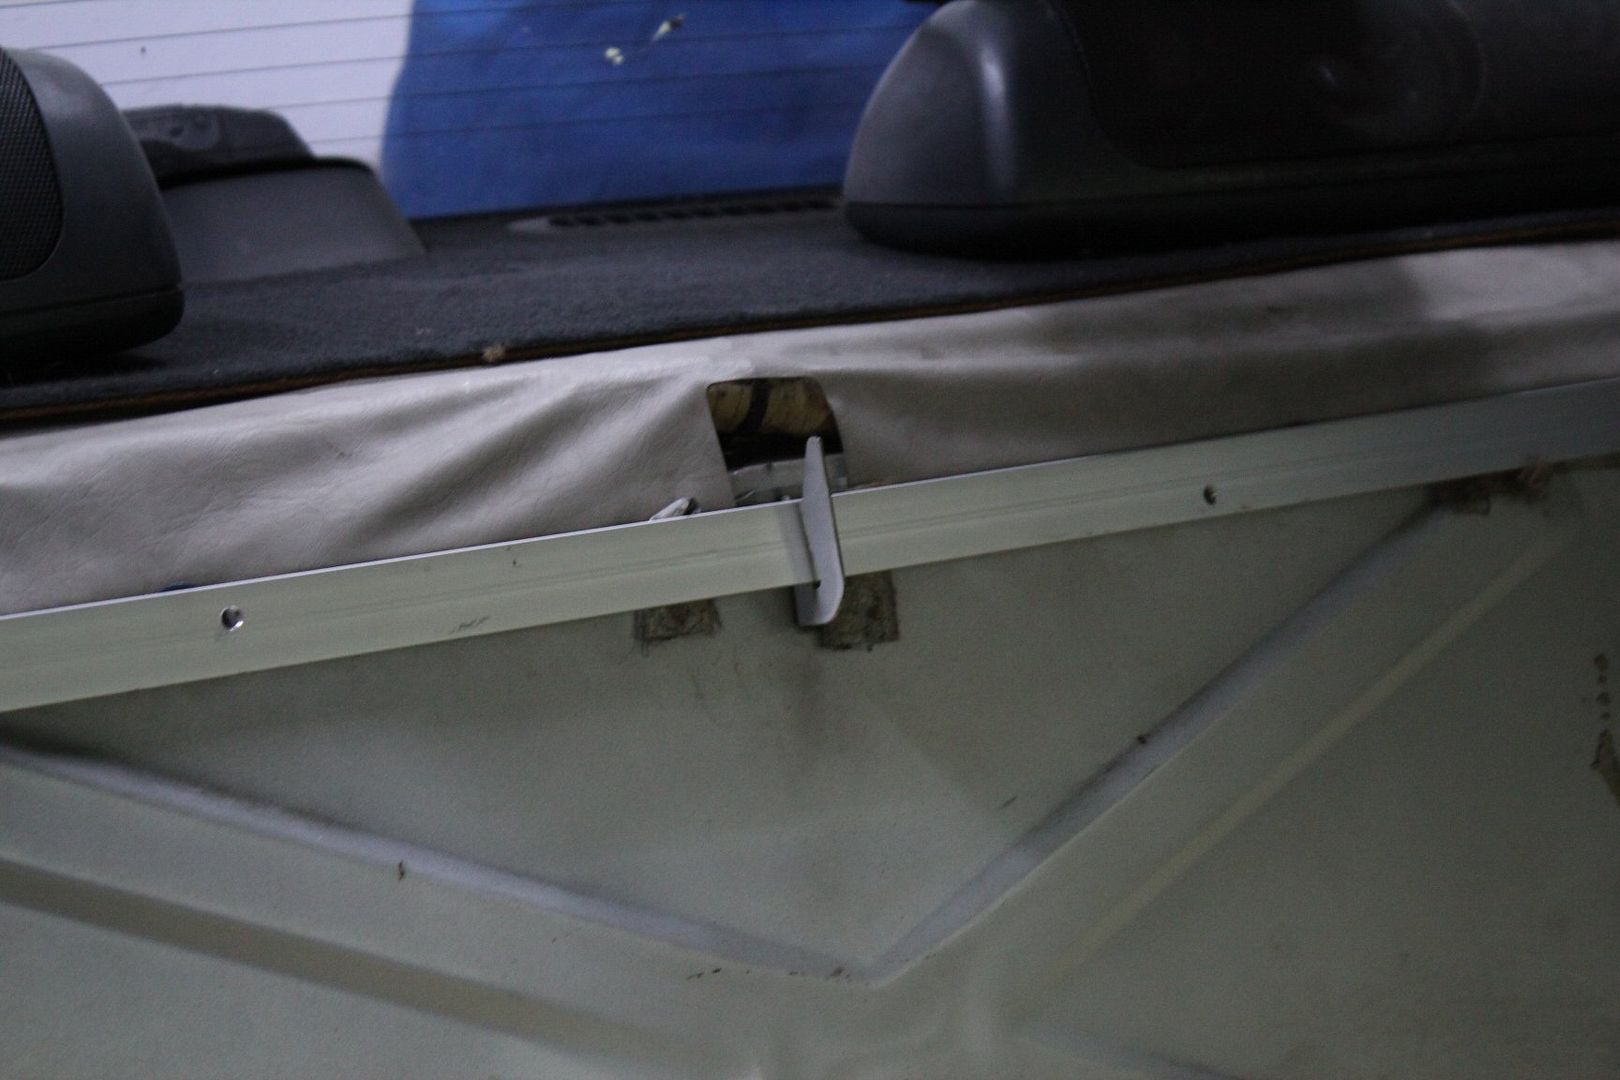
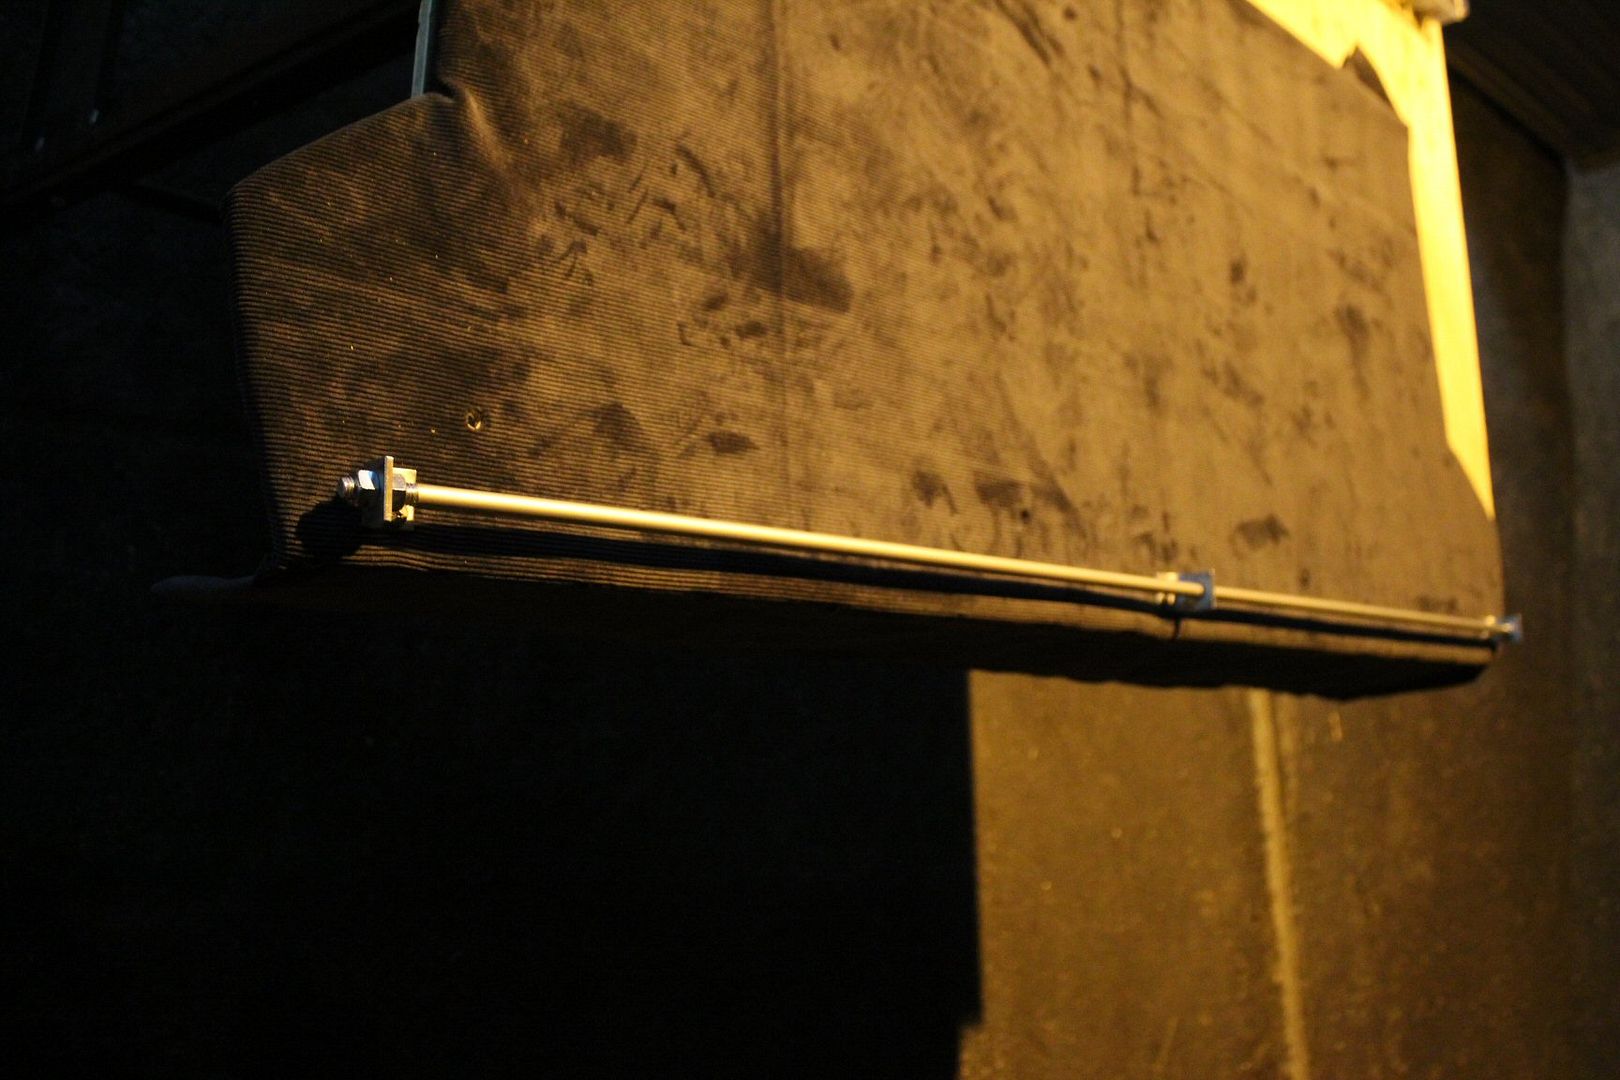
we did the same with the back rest, but i added something extra,
i modified another 3/8" aluminium rod and made 3 brackets to hold it;
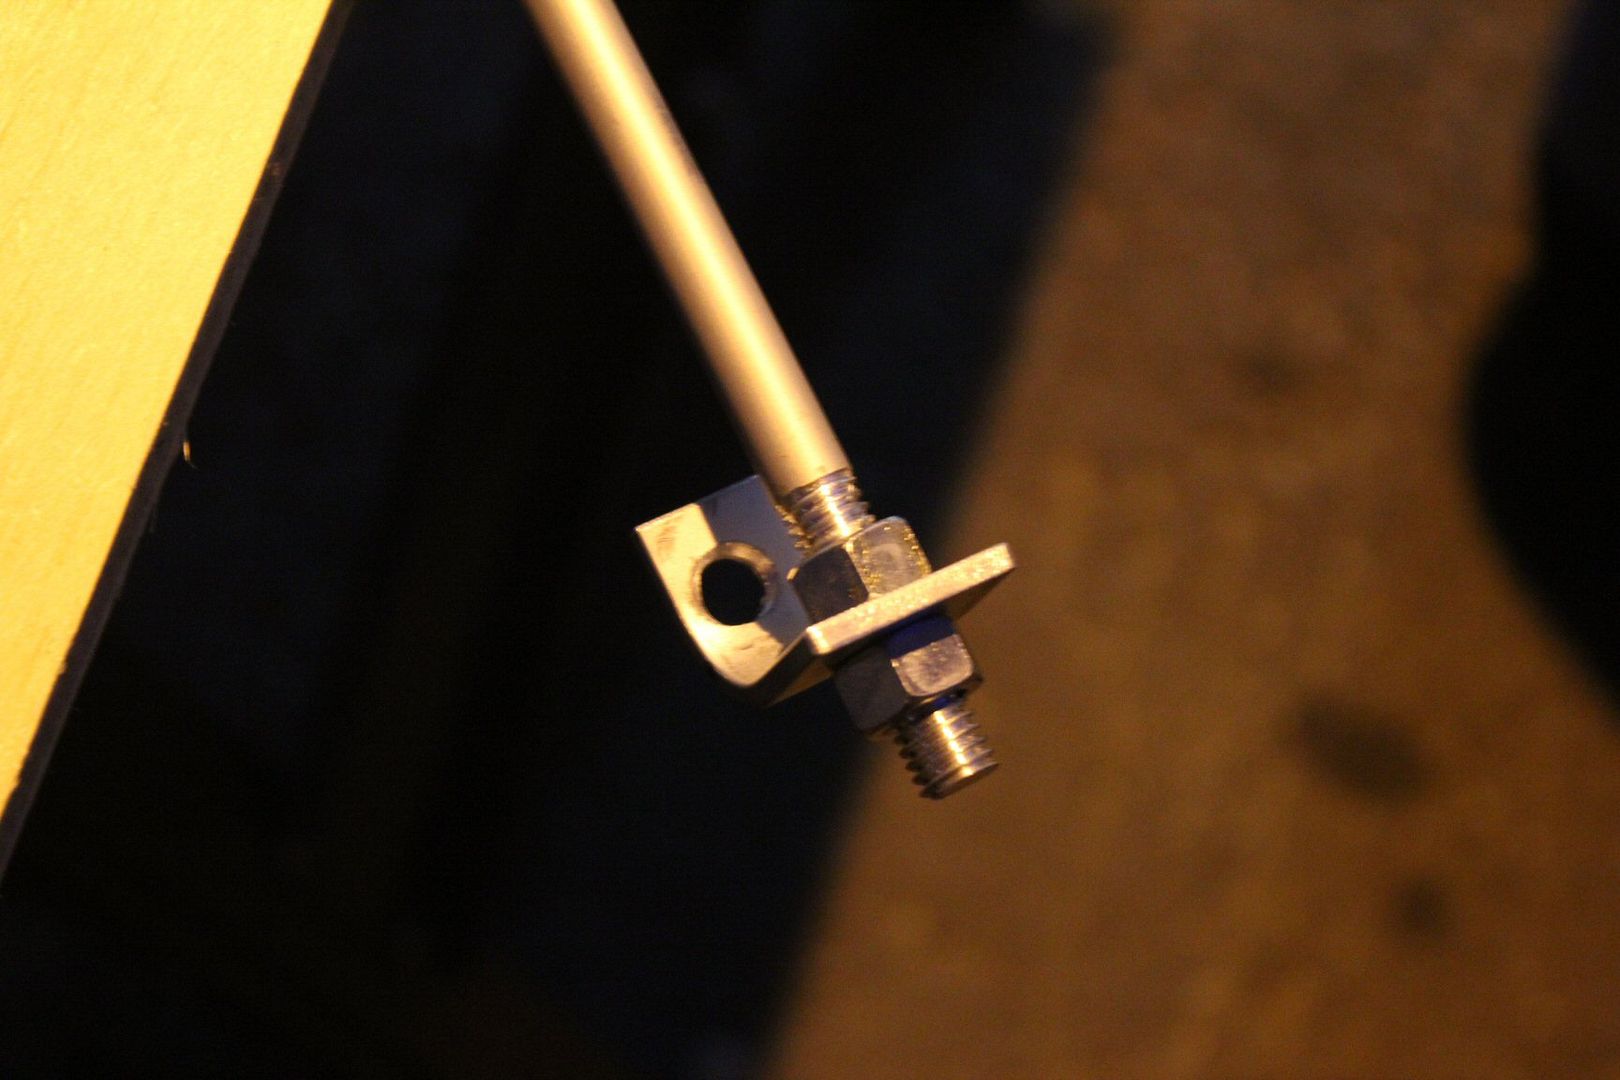
to make sure it wouldn't tear through the wood, this is how it would be fastened;
my mom and i finished up the back rest, while clever techniques to hide seams and edges and such;
i bolted the rod to it;
then i punched holes in the fabric where all the holes i drilled in the wood were,
i even modified countersunk screws the make it much much easier to align them into the respective holes in the aluminium brackets,
using these screws, their heads would be flush with the surface of the boards, for a clean look

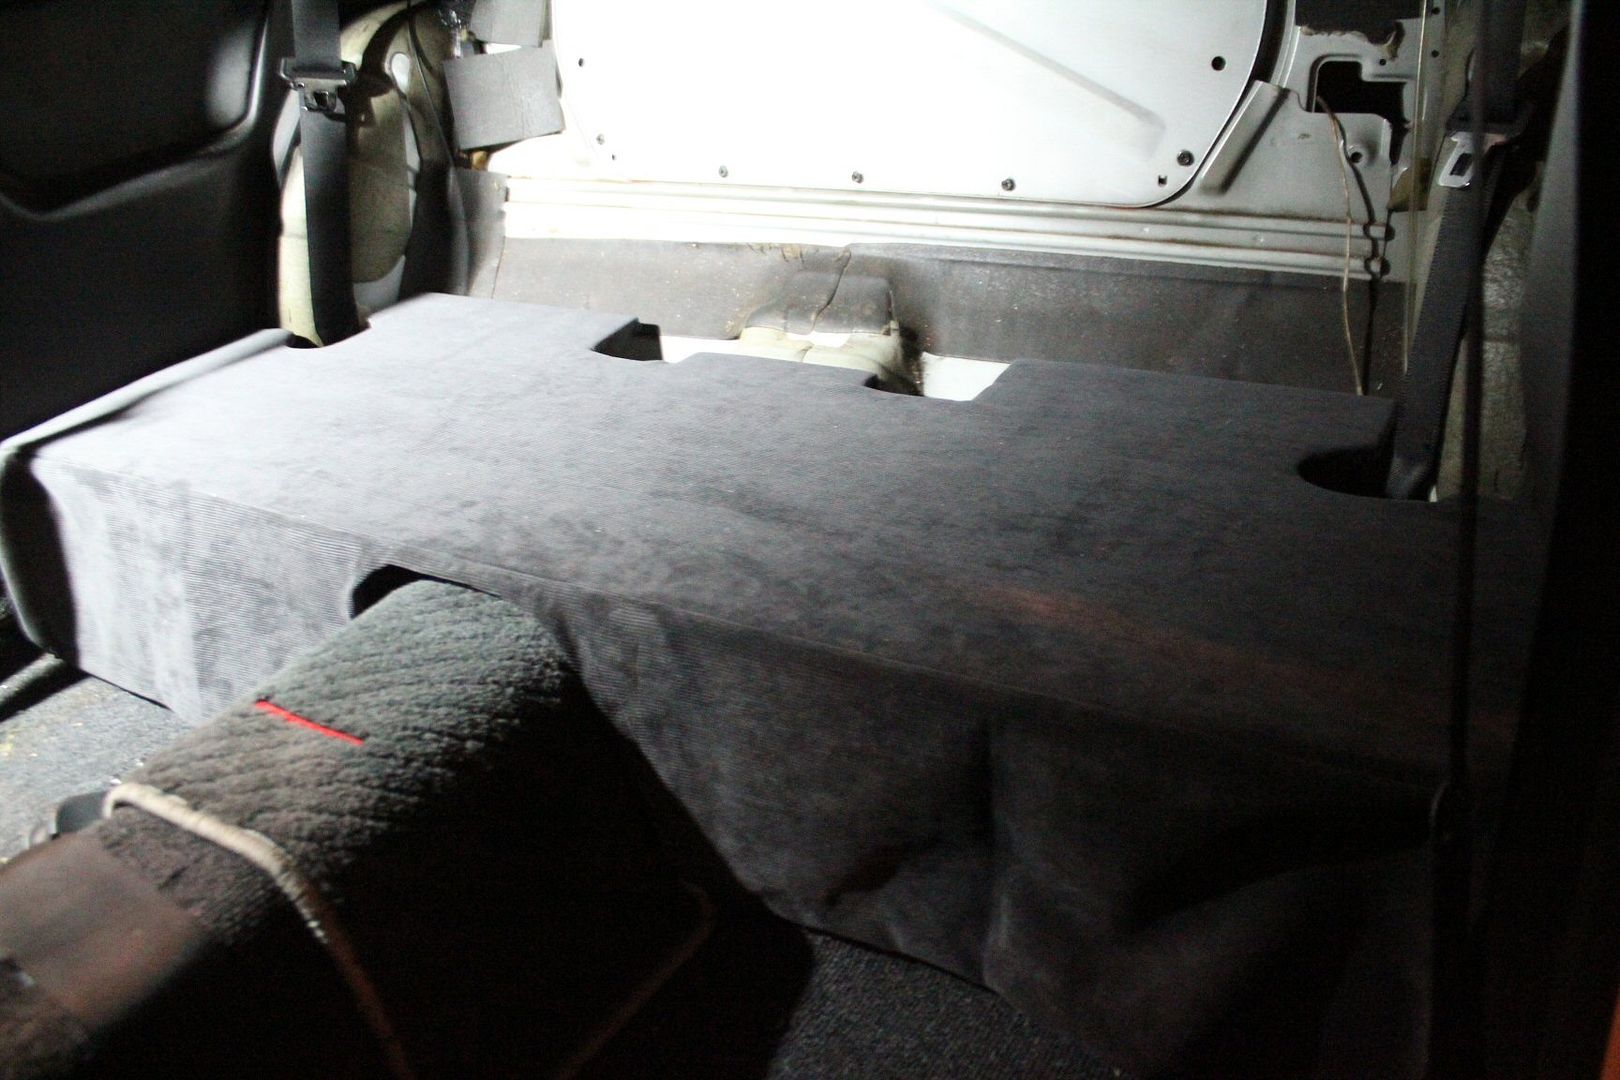
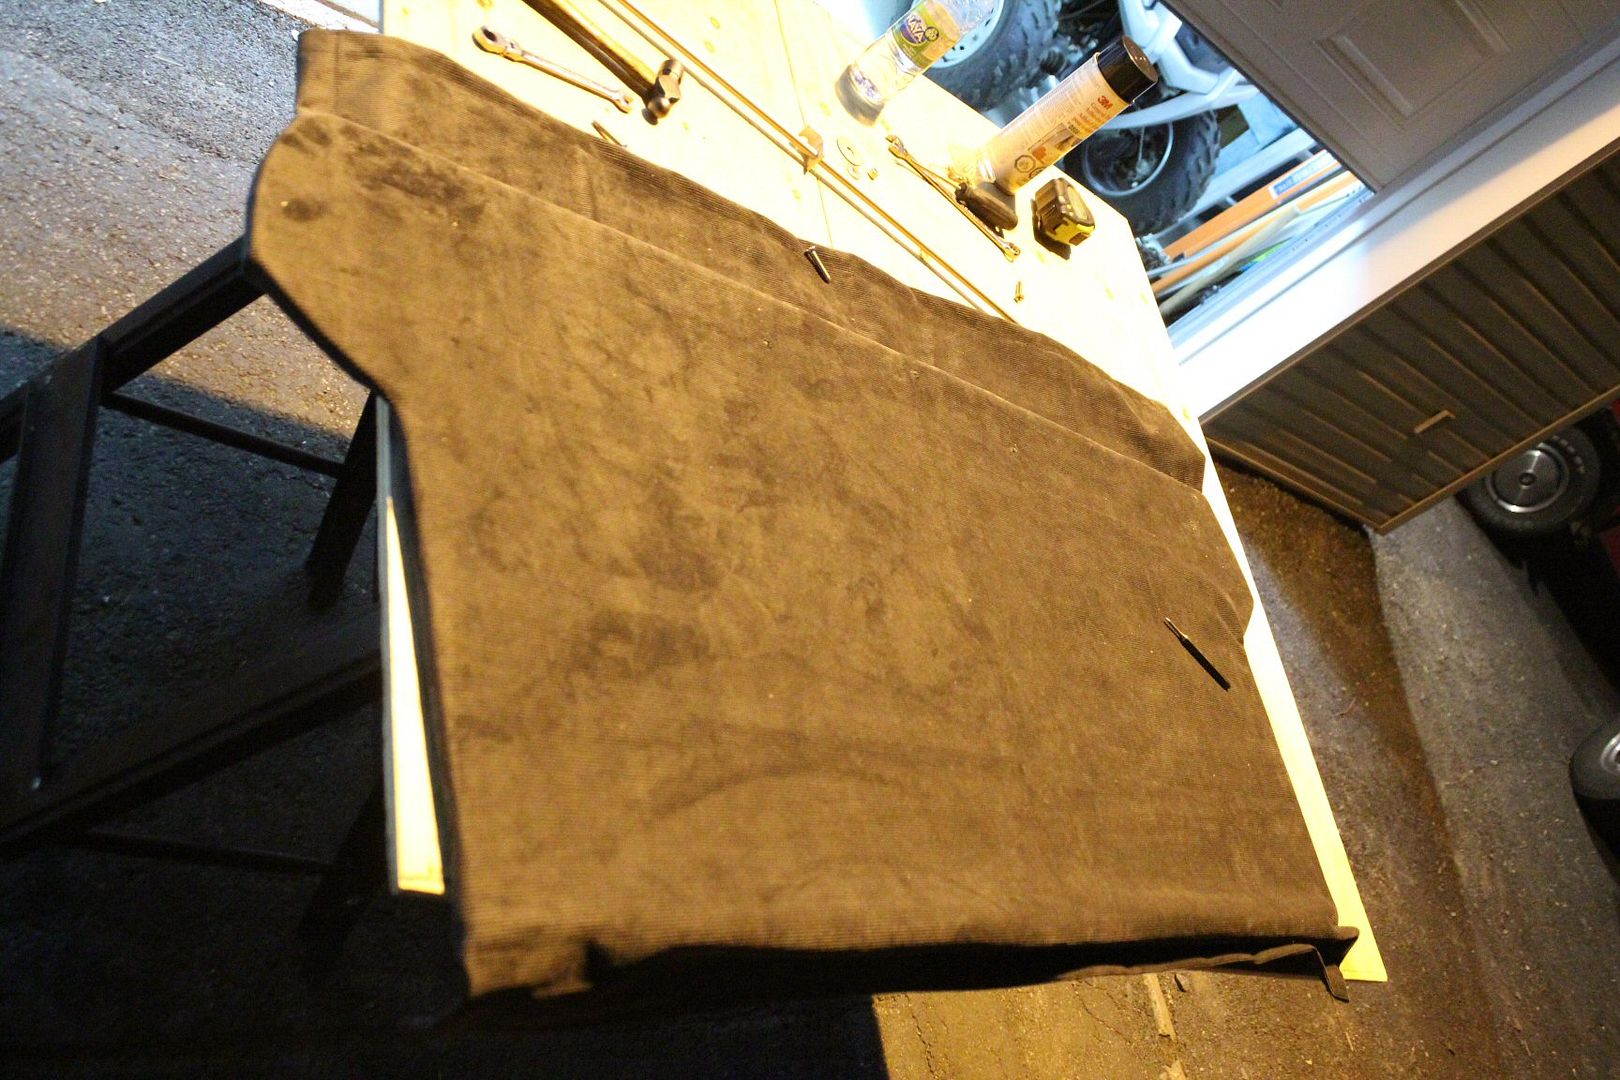
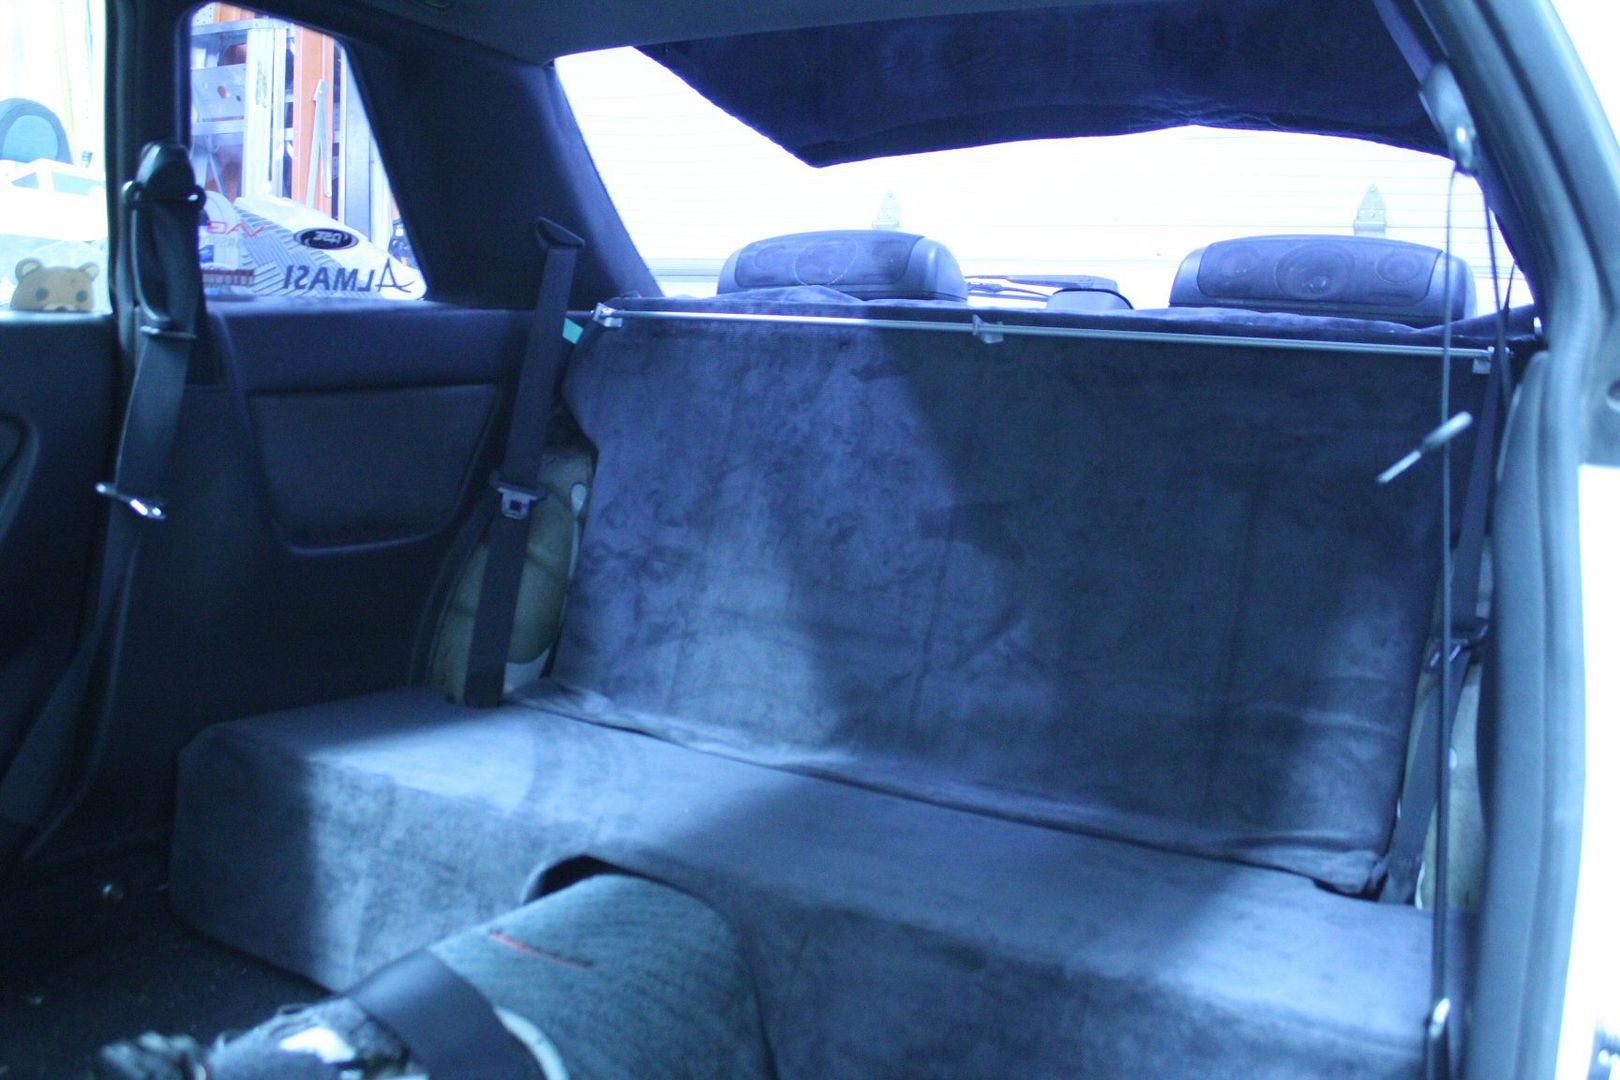
for the back rest, the fabric was longer at the bottom and the top,
to hide the holes for the racing harness at the bottom,
and to hide the edge of the speaker deck at the top,
this was the final result;
more on this and the cage in the week6 update soon
stay tuned!
thanks for reading!Last edited by frankiman; 03-12-2012, 11:55 AM.Leave a comment:
-
Chapter 42 - Interior works
week5 - 2011, part 1/2
disclaimer :
the following story depicts actions that occured between May 27 and june 4 2011
information is recalled purely from memory, endure with me
if you've read the last chapter, you know i had been working on modifying a Cusco roll cage during week4
after all the hole were drilled in the brackets and the harness bar, i bolted it all together to check for fitment;

since the harness bar was a bit too long for no good reason, i cut off bits of it at each end;

then i buffed alot of the rust off the feet of the main hoop, i don't know why it was so corroded there and where the paint had gone;
then to make it all look better and eliminate sharp edges, i traced a round cercle on the brackets were i'd cut some of it off;
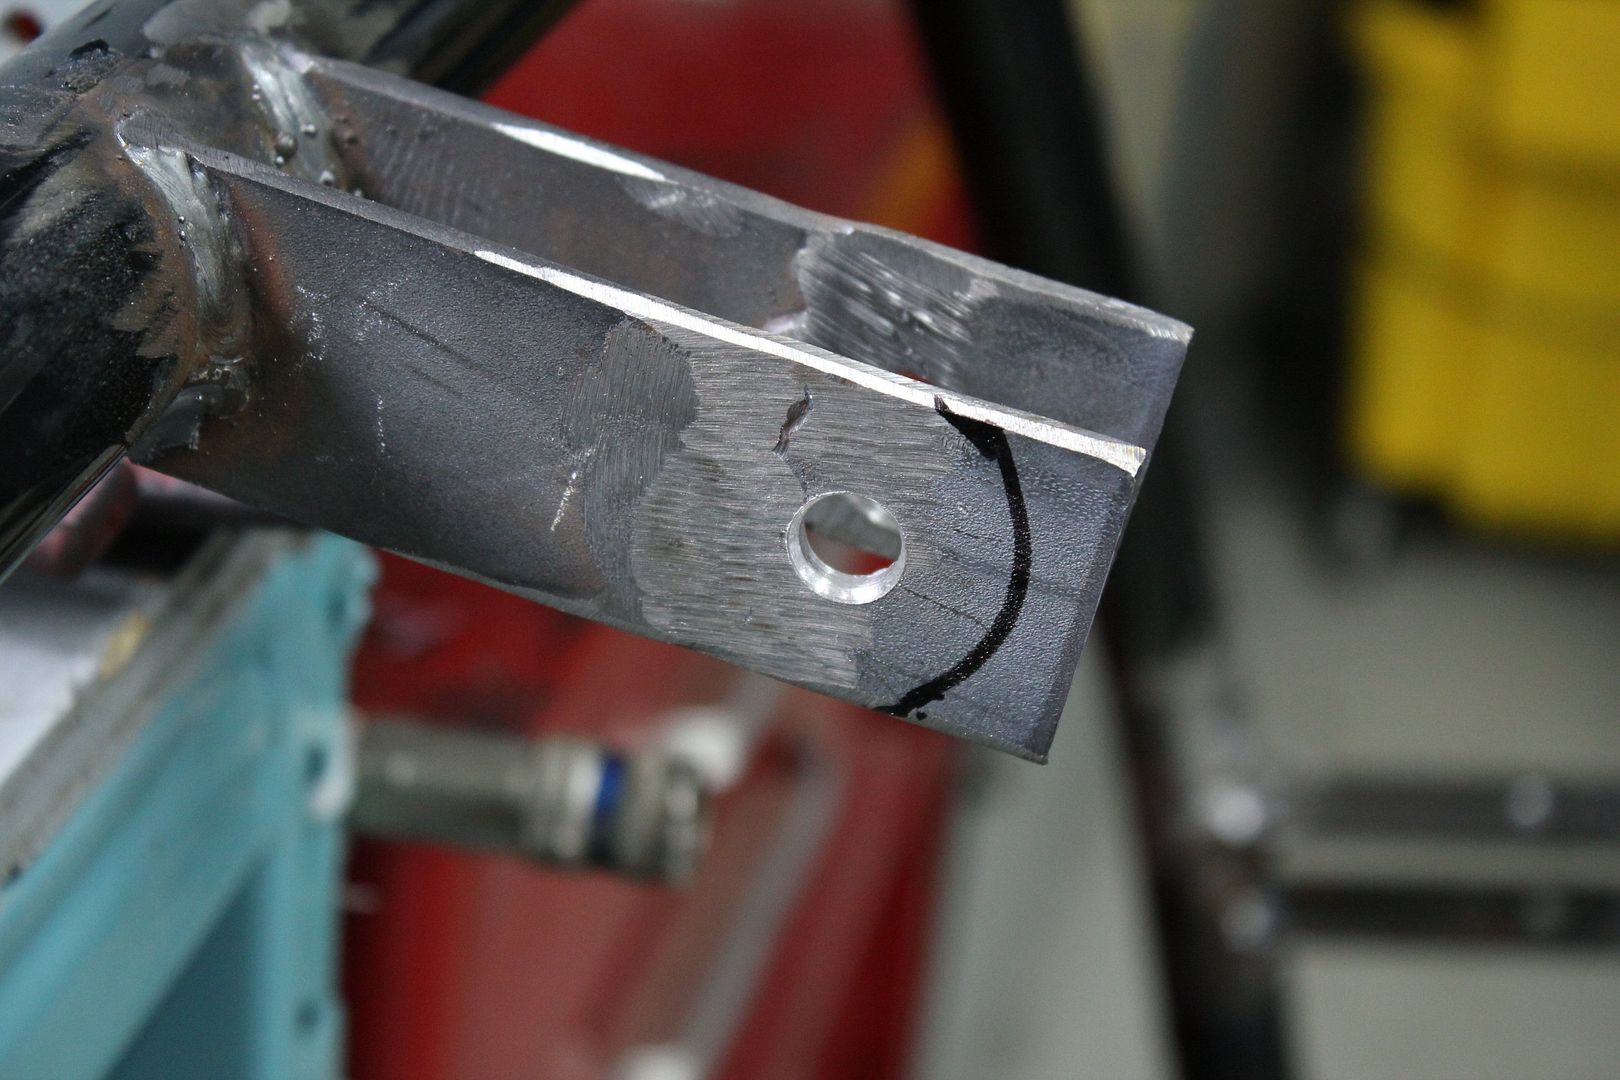
my dad came to help me, since what was done next couldn't easily be done alone,
standing outside the garage, my dad was holding the hoop firmly while I was using a cutter/grind electric tool to cut the thick steel brackets into shape,
after all of the brackets were cut, i spend a good amount of time smoothing all the edges with my pneumatic sander;

i also did the same to the 'fixed' cross brace;

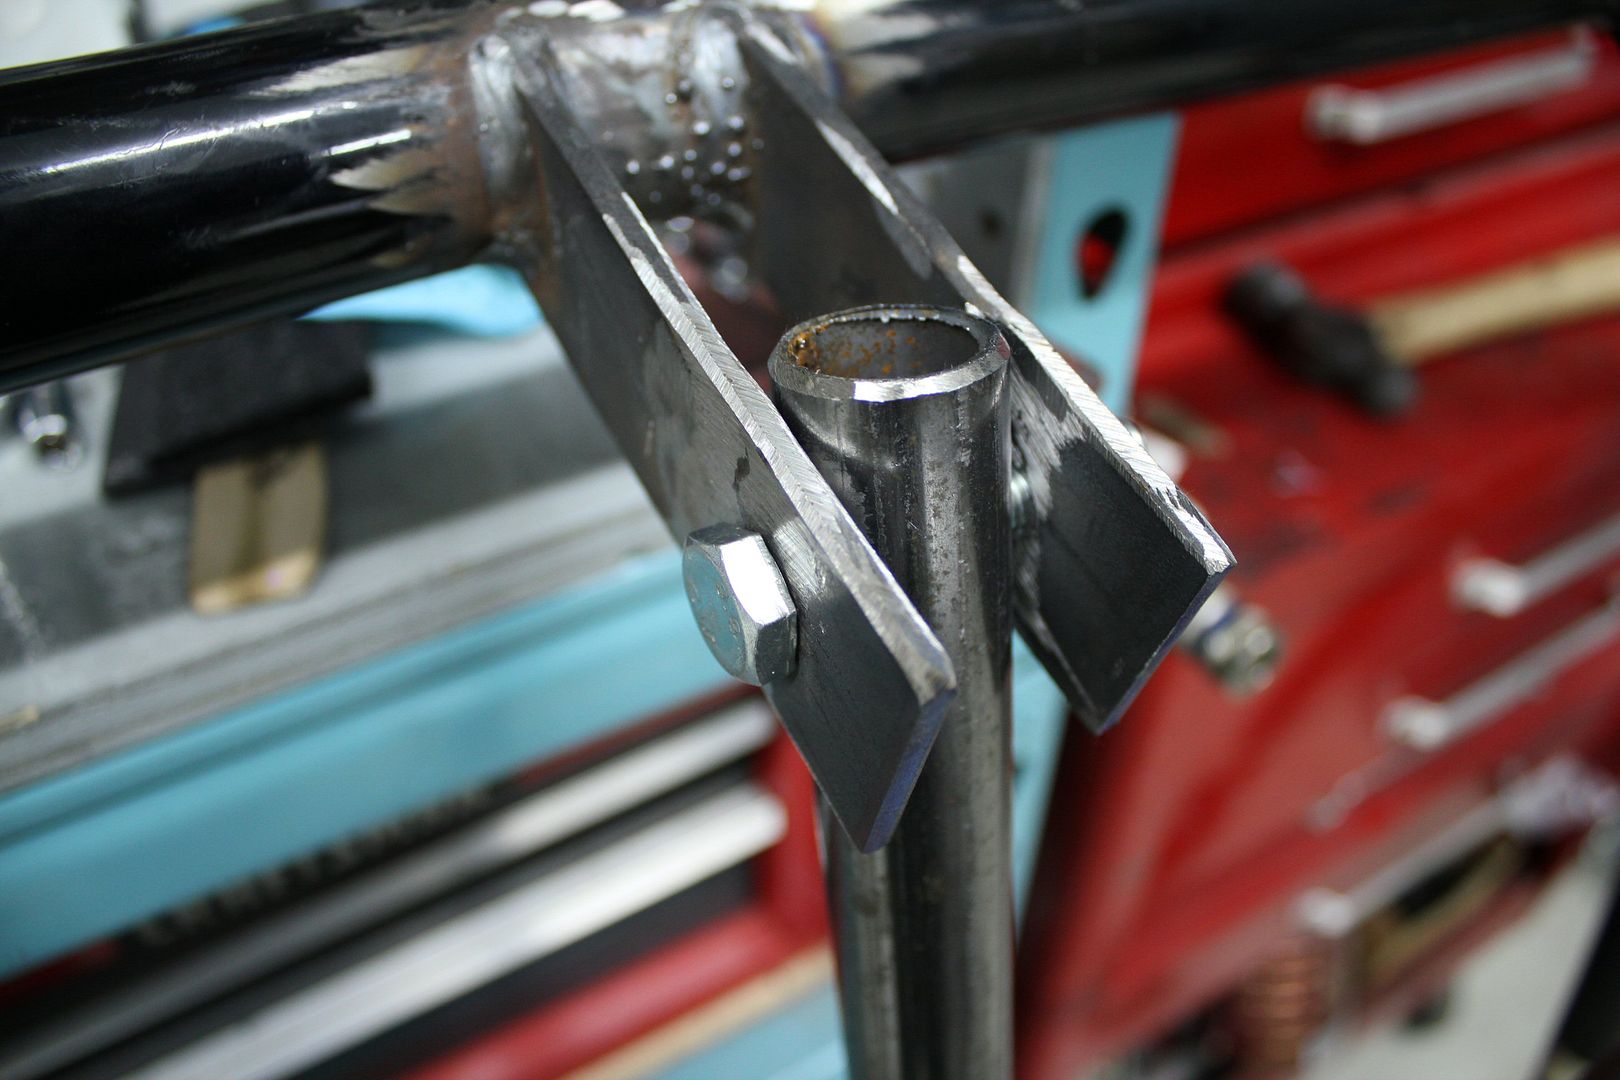
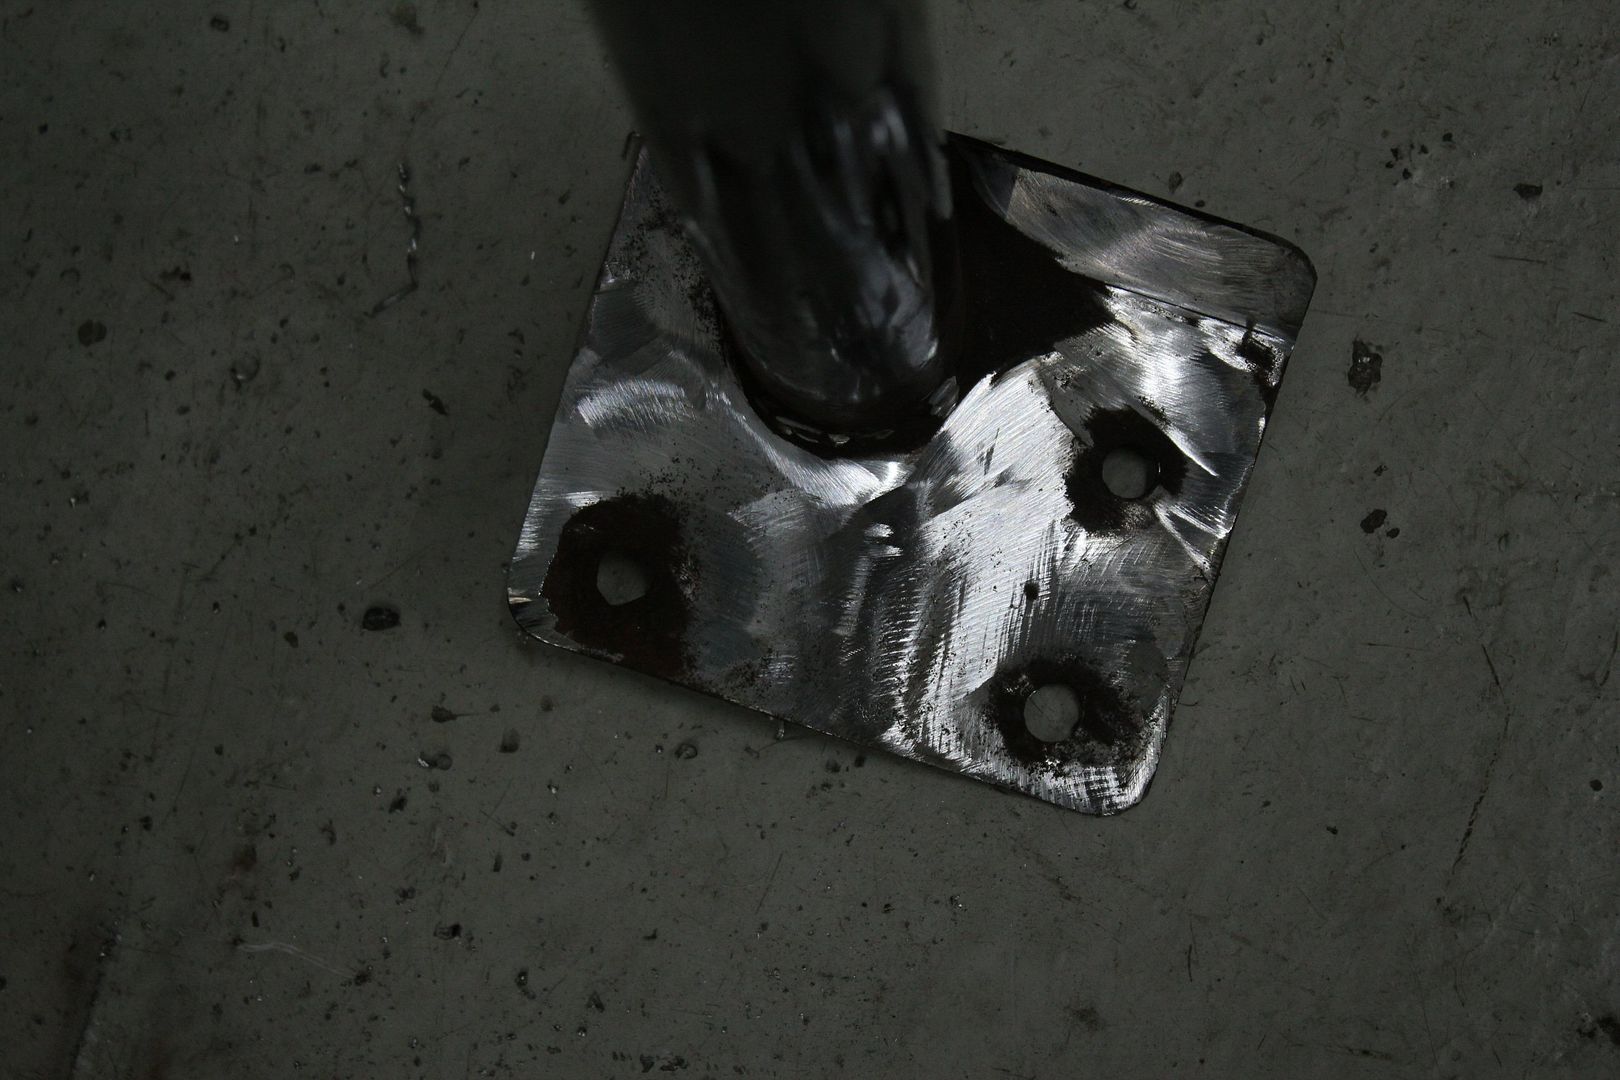
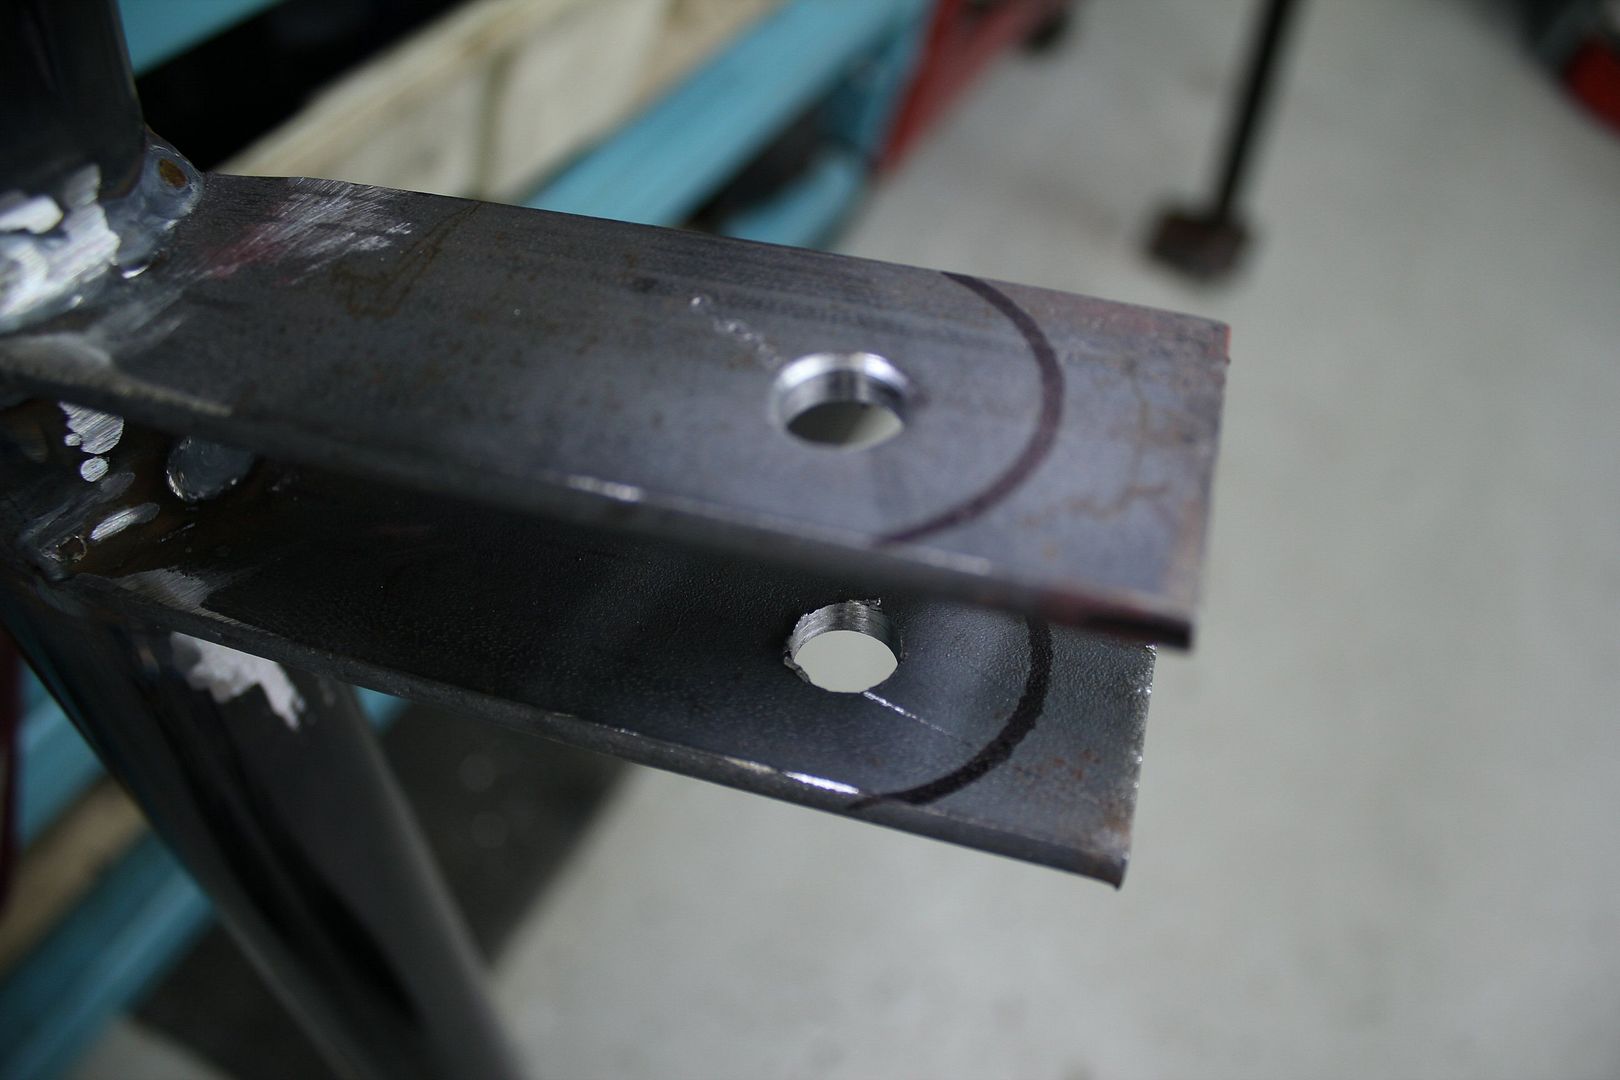
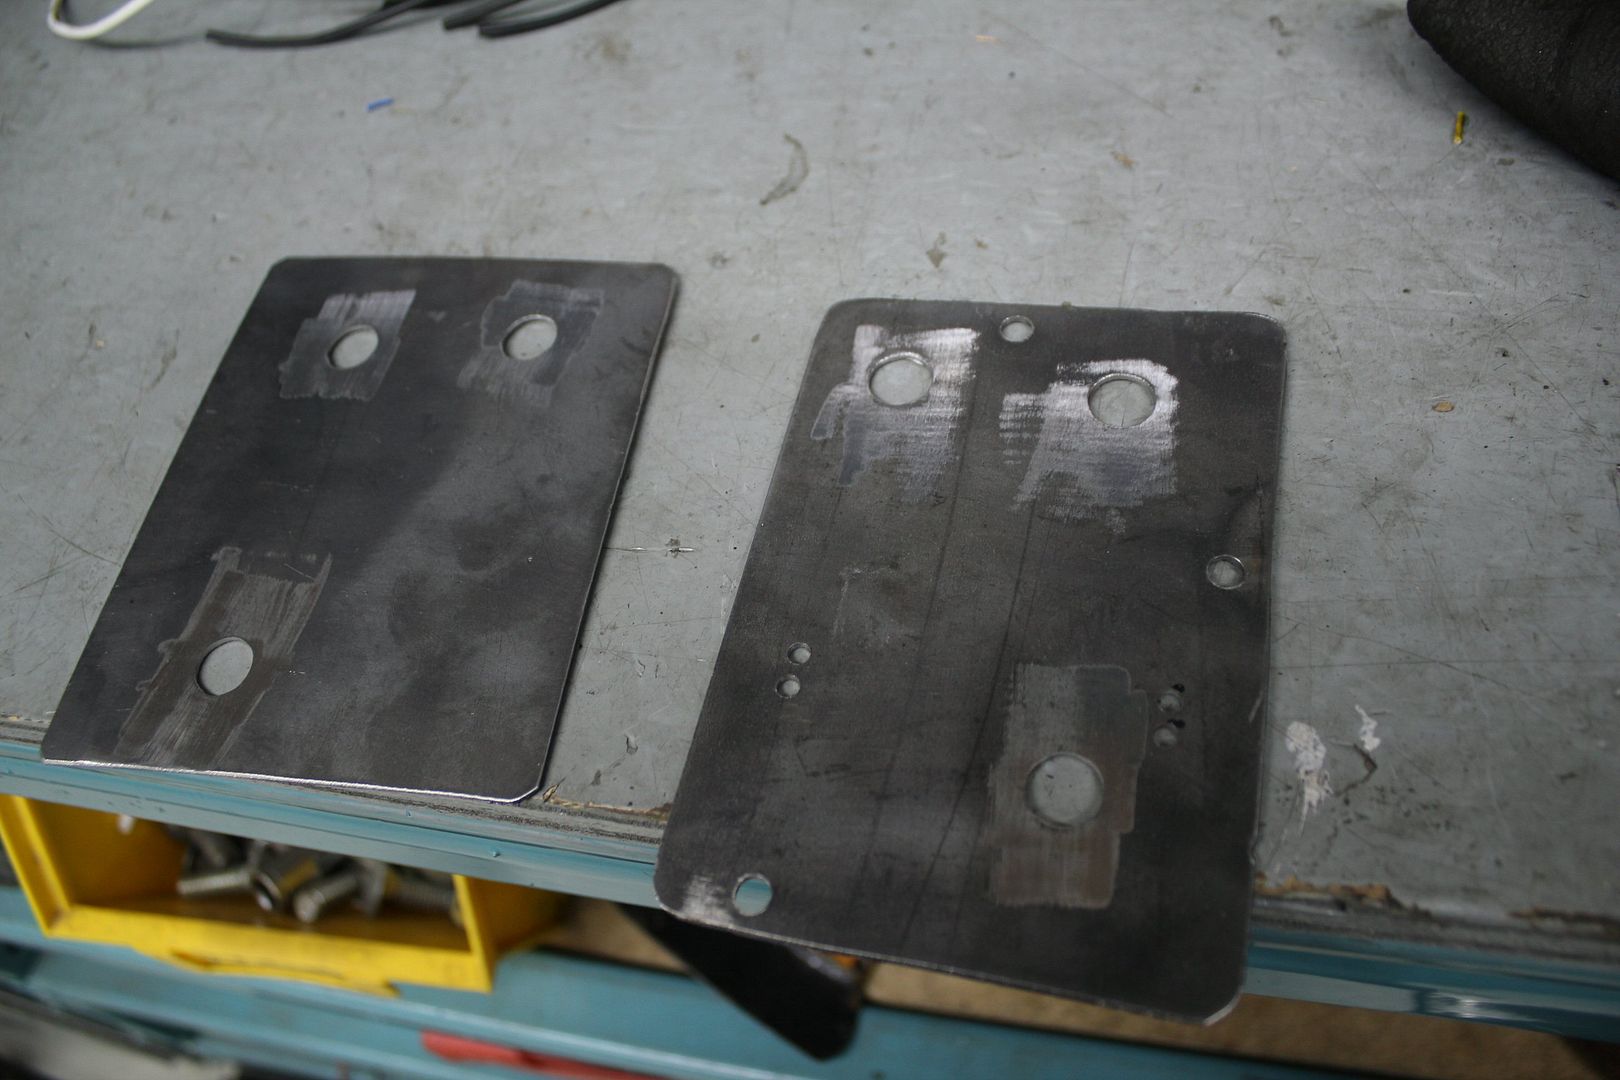
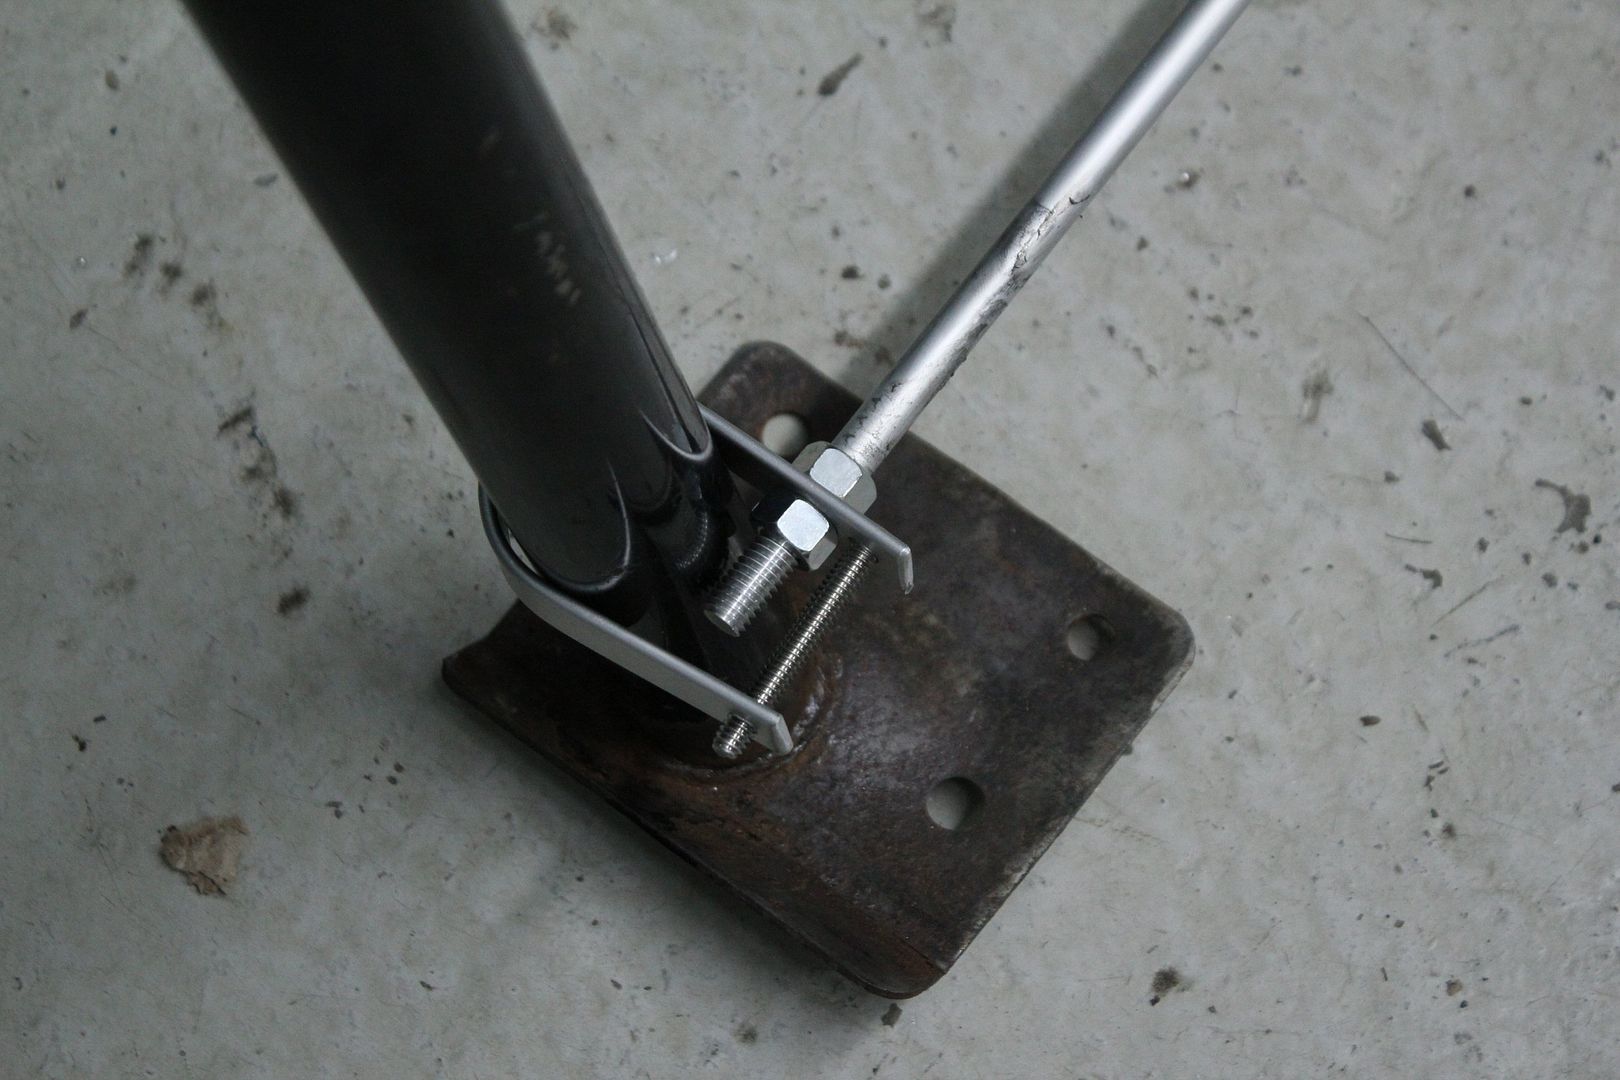
i then cut 1/8" steel plate about the size of the hoop's feet, and drilled matching holes in them,
these plates would go underneath the car to bolt the cage onto the floor;
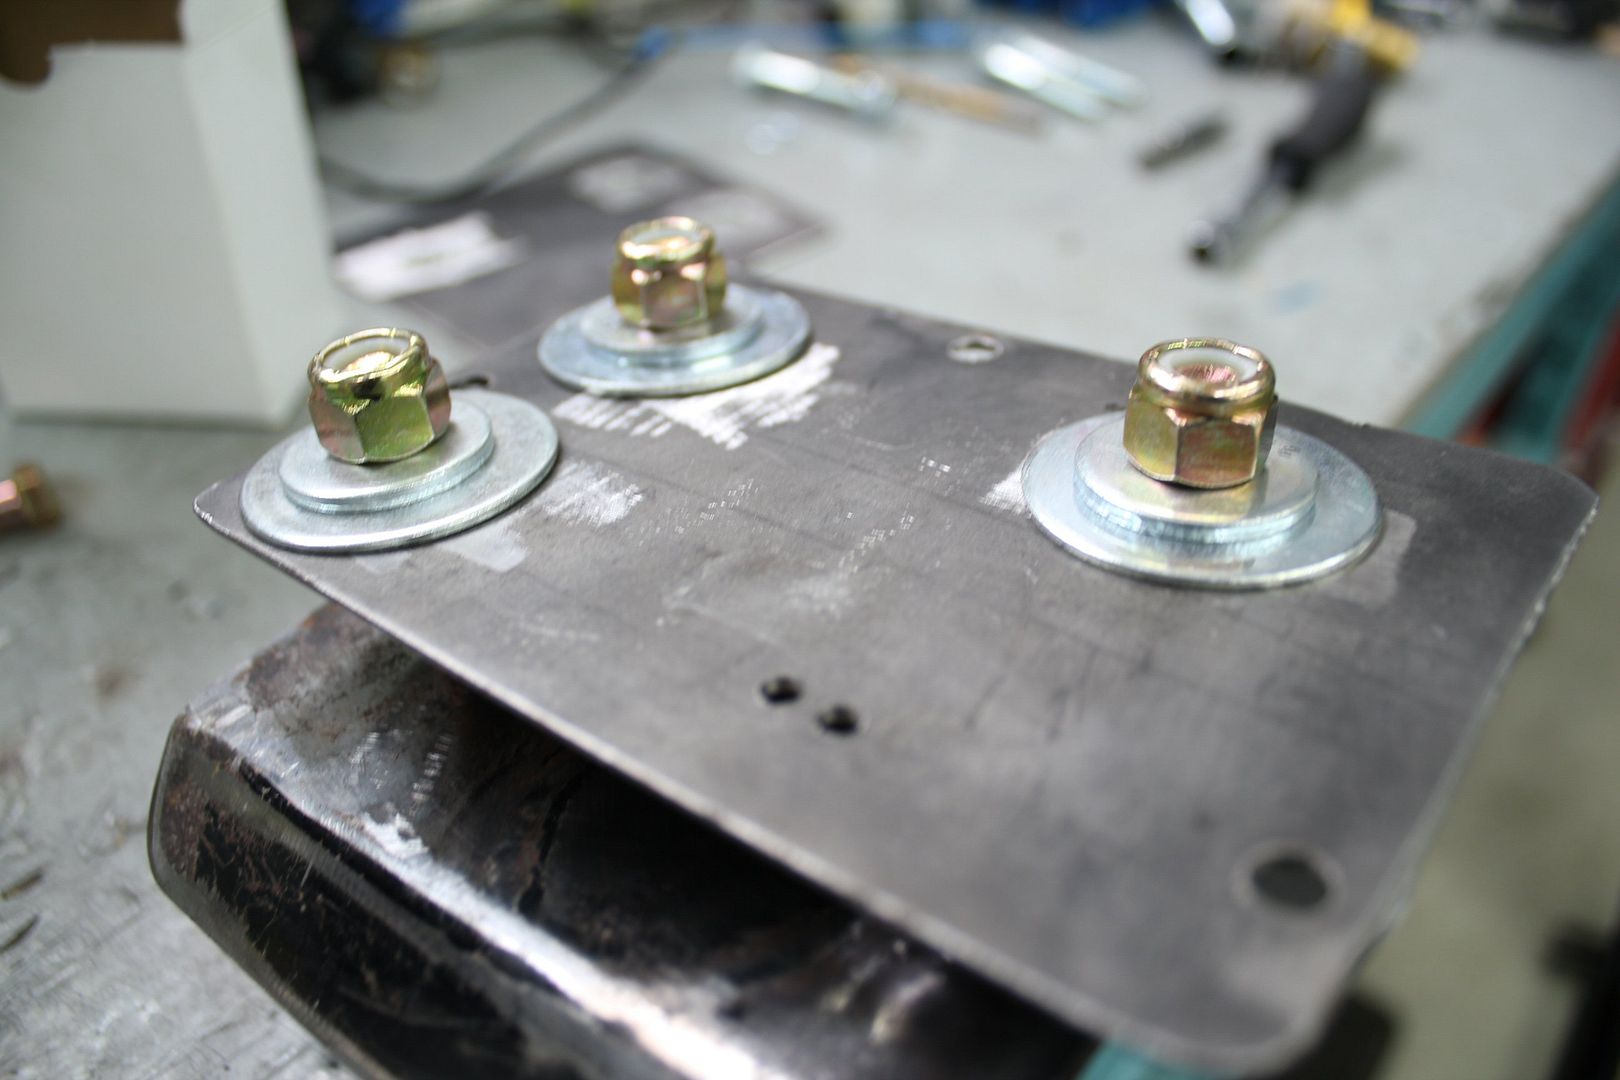
using some of the hardware i had bought, i test fitted the plate with the hoop;
then i had a brilliant idea on a setup that would allow me to store anything on the new backseat,
it will all make sens in time,
i cut and bent small bars of aluminium, drilled and tapped holes in them to make little 'C' clamps like such;
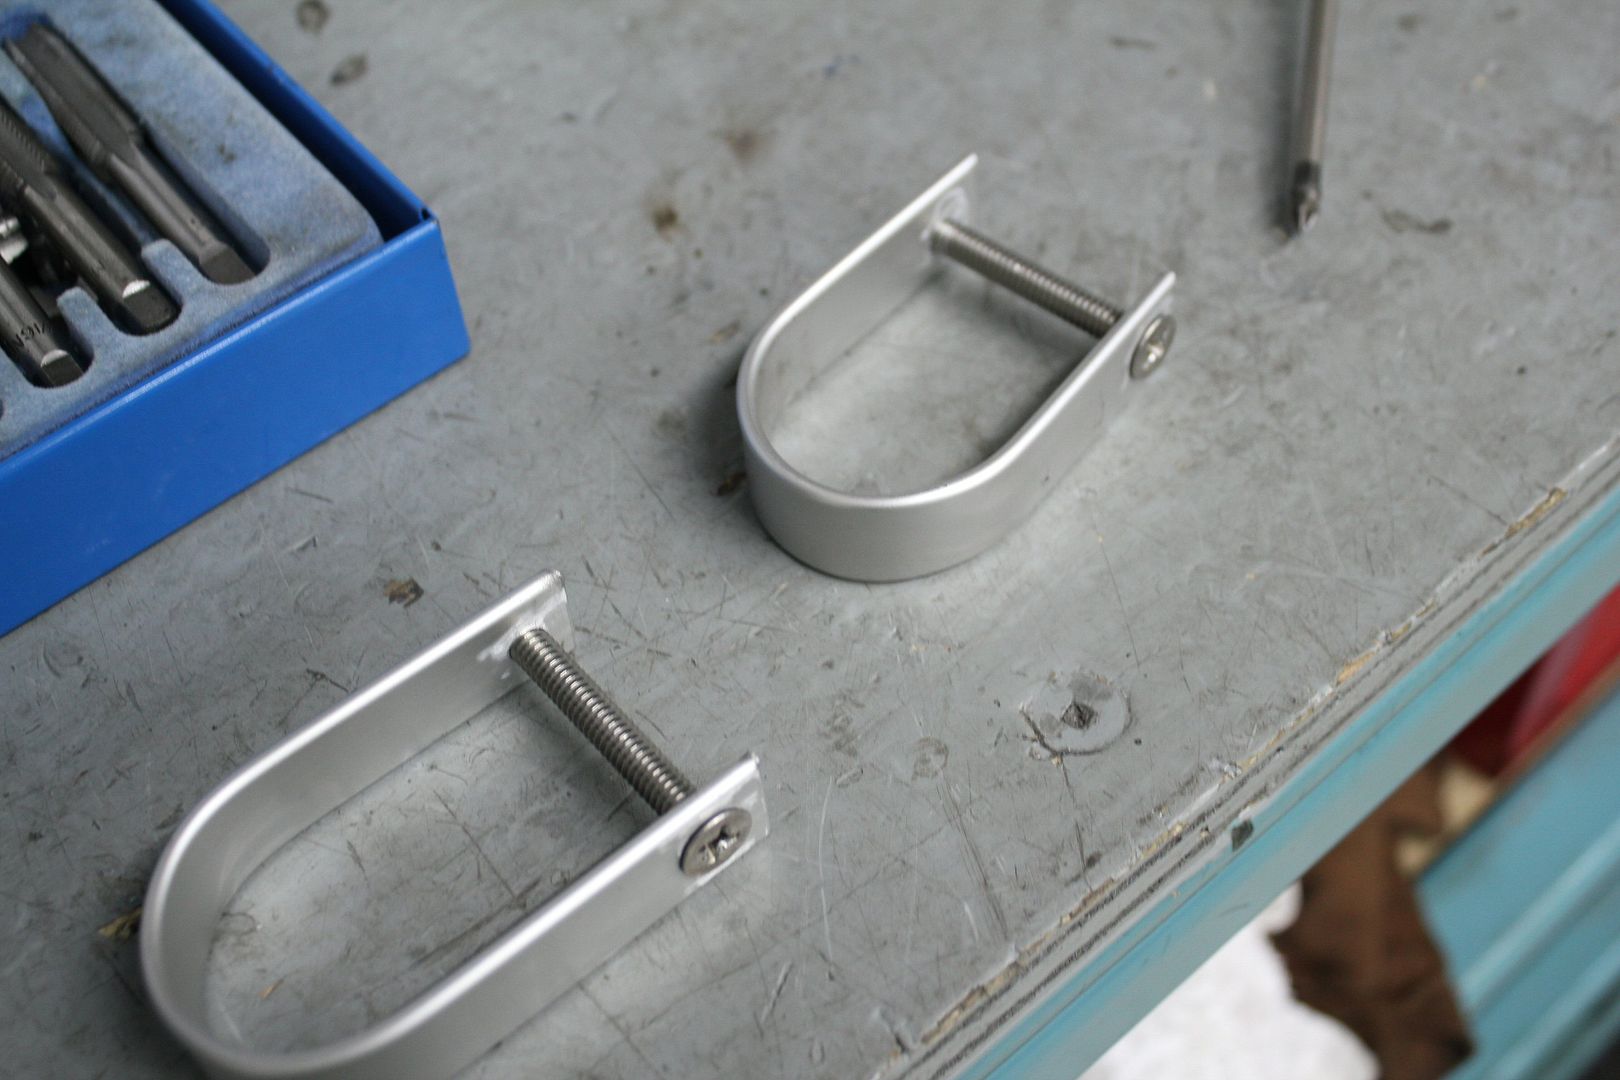
i had bought 4' long 3/8" aluminium rods, which were the exact lenght i'd need,
so i threaded about 2" after each of the ends;

so the rod could be bolted to the clamps as such;
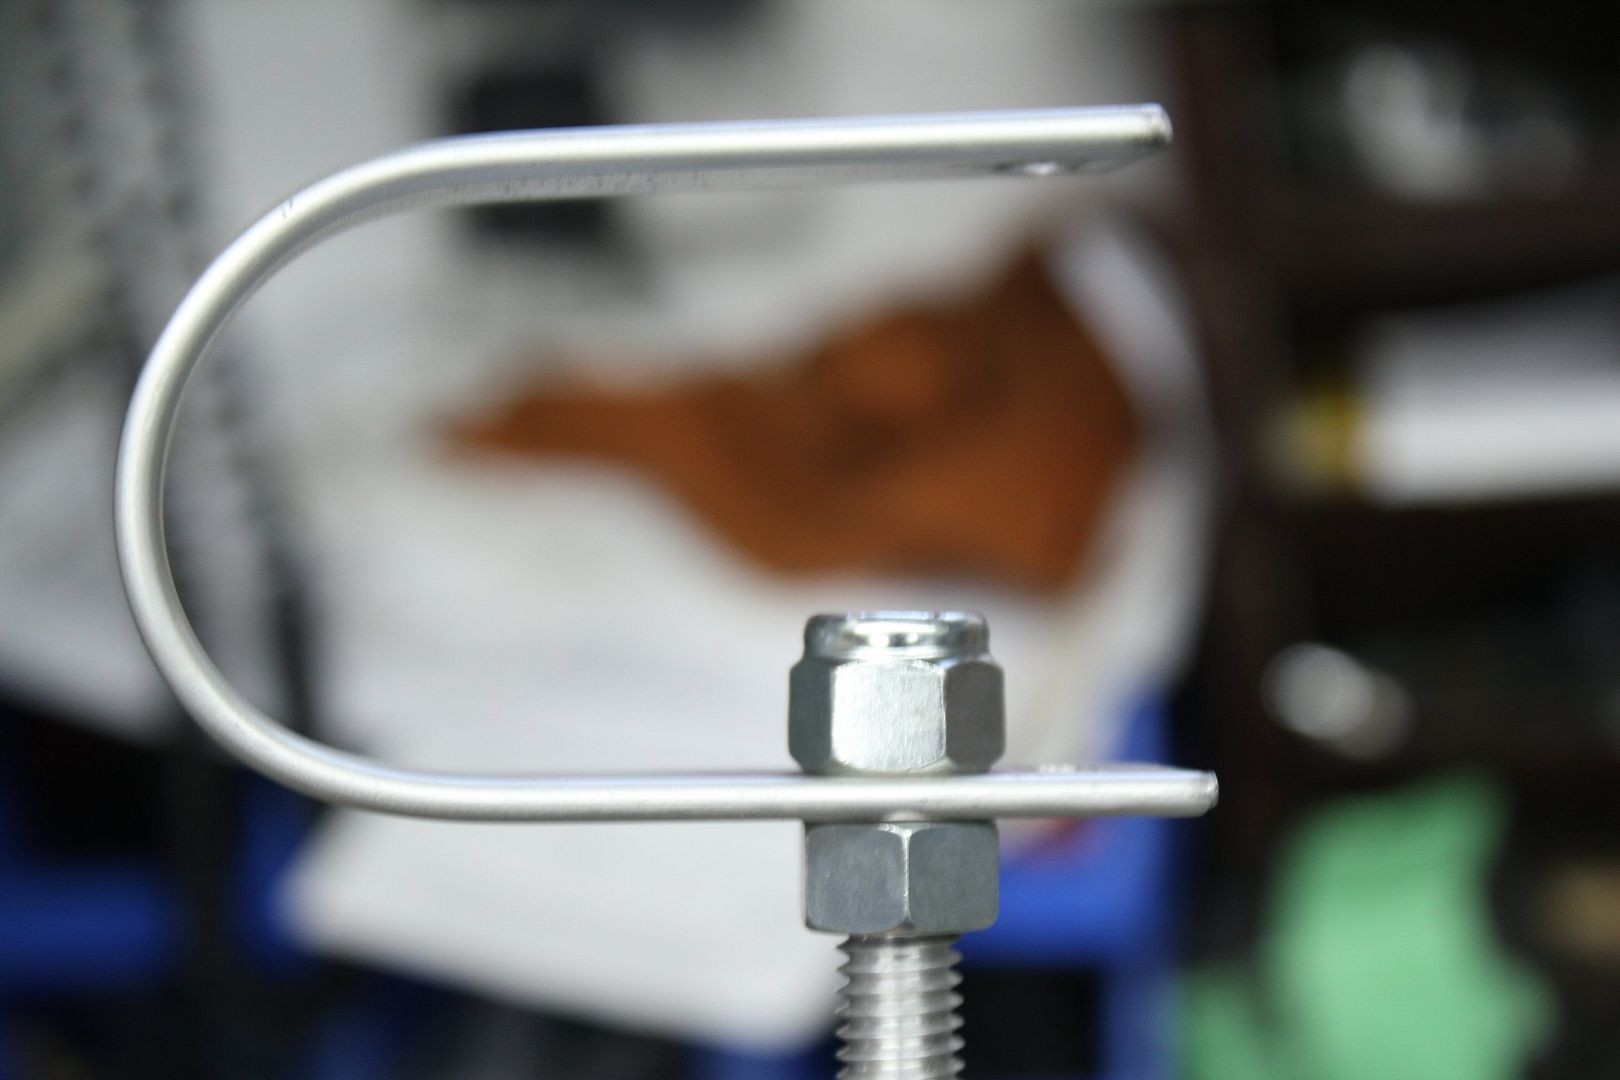
and finally this is what it ended up looking like,
this is not made to be structural at all;

thats all about the cage for week5, more in next week's update
----------------------------------------
my buddy also came back during that week to continue work on the A/C control module's harness which was coming along nicely

thats not all for week5, keep reading -->Leave a comment:
-
Can't wait!!! This is awesome. Love how you put it all in chapters man. Alot of valuable info hereLeave a comment:
-
Chapter 41 - Caged in
week4 - 2011, part 2/2
disclaimer :
the following story depicts actions that occured between May 22 and 26 2011
information is recalled purely from memory, endure with me
during the 4th week, i worked alot on the cage, but during the days where i didn't have parts of the cage because they were at a shop,
i had to find something else to do
so i had a friend help me, the good friend who helped me with the turbo swap,
the plan was to change the location of the Climate Control Module, again...
in 2010 i had placed it in the glove box to liberate space in the center console to put electronic gizmos theres
but the fact that beeing in the glove box, upside down, far from the driver, made it very unpleasant to use, at all time
so i decided to move the control module much closer
before moving forward, we had to take some steps back, what i did in 2010 had to be undone,
the glove box was removed and also the module's wiring harness

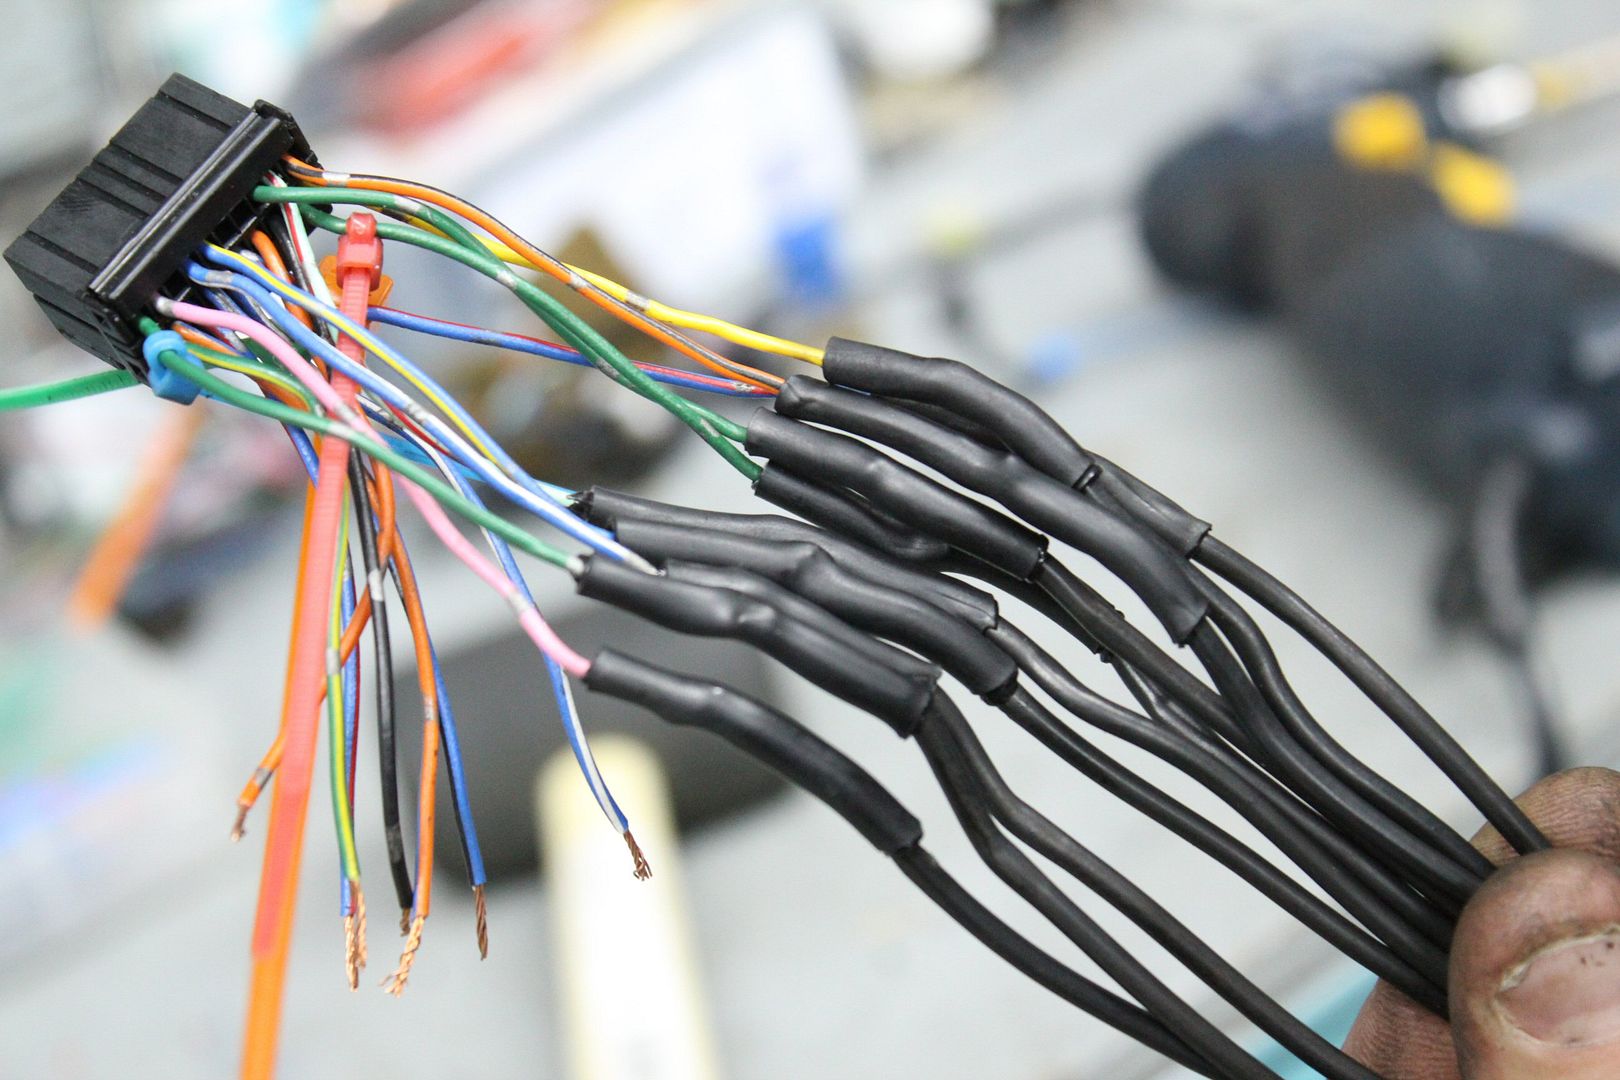
this is what the harness looks like,
i knew it was seperate from the rest of the wiring, since i had sold that harness from my old GTR,
its comprised of 2 different main sections, one for each plug, with 18 wires each
since there isn't an infinite amount of main colors in the alphabet (wait.. what?) not all 36 wires were of different colors,
so repeating colors were identified with matching zip-ties at each end;

now came time to lengthen each wires, 36 wires meant 72 solders (ouch)
so i made my buddy a comfortable work station and gave him all the necessary tools and materials;
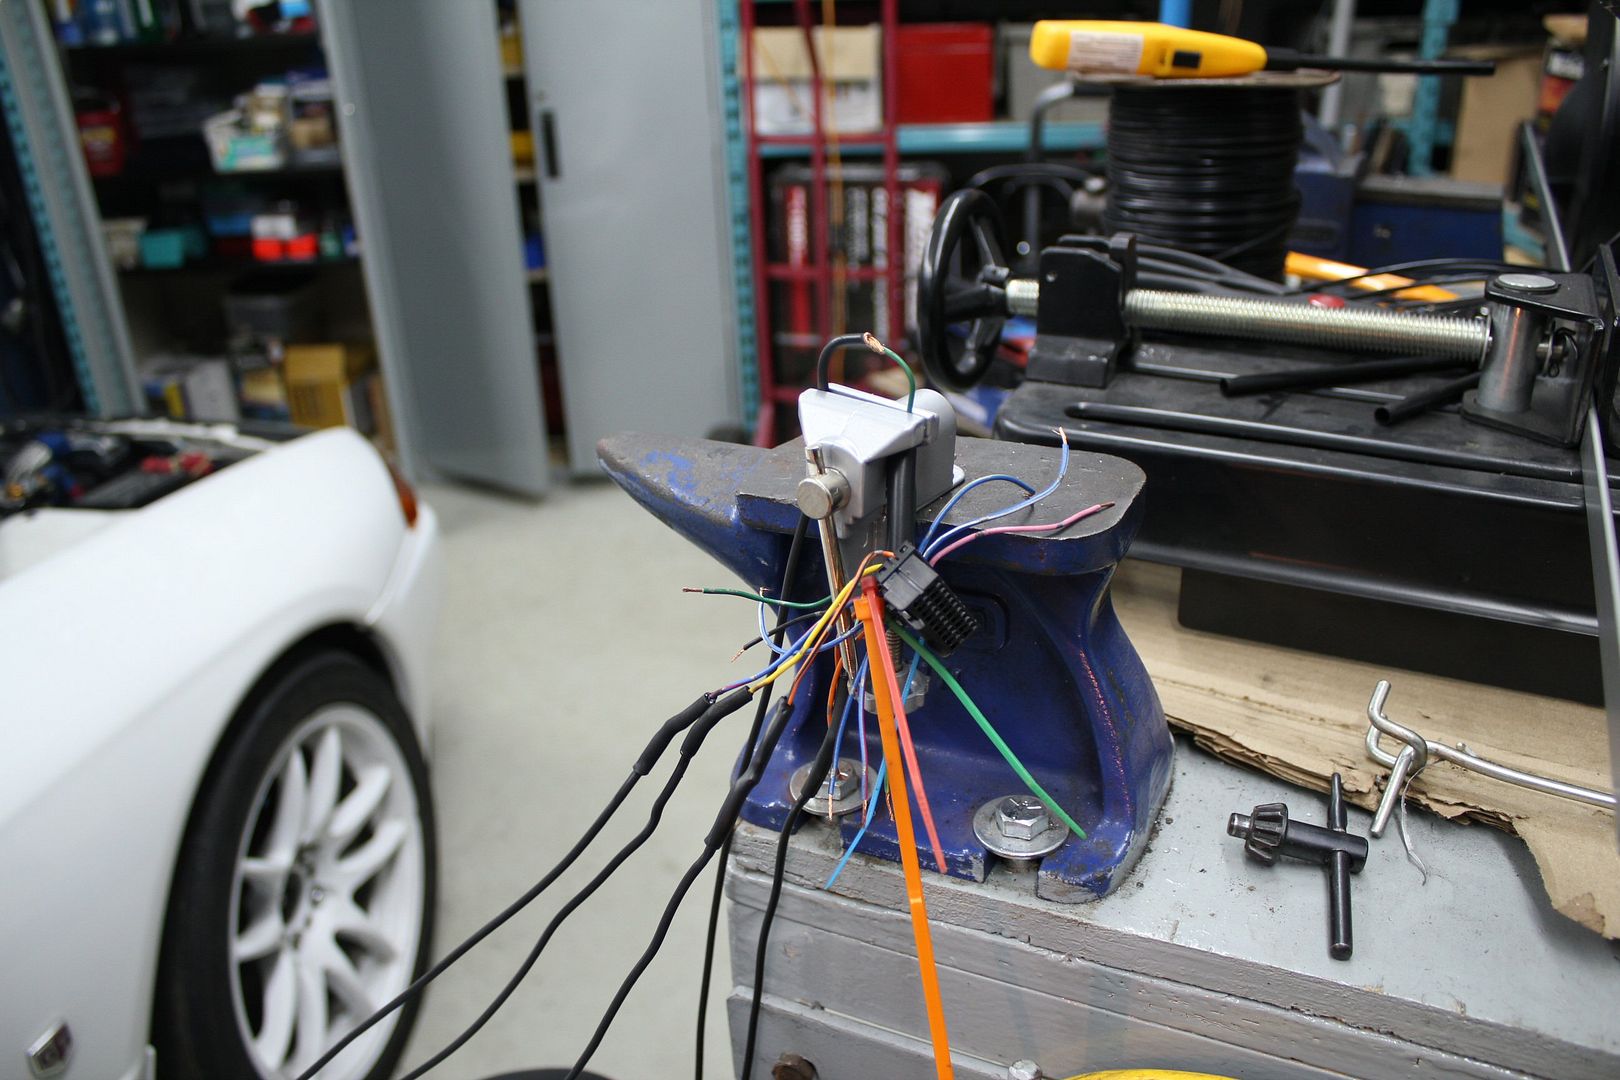
after more than an hour, him working on the wiring and me on the inside of the car, we both got pretty tired and started messing around;

at the end of that particular day, this is what the partially completed harness looked like;
more on this in the week5 update
---------------------------------
while the wiring was beeing done, i was working insinde the car working on something to replace the rear seats with,
because of the cage, i wouldn't be able to use the rear seats,
and i didn't want to simply remove them and have to look at the car's ugly sheet metal, i still have all the interior in place after all, its a street car
so the idea was to make some sort of deck, that could be used to store stuff, anything, while still looking appropriate, OEM-ish
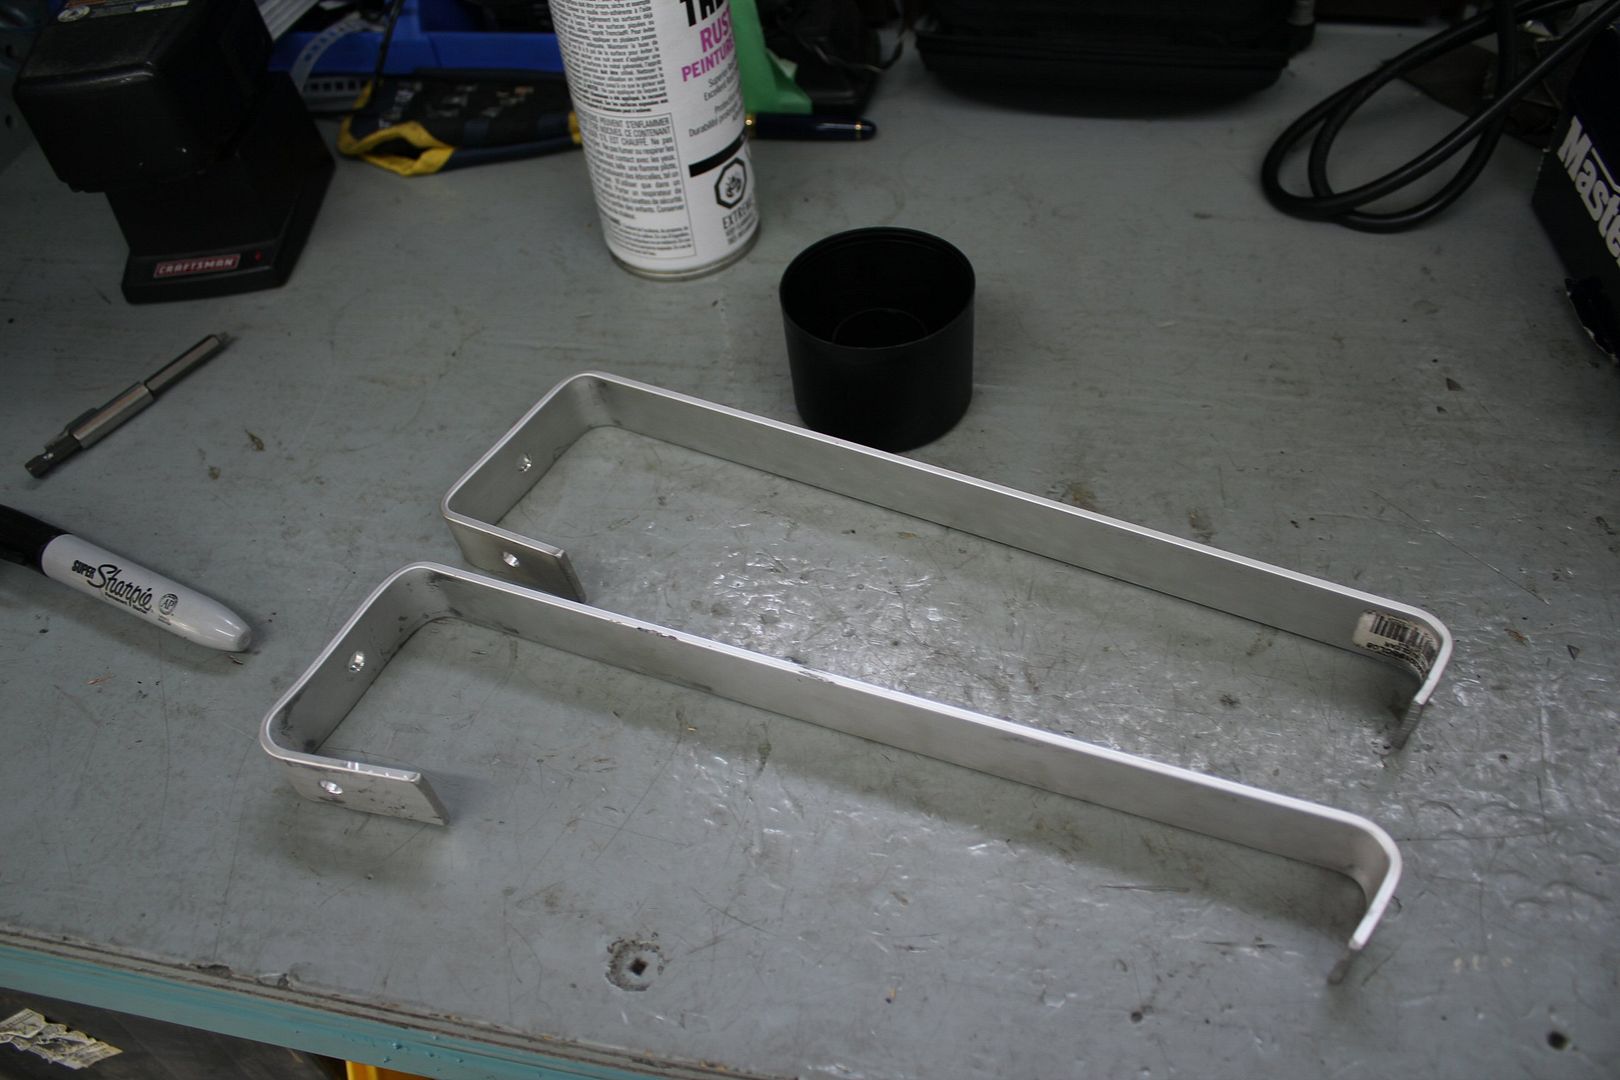
using trusty -simple to work with- 1" x 1/8" aluminium bars, i made custom supports,
since 1/8" i pretty thick, you have to bend the bar with a big radius or the metal with crack;

the bars were bent multiple times, to make sure they were level, while still using existing fixing points
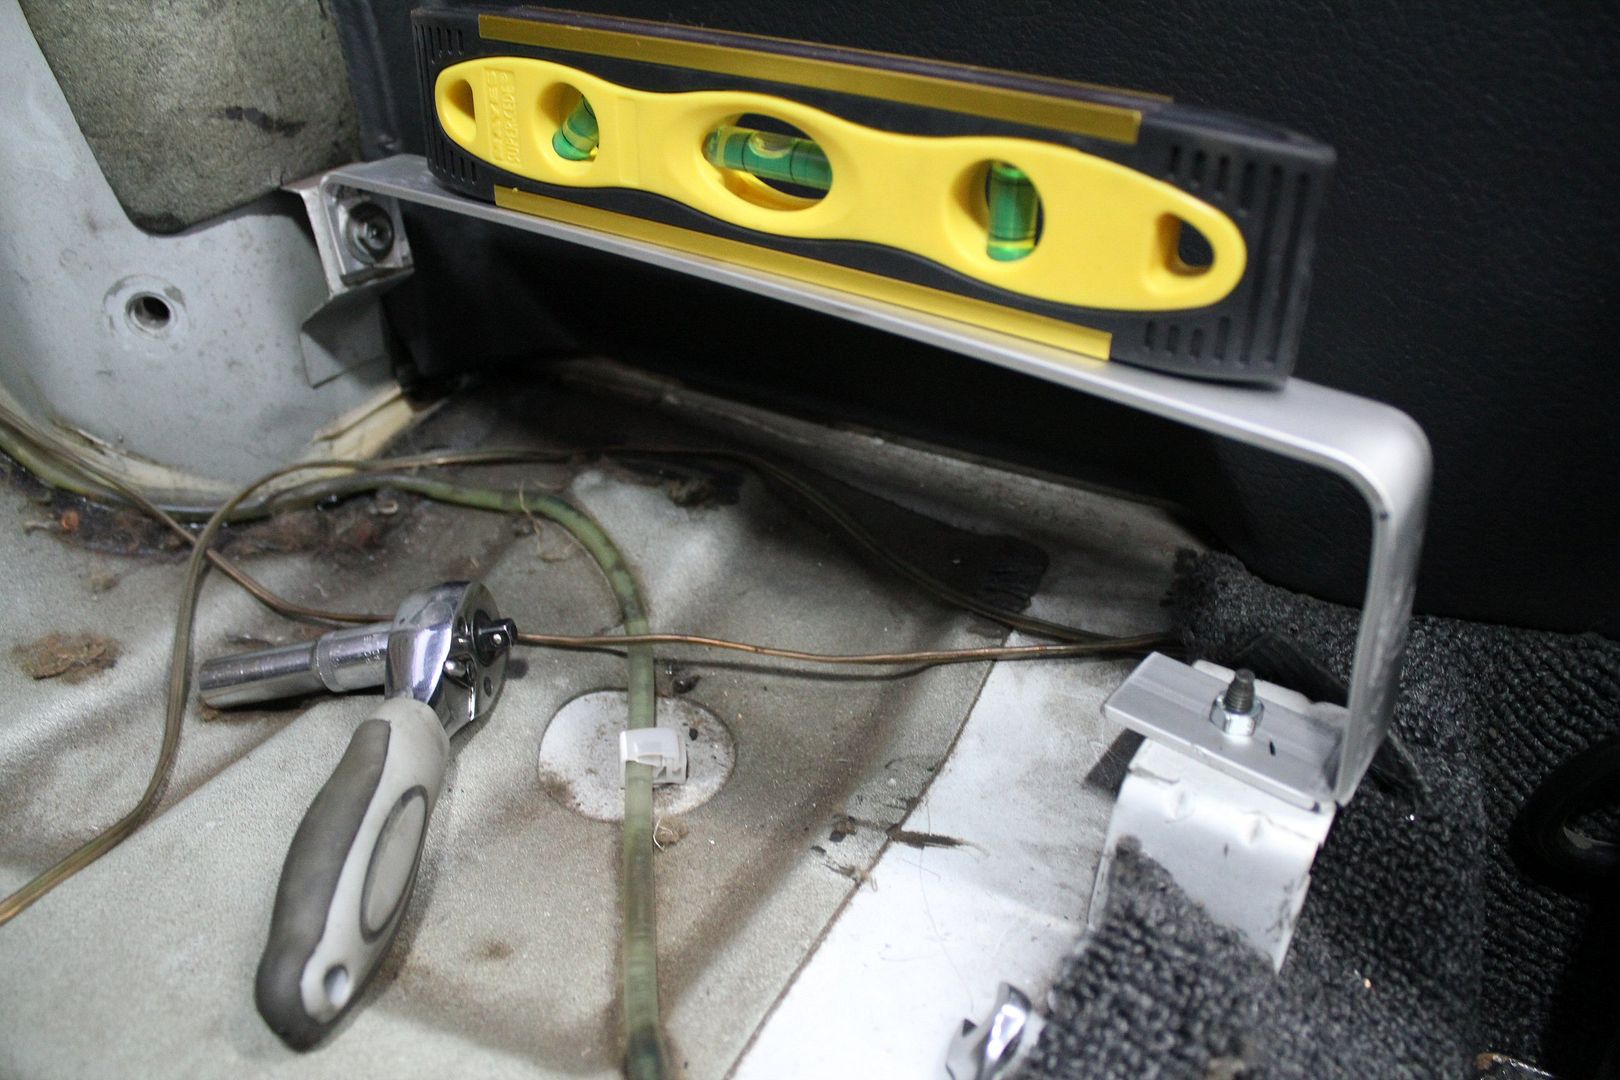
the end result;
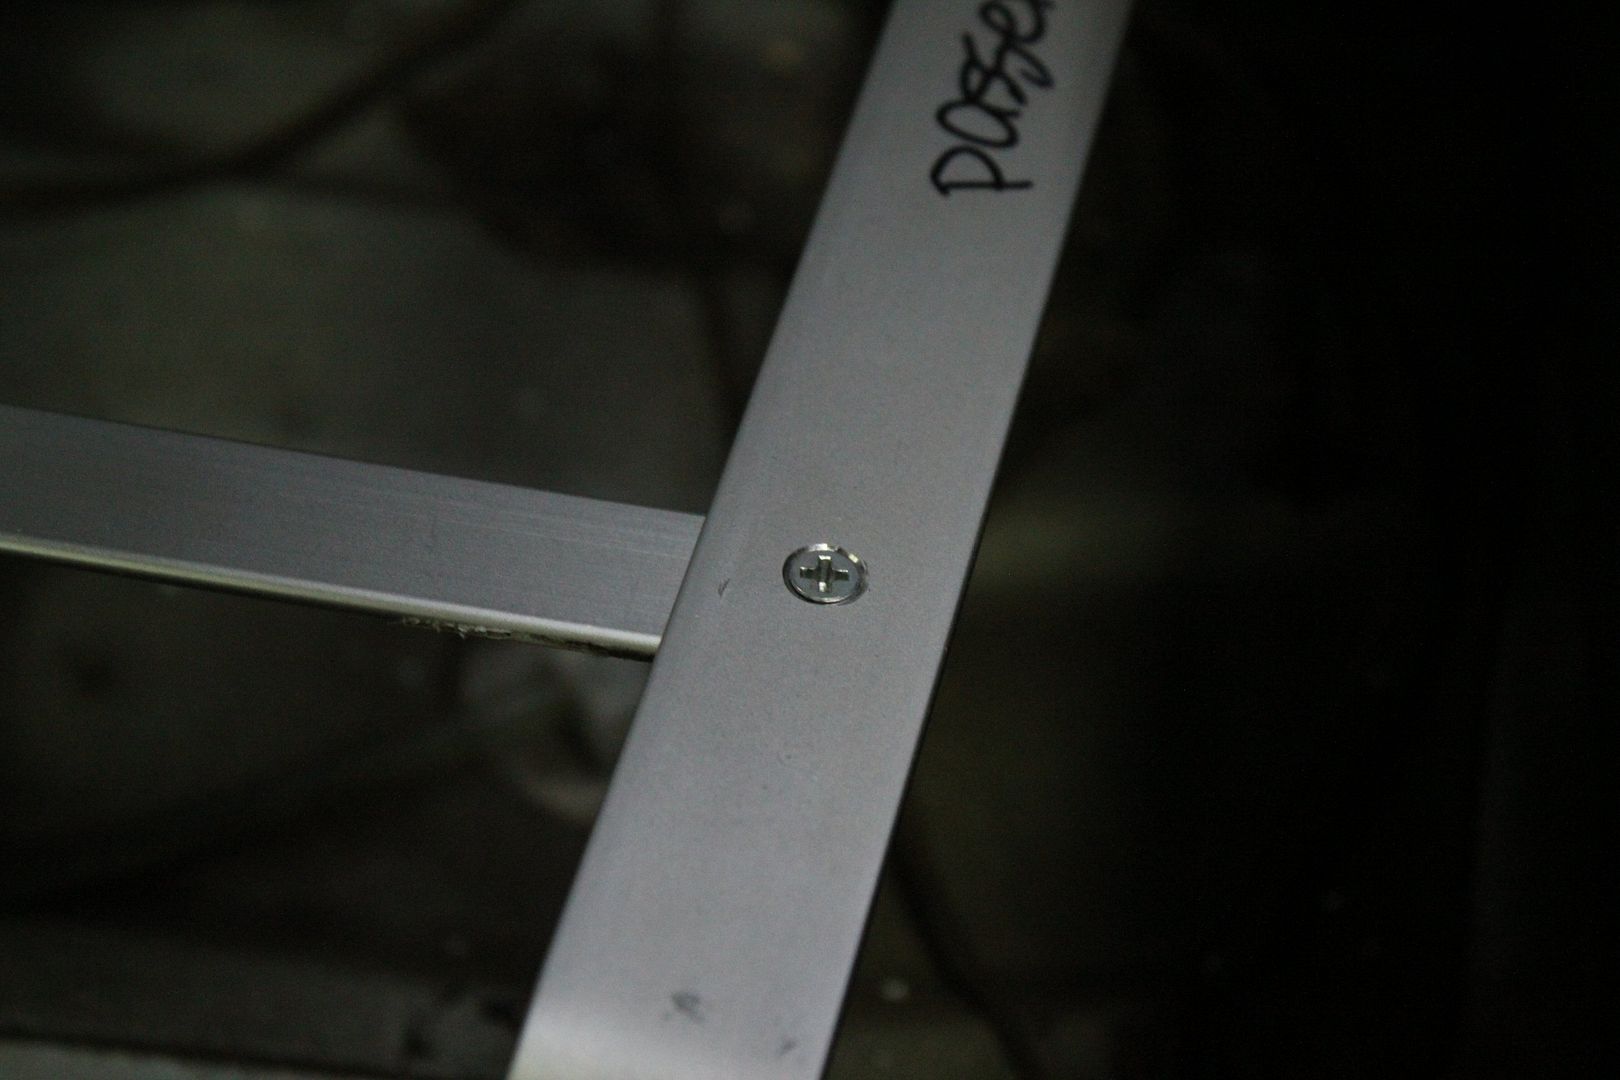
then i added a brace between each support and the drive-shaft tunnel;

by tapping the brace at each end, i could fix it to each support with a simple tapered screw,
so there wouldn't be anything protruding upwards of the supports;
then using part of a huge cartboard box, i outlined the basic shape i wanted with a sharpie,
then cut it with an exacto knife,
after that it was just simply tying to fit it, and make adjustements, cut more and more of it,
till i had the final design down;

more on this in the week5 update
---------------------------------
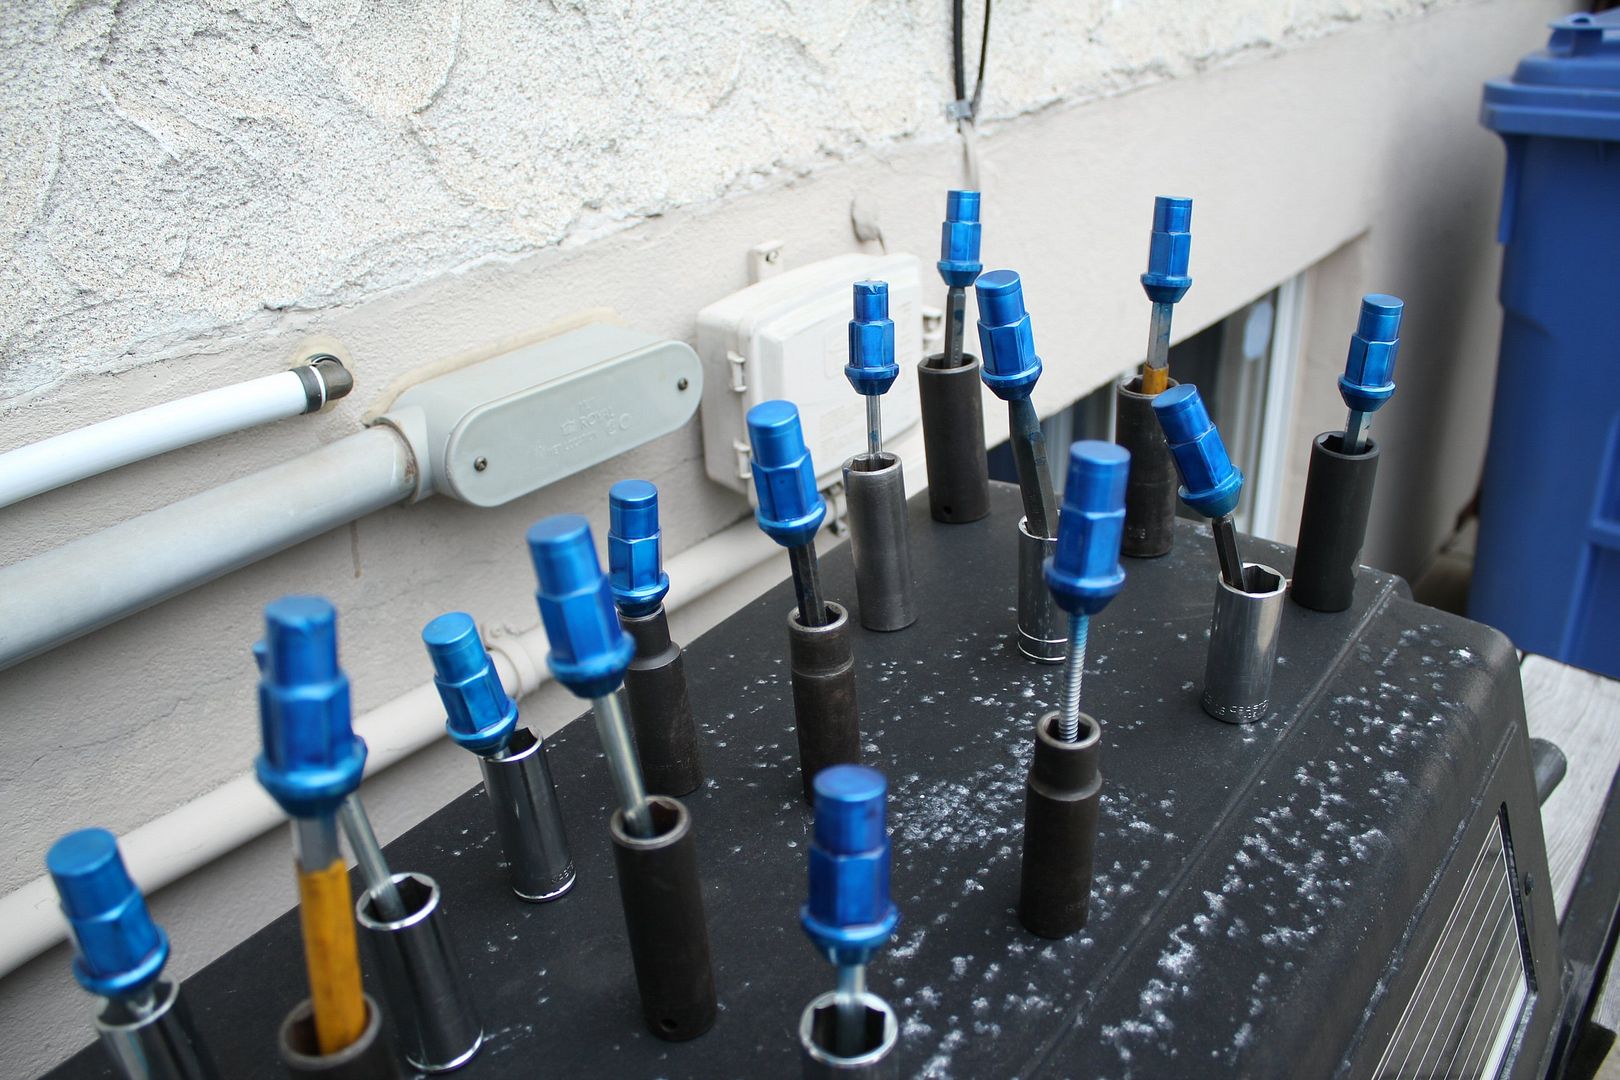
another thing i was working on was the refurbishment of my Rays ''duralumin'' lug nuts,
during week3 i had buffed them all to bare metal,
the new color would be done with Dupli-color MetalCast anodizing effect spray paint

i had setup a sort of paint booth (not) since it was windy that day;

i was really much liking the color;

and since i wanted to have multiple coats on them to resist better against the element,
i had to find something to hold them, all 16 remaining, between each coat,
so i used every big impact socket i had, with any pen-type items i could find,
it looked like a field blooming with blue flowers;
----------------------------
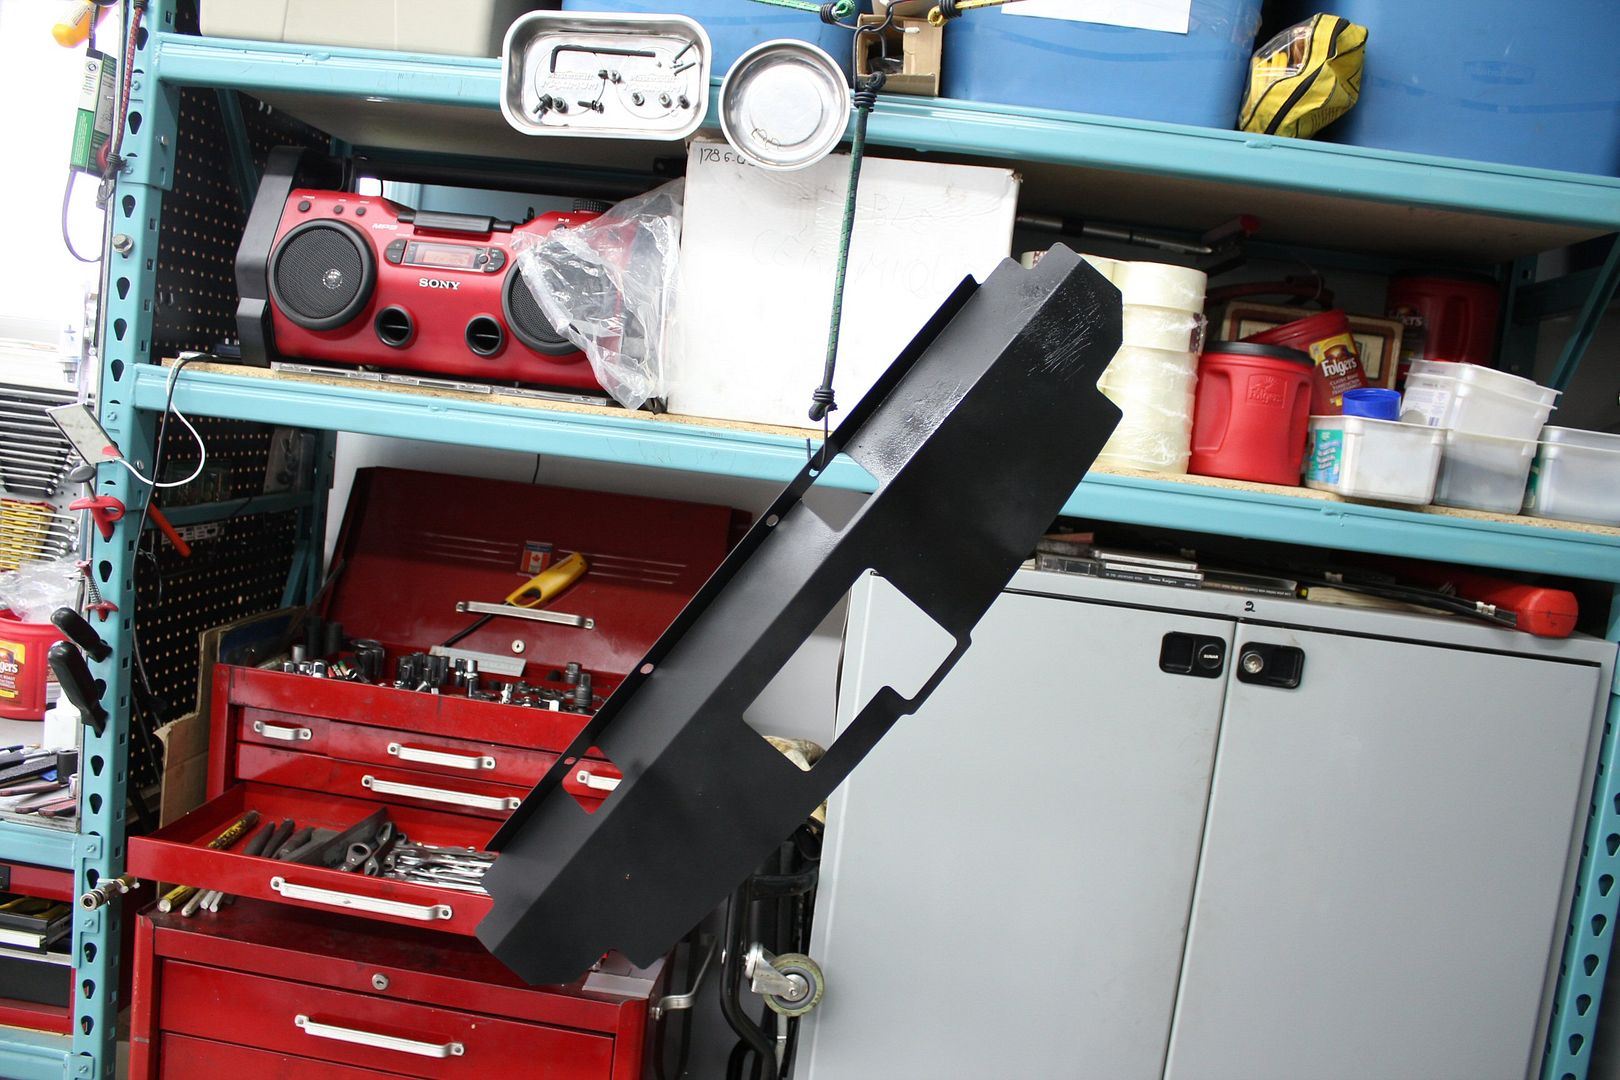
while those were drying, i worked on my ARC cooling plate
i had previously drilled out the rivets holding the nameplate and painted the thin aluminium sheet metal with epoxy semi-gloss paint;
(don't worry it dried evenly)
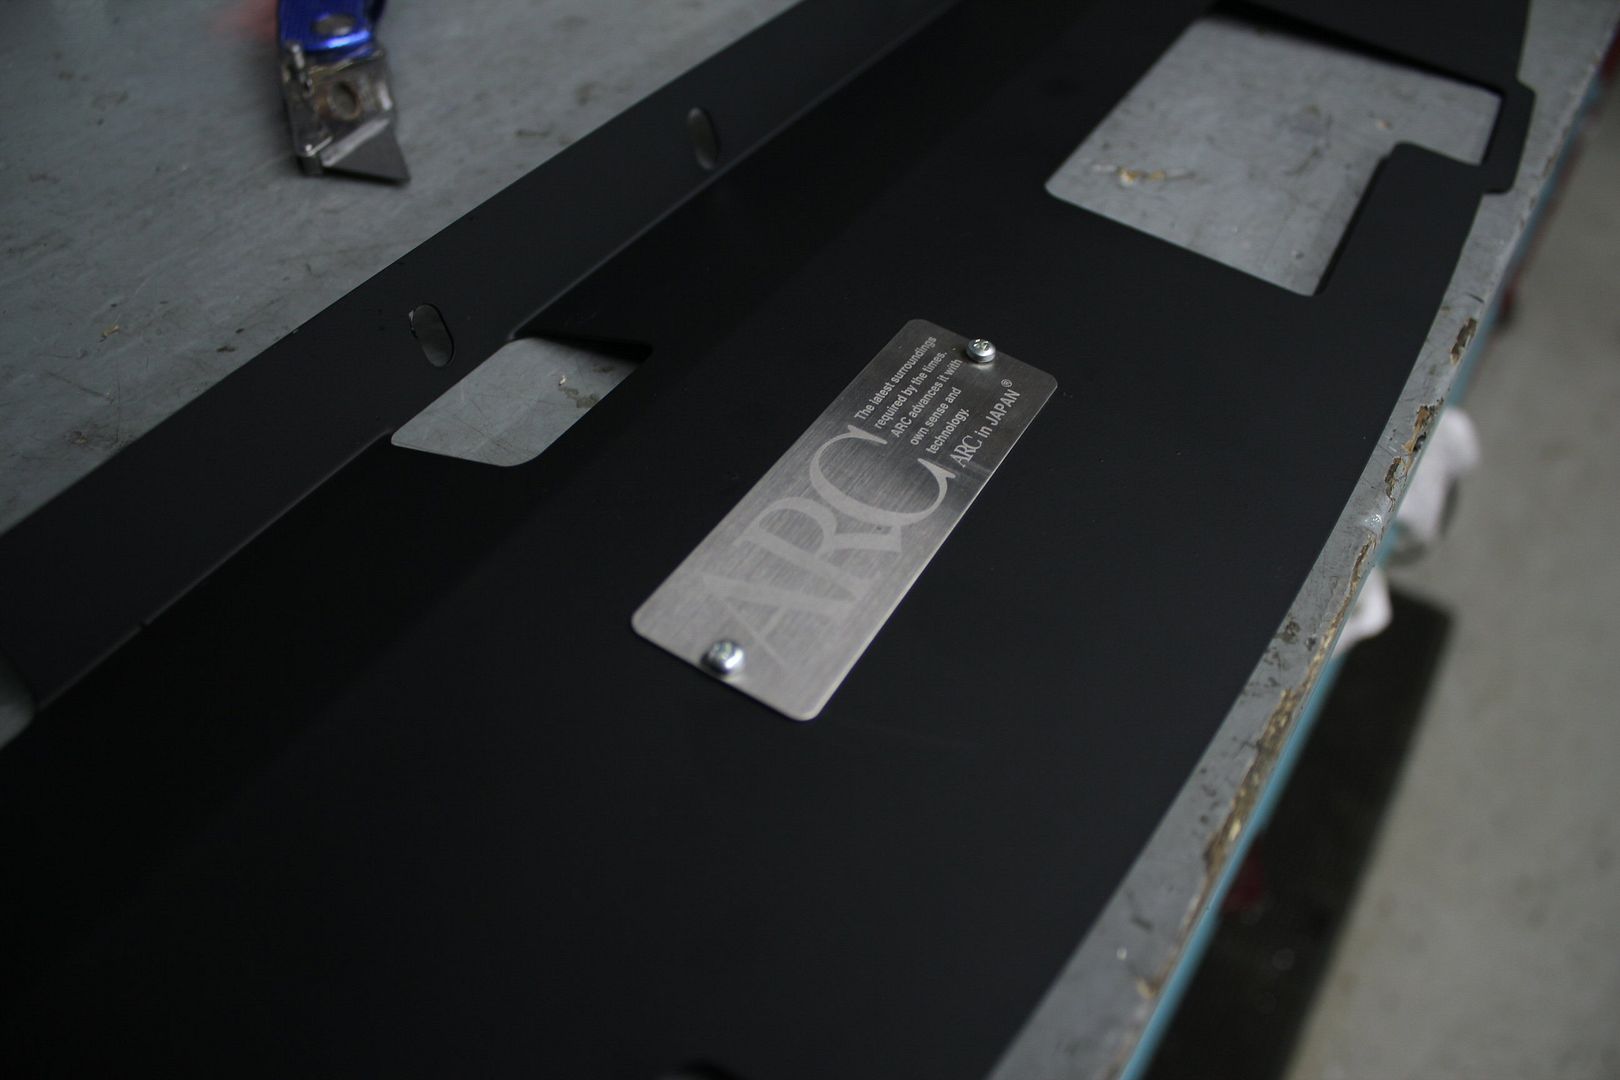
i got small-a.s.s. screws and nuts from a computer store to put the nameplate back on;
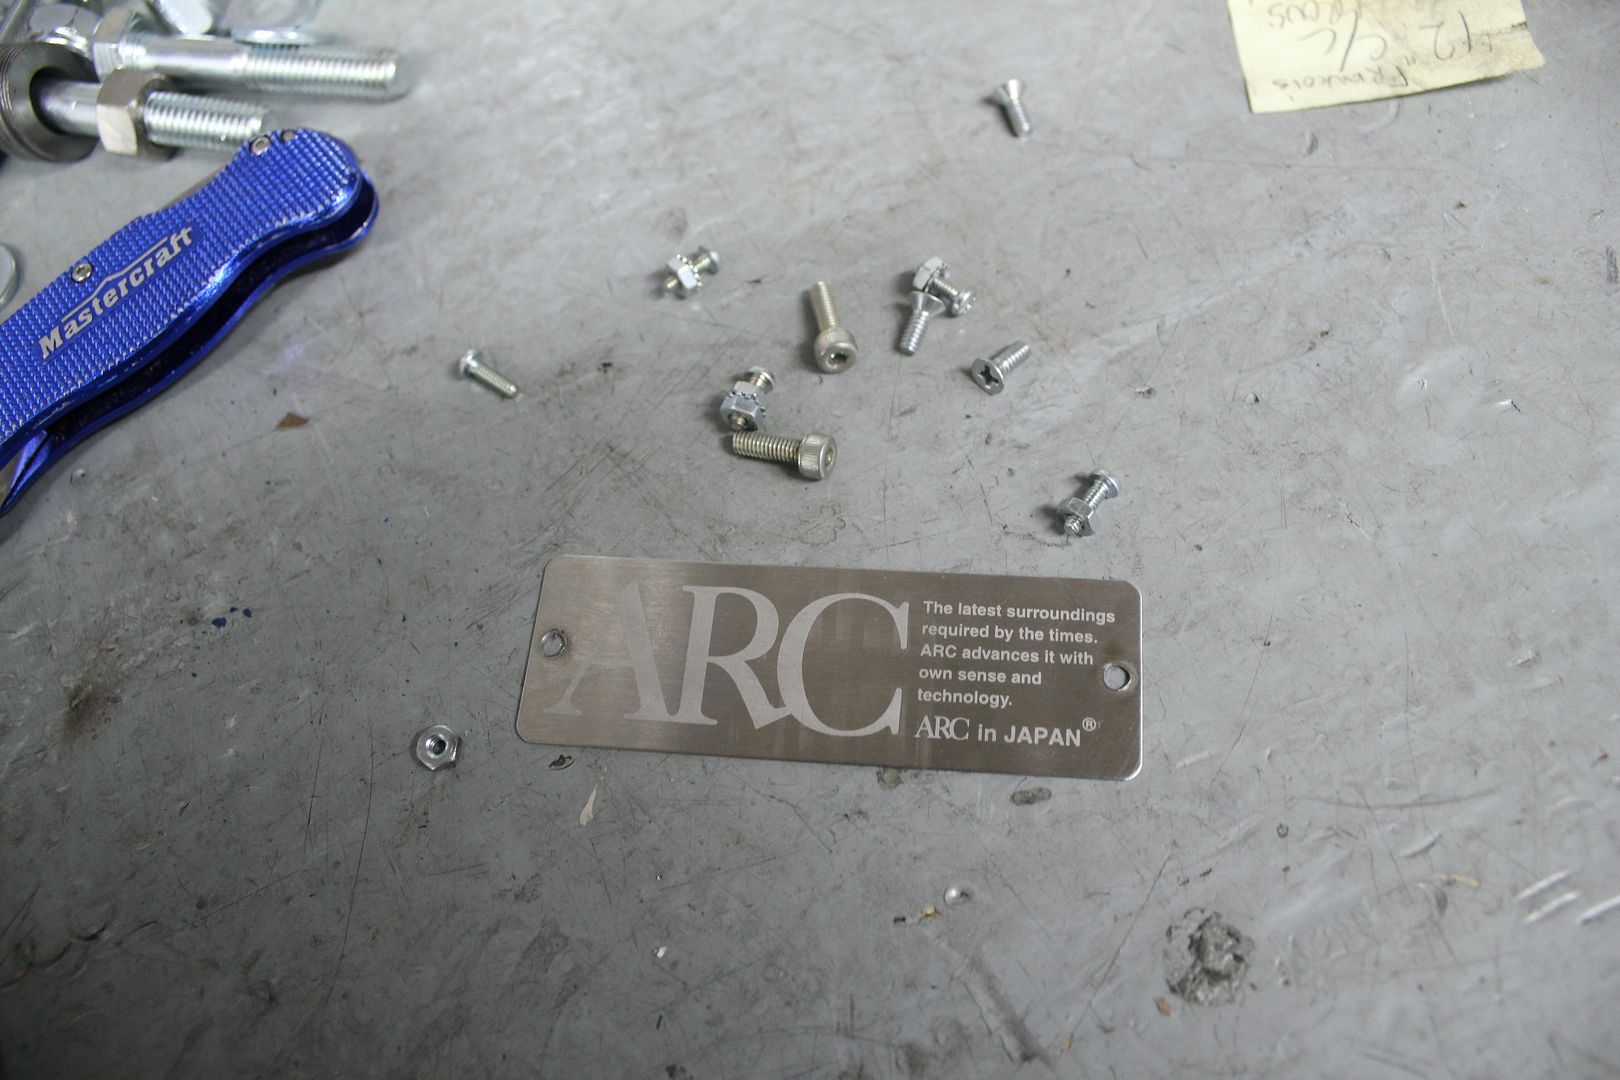
it ended up looking pretty cool, much sleeker;

----------------------------
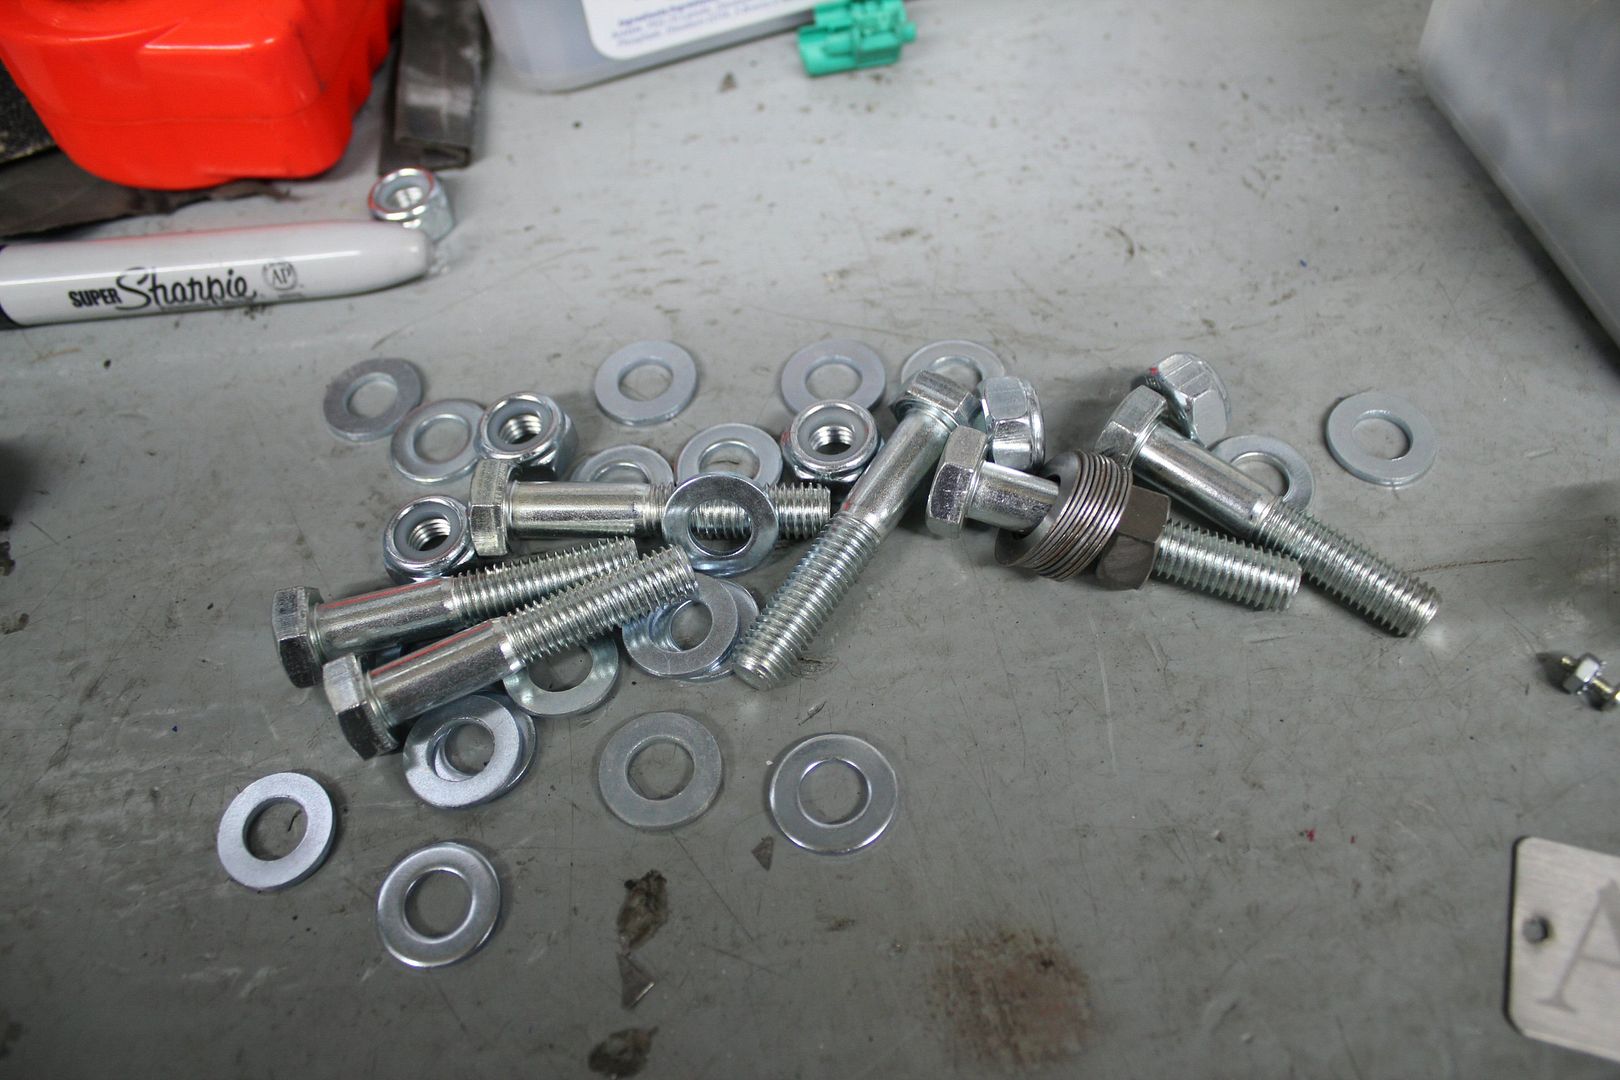
during that week i also purchased fasteners for the cage, high grade nuts and bolts from a speciallty shop
this is no home-depot stuff fool !

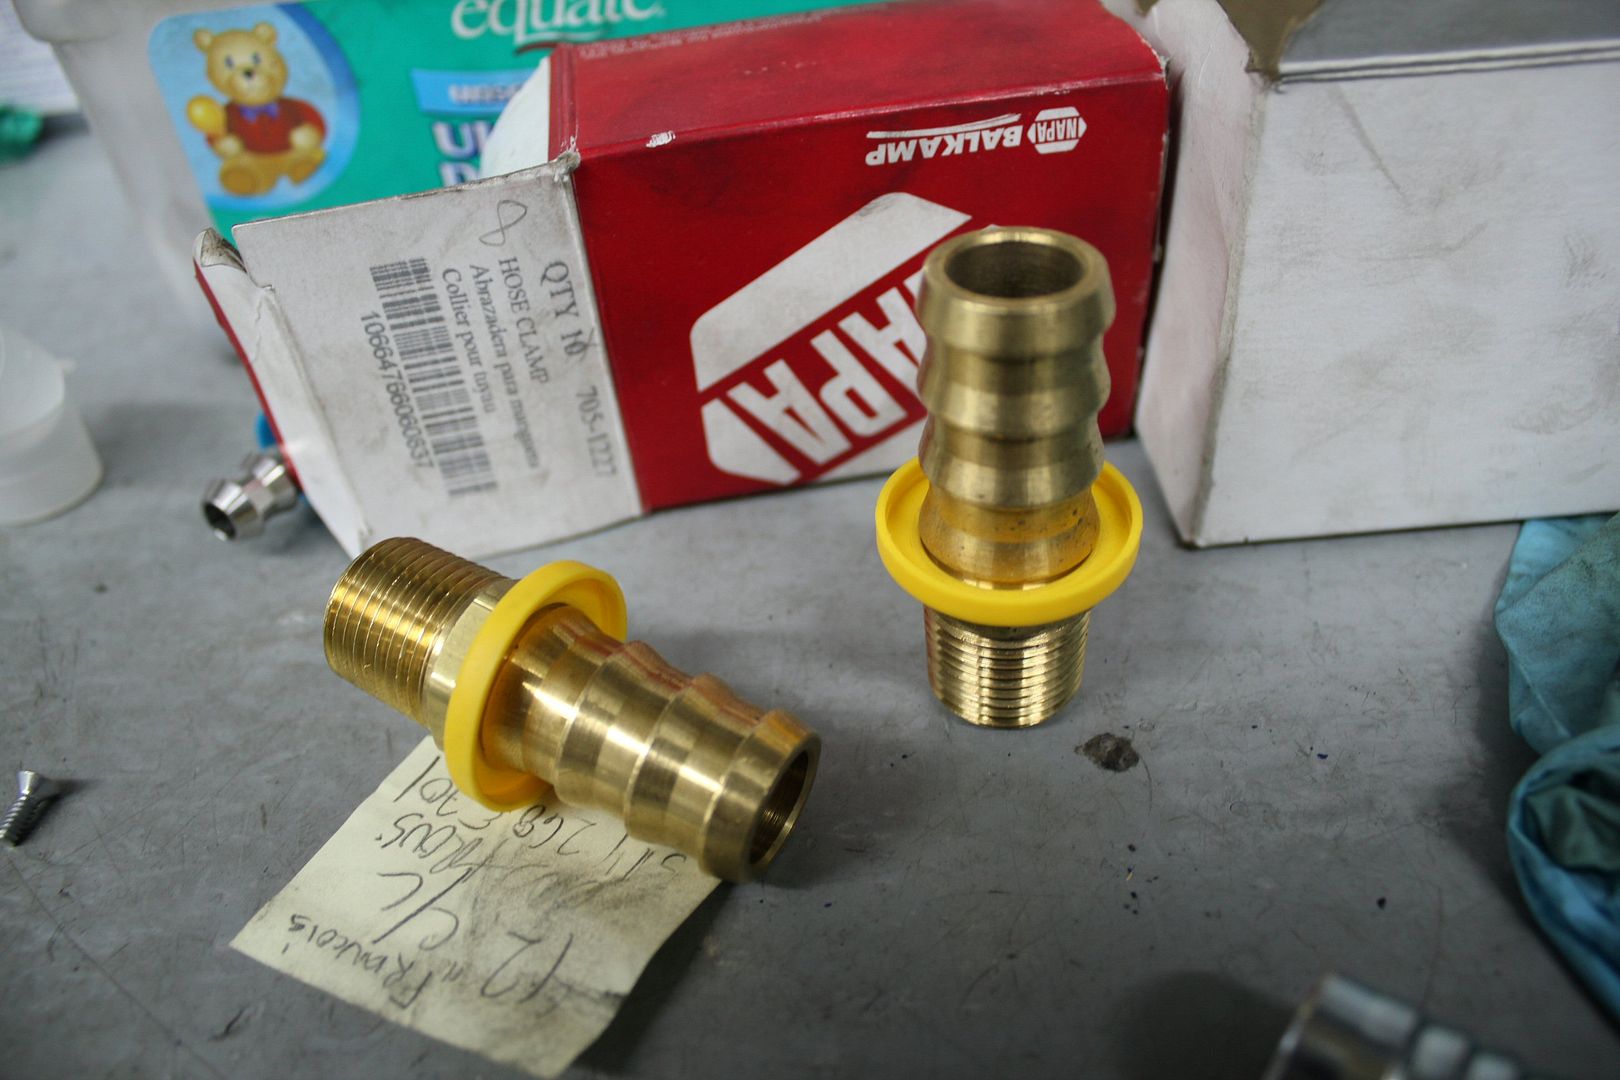
also picked up special fittings for the catch can from an hydraulics shop;
added some more trophies to my trunk;

and.... got this in the mail...

thats all for week4
more to come about week5 soon, stay tuned !!Last edited by frankiman; 03-09-2012, 11:57 PM.Leave a comment:
Leave a comment: