Announcement

Collapse
No announcement yet.

Nelsonmxmarc 1993 GTSt Type-M Build / Tips-tricks for HCR32 (Skyleezy!)

Collapse
X
 
  • Filter
  • Time
  • Show
Clear All
new posts

  • Nelsonmxmarc 1993 GTSt Type-M Build / Tips-tricks for HCR32 (Skyleezy!)

    Build chapters

    - Build 1 (Winter 2009) begins HERE

    - Build 2 (Winter 2010) begins HERE

    Thanks for looking!!

    ================================================== =============================
    BUILD 1 - winter 2009

    Well i'll begin by mentioning that i don't particularly condone build threads, simply because i'm always worried someone is going to break into my car with intent, knowing what to steal because of my own stupidity, ie. putting my car and its valuable goodies up online..

    However! I have gone through quite a long process in my build, and as others have stated, it helps to attain constructive criticism as well as keep track of your build as you go along, not to mention is a helpful aid to others..

    Bare with me, as my build process is nearly complete. This is merely a compilation of photographs of the process and idea/guide as to how i did everything.

    I hope this build entices some of you to do the same; and in others, i hope you can help me further cheese off RBC by depleting my funds!

    ------------------------------------------------------------------------

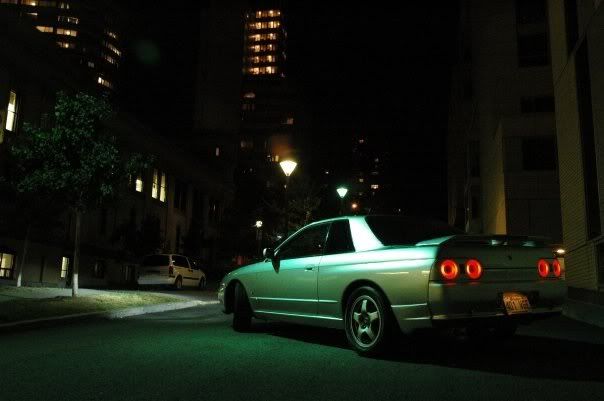
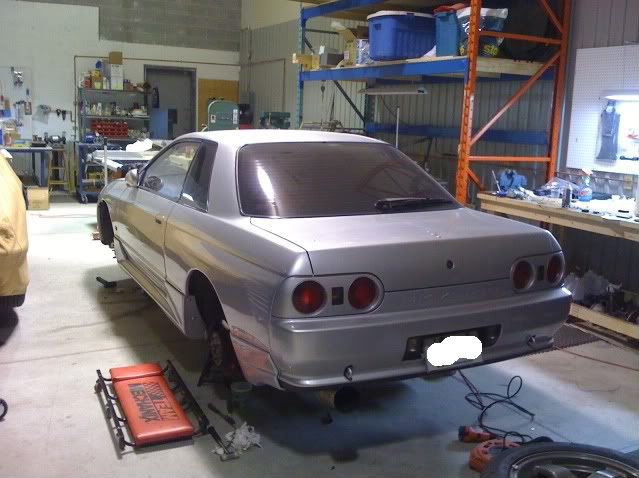
    HCR32 1993 GTST Type M.
    Bought with; 101,850 km
    Purchase date; July 6th 2009

    Mods at time of purchase;
    M's K&N Pod filter
    Ultra turbo timer
    Greddy (Most epic failure POS, circa 1978) Boost gauge
    HKS Hi-power Catback
    GAB KYB Adjustable coilovers

    This is simply the beginning of my build, mods and work will be covered in my next post. ENJOY!

    After purchase;


    Became sick of the stock rim color. Decided to go to CDN tire and pick up Duplicolor wheel paint;


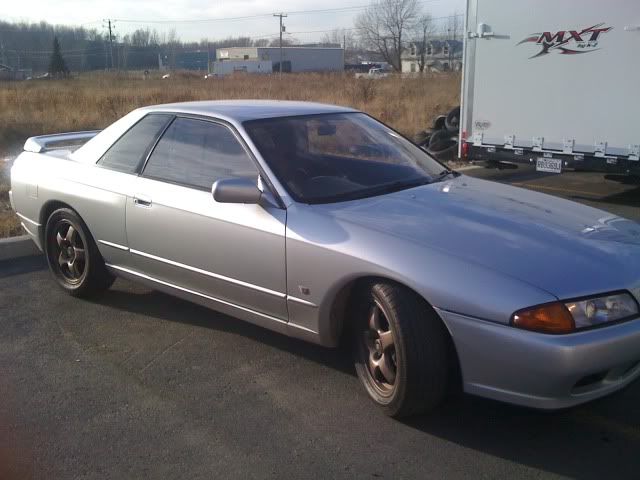
    Would recommend getting the wheels REBALANCED after, as it made a significant difference for some odd reason..

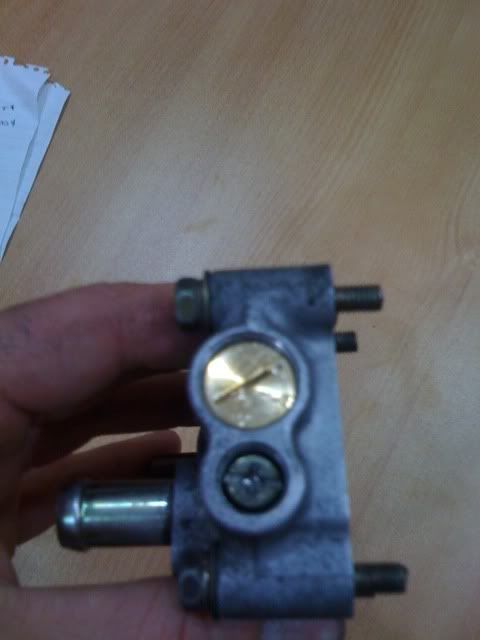
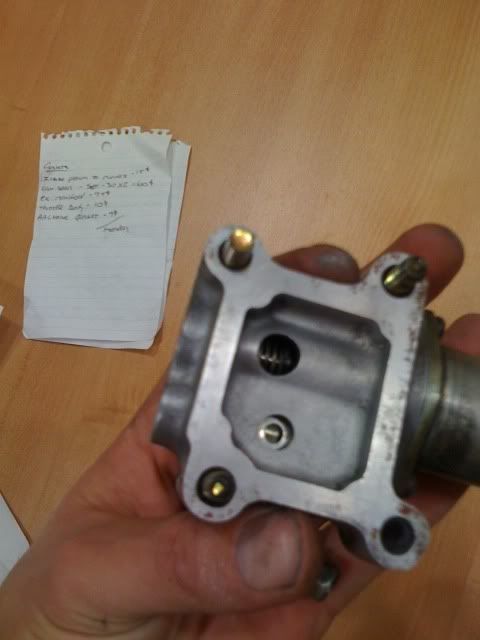
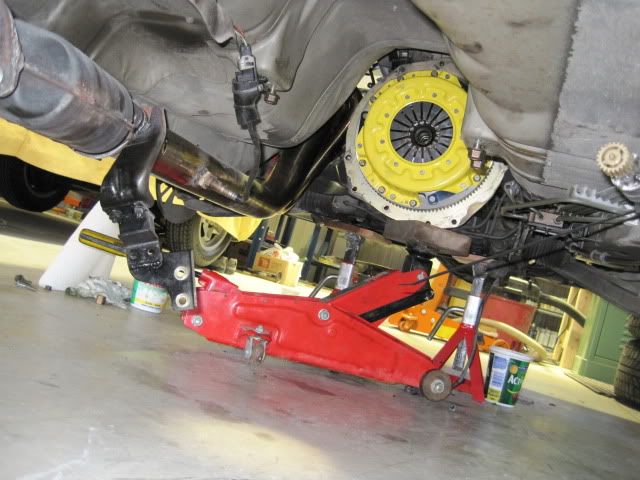
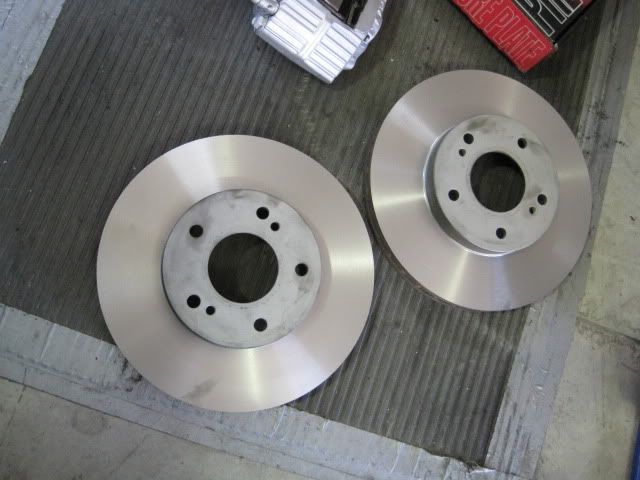
    Anyways, i decided general maintenance would be a good start.
    Swapped all fluids, cleaned everything up, gave the underbody a good thorough insepction.
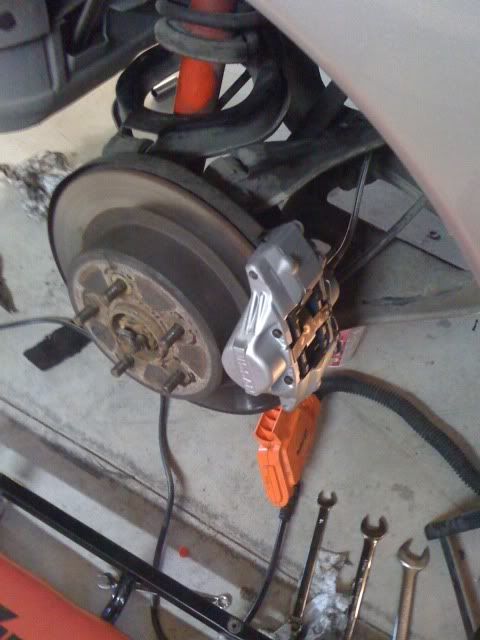
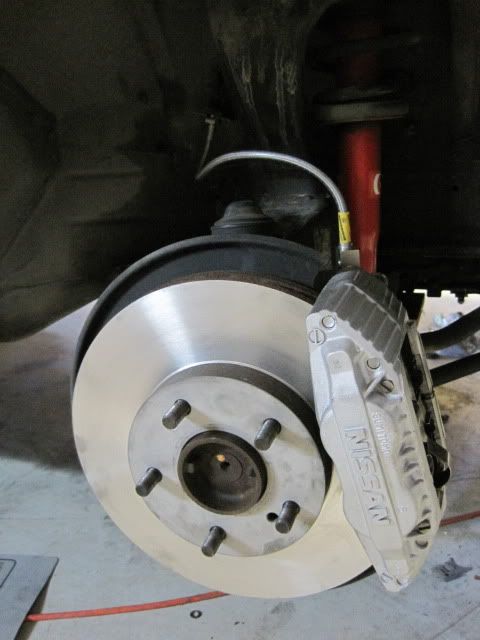
    One key note in checking wheel bearings/brakes, there is very little room between the rim spoke and caliper..


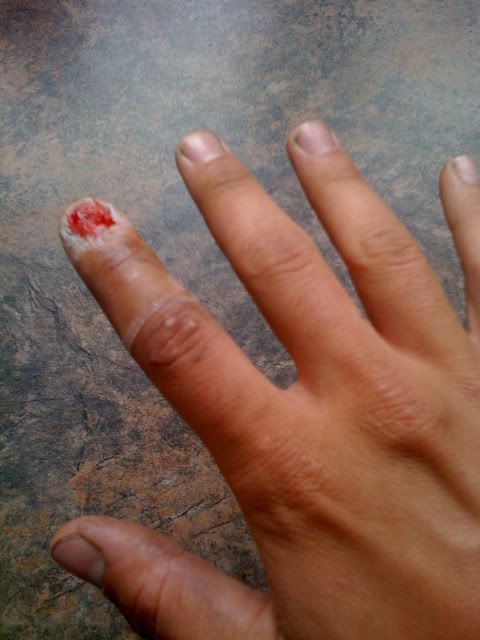
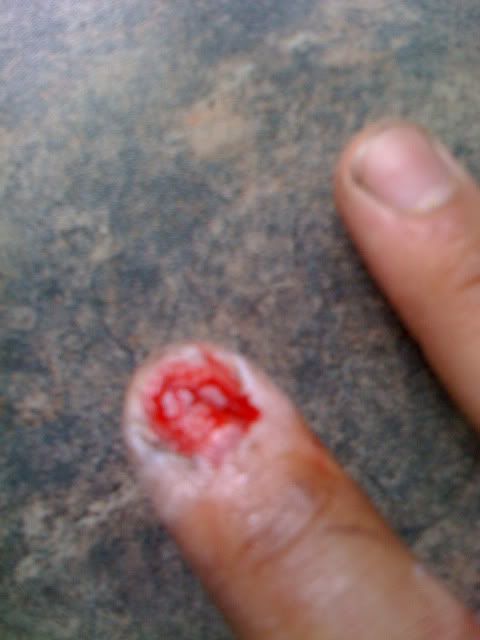
    Yea, the pain is actually as bad as it looks lol.

    End of summer 2009 = end of parking downtown


    Jeep backed up on top of my hood while i was in club Opera on St-laurent street in Montreal.. No info or anything left.. Public liability BLOWS lol.
    This is after pulling and sanding.. Looks 100% now thanks to my dad's body work experience!

    So this sums up my summer's experience with my nearly stock car.

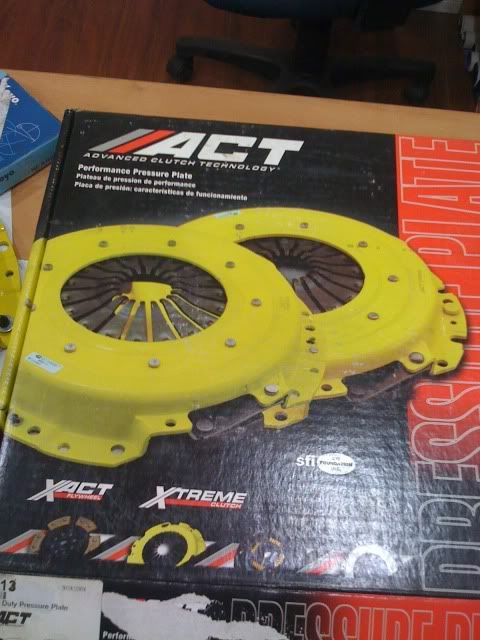
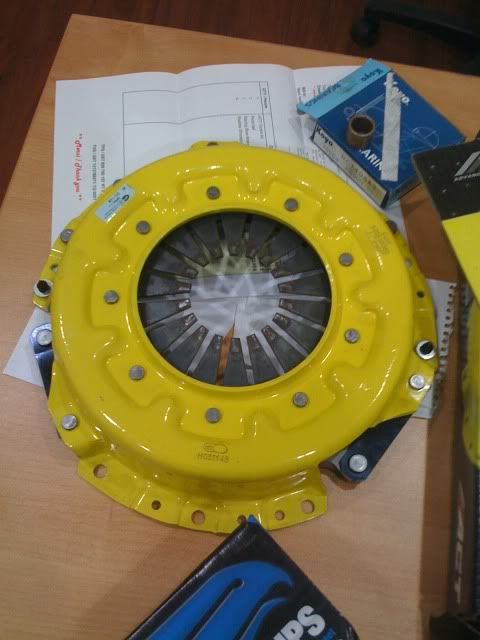
    Next post will be my actual build process, with pics and tips/tricks on installation of particular parts that i would recommend doing!

    Enjoy!
    Last edited by nelsonmxmarc; 12-08-2010, 05:18 PM.
    Check out the GTST Projects page and keep up to date with my build!
    www.nelsonmx.wordpress.com
    Like us on Facebook! www.facebook.com/NelsonMX
    Any part inquiries can be forwarded to marc@nelsonmx.com

  • #2
    Winter build process

    Winter build 2009-2010

    Goal is 320whp via RB20DET and stock transmission/LSD.
    Engine output now is unknown.
    Engine compression is 141-142 across the board and is considered quite healthy.

    I have been sourcing parts for some time now and this is a nearly complete list of my winter build;

    Greddy Profec b Spec 2
    XS Power - split dump/down pipe with. 3" / 1.5" divorced WG
    GTR Injectors + resistor pack (judasentinel)
    New Windshield (mine was cracked )
    AEM UEGO wideband (judasentinel)
    GTR Fuel Pump (OEM) (Braden @ jns)
    OEM GTR Rims
    Strut Braces - Tanabe / Sustec
    Hawk HPS Brake Pads
    Goodridge Stainless braided brake lines
    Brembo rotors
    ACT Clutch - Pressure plate and 6 puck ceramic disc
    Fuel Filter
    Z32 MAF (Vtec Killa)
    Godspeed FMIC (Bryan @ BV)
    Prosport gauges - Oil temp, oil pressure, boost + sandwich plate
    R34 Neo 6 GTT turbo (Feast)
    Fresh top end gasket set
    Swap fluids
    Type M Skirts
    HID's


    So far these are the parts i've compiled / installed for my current build. Next to some items list the names of the individuals who helped me out with my parts; big thanks to them, and those i will mention throughout my build!


    -------------------------------------------------------------------------

    Where she currently sits;


    Incentive;


    And of course some photos of parts ive listed;


    -----------------------------------------------------------------------

    My gauge install;

    My center vent came cracked when i purchased the vehicle, and i'm the kind of person that has an absolute knack for perfection, or at least, to delete the kinds of things that remove from the perfection of the vehicle. So, i decided i'd remove the vent completely and replace it with fancy gauges

    As mentioned, they're prosport gauges and are actually VERY VERY nice gauges to look at, not to mention function properly and have had no issues to date.

    To delete the vent, i needed to fabricate a holder for the 3 gauges.. Using the vent as a template/mold, i made a carbonfibre replica in the same contour to fit.

    BEFORE


    AFTER


    I'll get an image of the final product lol. My bad..

    At any rate, basically you want to block off the vent entry from behind.
    Using cardboard and tape (of all things) cut a suitable size of cardboard to block the opening of the vent then use tape to hold it in place. Voila, pretty simple..
    I ran the evac to see if any air blew through - nothing. All air redirected to other vents..

    This just saves any build up of moisture (A/C on hot day or vice versa) in the gauges and keeps them in good shape!


    ----------------------------------------------------------------------

    Greddy profec B Spec 2 install;

    My install guide can be found here, with relevant facts and pictures..


    -----------------------------------------------------------------------

    Dump, down pipe install;

    I cannot for the life of me find an effin' pic of this thing online, as well as find it for sale anywhere..

    I'll get pics on this soon and update my thread accordingly..

    Tips-
    Installing onto a stock rb20/25 exhaust housing is a pain.. Sometimes it's actually better to remove the turbo from the manifold to get the two nuts off the bottom turbo housing bolts (as they're bound to the housing).

    Another way this can be avoided is to replace the studs on the housing with a bolt / nut combo.

    This downpipe is amazing, and i would highly recommend it.
    For those of you who are Anti ebay, i will say this. This dump/downpipe is not an HKS nor a greddy, but it will provide the same benefit overall and save you nearly 400$ (this particular item was 125$ shipped!!)

    Quality is amazing and fitment is 100%..

    I'll get pictures.


    ------------------------------------------------------------------------

    Clutch/transmission;

    Pulled my bell housing to see what kind of wear i was dealing with, as well as swap my noisey as tits throwout bearing...


    Clutch plate wasn't actually too bad, however the flywheel had never been turned, resulting in this;


    The clutch pressure plate and disc looked like this;


    15 years baby, 15 years.

    Anywhos, the ACT clutch as pictured up there somewhere would surely provide a nicer feel so off to work i got!

    Noticed a bit of seepage @ the rear main?


    Told there's nothing to worry about as i've never experienced leaks/drips.

    ....

    Flywheel was sent off for resurfacing, thanks to my good friend Phil, also known as T-bag to the GTRC community. He has yet to physically hold me down and t-bag me, however i shouldn't speak so soon!

    He works at A&N out in Ile-bizard, west island of Montreal; great guy who's willing to lend a hand, and definitely knows his stuff! Highly recommend giving him a shout if you're stuck on something car related.

    ....

    Flywheel came back resurfaced and good as new.

    Installed;
    Center torque on flywheel is approx 105 ft/lbs. Give'er with an air gun @ 90 lbs. Couple cranks, she's good. Also use red locktite, last thing you need is that beast comin' off mid summer..

    Tip - definitely get a hold of an alignment tool for when installing the pressure plate and disc, will make your life considerably easier.

    I decided to try both ways for fun, and i can argue hands down that the installer is definitely worth getting your hands on.

    Torque for the pressure plate was minimal - i'd say give a good tug on a 1/2" breaker bar. Again, locktite, blue in this case as it's less determintal (more spacing for bolts, lets tension on them than on flywheel).
    Torque it down like you would a wheel; cross directionally, otherwise you may warp it a bit without noticing and end up having a larger issue at hand later..

    Incentive to swap NOW, rather than waiting;


    One more thing,
    If you're doing this on the floor with jacks, please get it higher than 2 feet off the ground (to frame rail). I couldnt get my bellhousing out from under the car until i pulled the wheel and jimmied it out of the wheel well... Consider it.. lol

    Oil to replace: Redline heavy duty shock proof
    Check out the GTST Projects page and keep up to date with my build!
    www.nelsonmx.wordpress.com
    Like us on Facebook! www.facebook.com/NelsonMX
    Any part inquiries can be forwarded to marc@nelsonmx.com

    Comment


    • #3
      -------------------------------------------------------------------------------------

      Brakes; Caliper rebuild and stainless line install

      Picked these S/S lines up from Haig @ autoworx.


      Goodridge lines.. Had no real preference, however i had these on my CBR600rr and loved them.

      ...

      Decided to rebuild the calipers so i began to take them apart, clean, replace. There are no photos of this for a reason.. I know what brake fluid can do things, and i was just not willing to put my iphone at risk lol..

      Anyways! Caliper rebuild was simple, as would be the same situation on a bike (have rebuilt many calipers on my CRF450 after track days..). Seals were mint as well so no issues there..

      Went with Hawk HPS pads, as most people seem to find them ideal for light track days and DD which i what i hope to accomplish..

      Josh, known as Archaeic_bloke on GTRC, has the most epic brake caliper work/paint job EVER. I love the damn things, so i attempted it, of course i became to lazy at which point i taped up any seals and simply spray painted them silver with caliper paint..

      Ya ya i know Josh..


      My inferior quality work


      But we all know gold doesn't match silver sooooooooo you know..


      Anyways! Back on topic..

      Installed all the lines, and rear calipers, just awaiting front disc's now!


      Line install were a snap.. a little rust may make it difficult to remove the tabs holding the lines in place, however a bit of WD-40 and a hammer/screw driver combo works great. Took approx 30 min to remove old lines, install new lines.

      Brake rebuilds are about 30 min per caliper not including paint, but it also depends on how meticulous you are as well...


      Brake fluid: ATE Super blue - Easy to see when bleeding


      I'd recommend this if you plan to do a full brake fluid / clutch fluid swap ALONE;


      Picked it up for 90 beans (we use beans in Montreal as currency).

      Was primarily for flushing the fluid out of the Cayenne coolant system, however it has made it into my tool box for more purposeful uses.

      Bleeds brakes and other lines with pressure fittings in a snap!
      Highly recommend if you plan to do it solo.
      Check out the GTST Projects page and keep up to date with my build!
      www.nelsonmx.wordpress.com
      Like us on Facebook! www.facebook.com/NelsonMX
      Any part inquiries can be forwarded to marc@nelsonmx.com

      Comment


      • #4
        -------------------------------------------------------------------------------------

        AACV Cleaning, what you may not know!

        Here is the typical how to from SAU;


        One thing i'd like to extend on behalf of my own experience, is that there is infact more to the AAC than we typically believe..

        SHIZAM!!!


        I know right? It's like finding that effin' LAST piece of the tressure in Drake's fortune, however in the game, you get absolutely nothing of value from it; in terms of the AACV!... You can actually thoroughly clean it..

        On the back you now see this large brass screw. In OEM form, there is a thick layer of GREY/WHITE epoxy covering this bolt.. Heat it with a heat gun or torch (From a safe distance...)

        Using a flat bladed screw driver, pry the epoxy off.
        It's old, so be patient, it will come off in chunks.

        Now you can expose the brass screw behind.

        ****** COUNT THE AMOUNT OF TURNS OR DEPTH OF SCREW BEFORE REMOVING ****

        For the love of god PLEASE do this.. lol....... and then call me and tell me how many there are

        I didn't however i estimated the position and placed it approximately where it was..

        At any rate you've now exposed all the innards of the AACV.. The solenoid comes off via 2 screws, and the idle screw simply unscrews and comes out.

        Careful not to lose or damage and gaskets (Expeez) and then valiantly pwn it with brake clean..

        Reverse the steps, and your AACV is minty fresh.

        Check out the GTST Projects page and keep up to date with my build!
        www.nelsonmx.wordpress.com
        Like us on Facebook! www.facebook.com/NelsonMX
        Any part inquiries can be forwarded to marc@nelsonmx.com

        Comment


        • #5
          Who said painting isn't fun??

          Had to decide on a new paint scheme for my motor, as red imo is overplayed and super cheesey looking on an RB20 w/o coilpack cover.. So i played the field in terms of what i thought would look ok.. Photoshop photoshop photoshop...

          Finally came to terms and went from this;


          Motor in the midst of work (day one of storage )

          and what it will be...


          Silver; intake runners, intake plenum, TB, AACV, J pipe, turbo elbow and turbo compressor housing..

          Blue; intake / exhaust valve covers, injector resistor pack cover, fmic couplers, exhaust side compressor housing on turbo.

          All the electrical tape used is blue or black to match

          Paint used;
          High temp Manifold paint - excess of 1500f for both blue and silver. 1 can of each color used. These don't take much paint to apply.. Just make sure you clean your parts really well before painting!!

          Steps to clean;
          1. Brake clean or engine degreaser
          2. Scotch brite pad (red) all over
          3. Hot soapy water
          4. 3-4 coats for complete coverage.

          Lasted on my red cam covers all summer without a scratch!

          As you can see im very particular and things do get down to the nitty gritty...

          Speaking of nitty gritty.....

          --------------------------------------------------------------------------

          RB26 GTR injectors and resistor pack install;

          First and foremost, no matter where you source your injectors from, no matter how convincing the guy is that they're BNIB or never used, or lightly used, HAVE THEM FLOW TESTED AND CLEANED.

          I went from a sporadic flow pattern of 113 - 115 across all 6, to 122 constant! No leaks, cleaned the filters through ultrasonic cleaning, then replaced all pintle caps and orings/grommets.

          Best and safest 225$ bucks i've ever spent.

          This was from Lew Dieslic off Sources in the West island of Montreal.
          Phil (t-bag) hooked me up with that, so big props to him!

          I just couldn't phathom using, used injectors in a fresh build..

          (i'll post pics of my results and pics of injectors before, after when i go tonight)

          If you plan to do this mod to your RB20, please read this, it will save you a great deal of trouble beforehand, as most sites do NOT supply this information

          Steps for RB26 injector swap

          1. Before storage or before working on this particular section of the vehicle, run the vehicle with the fuel pump fuse OUT as to deplete any gas in the lines, as well as to remove any fuel pressure.

          2. The intake plenum needs to be removed, runners can stay on head, for you to work with the fuel rail and injectors..

          3. Carefully remove the clips from the injector plugs! It's likely youll destroy a few tabs in the process but its not a BIG deal.. So dont worry.. A loom is approx 770$ last i heard, so be careful.. lol

          4. keep these clips and pull the injector connectors free from the injectors.

          5. unbolt the fuel rail (2 bolts) and pull. Since you burnt the excess fuel off by pulling the pump fuse, you wont have gas pouring out!

          6. injectors are out!

          7. now the step no one EVER tells you about.. EFgdiopfjdiohjdh

          - Each connector to each injector fits in a certain sequence, like key and lock. There are grooves in the wiring loom connectors that fit the RB20 injectors fine, but do NOT fit the RB26 injectors. The grooves on the rb26 injectors are different, as well, the alignment of the front tab is slightly off center.

          -I'll take pictures for reference, because it's hard to explain.. But some filing -needs to be done and some trimming as well..

          8. Now that the trimming and cutting is done, the connectors will match!

          9. Now we can begin wiring the resistor pack.

          10. Follow this, or pm me for guidelines;


          In my case, the power wire was WHITE, and the wires to each injector were BLACK. Not sure what the significance is ..

          11. Now find a place to mount your ballast! I used the solenoid mount holes for the hicas solenoid (which is now removed)

          I think that's it.. but if i think of anything else i'll fix it!
          Check out the GTST Projects page and keep up to date with my build!
          www.nelsonmx.wordpress.com
          Like us on Facebook! www.facebook.com/NelsonMX
          Any part inquiries can be forwarded to marc@nelsonmx.com

          Comment


          • #6
            nice build man, lots of good info..cant wait to see this finished

            Comment


            • #7
              Thanks mate! Can't wait to see it finished either lol
              Dyno graphs will be posted by mid march i presume.. If everything goes smoothly, of course hah.

              -------------------------------------------------------------------------------------

              Feb 4th.

              Get a call that a package is waiting for me in Beauharnois QC.. Of course those of you who know the geography of Quebec will find it quite odd that a package addressed to me in Pincourt, somehow made its way 70 km's south east.. Anyways wtv!

              Before going, i dropped off my molested oem rotors at the auto parts to have them turned.. Going to be using these on the street whereas my new brembo's will be paired run solely on track days along with HP+ pads. These pads are prone to eating brakes as ive heard, and that's why i was reluctant to use them on the street, as well with turned oem rotors..

              Anyways! I drive an hour to get this mystery box which turns out to be from Steve (Vtec Killa).. After some messing around and slight discontent, i find that the Z32 tt maf published in the FS section is in fact an N60 or, early model maxima, NA 300zx maf


              All epic failure aside, Steve was prompt to ring me back and we're working to rectify the situation as soon as possible! So big thanks to him for the understanding and help in all of this, great communication for sure..

              So, another hour and i get home, finally.
              Auto parts never called... Forgot to turn my rotors..

              5:00 pm - "you can come pick one rotor up but the other one will be done tomorrow"

              "yaaaa i'm gonna really accomplish a lot with one rotor and 45 min of time.. " LOL

              Fail round 2..

              Anyways, today was a fail.
              The end.
              Check out the GTST Projects page and keep up to date with my build!
              www.nelsonmx.wordpress.com
              Like us on Facebook! www.facebook.com/NelsonMX
              Any part inquiries can be forwarded to marc@nelsonmx.com

              Comment


              • #8
                One of the best build threads in HCR32 section.

                makes me want to rip into my recently tuned motor and do more stuff!

                Comment


                • #9
                  Originally posted by M13 View Post
                  One of the best build threads in HCR32 section.

                  makes me want to rip into my recently tuned motor and do more stuff!
                  +1 on that!

                  very few good gts-t build threads on here.

                  yo those calipers look mint man, whatchu talkin' about?... the silver came out SUPER nice!

                  and those valve covers look amazing as well, thats really coming along nicely..

                  you should make some CF accents for your exterior man... thought of any yet?
                  The SkyLife Community & News Website --> http://www.skylife4ever.com

                  Comment


                  • #10
                    those gauges in the center vent look incredible, eager to see the finished products

                    just out of curiosity, how much did haig charge you for the brake lines? pm me plz
                    sigpic

                    [links to all chapters in first post]

                    Comment


                    • #11
                      Hey thanks a lot for the positive feedback guys! I truly appreciate it!


                      @M13
                      Thanks a bunch man, i truly appreciate the positive remark. I work hard on figuring things out and i can't say enough about the people of the GTRC community, as if it werent for them, i would have absolutely nothing to contribute! So again, thanks for that heartfelt comment.

                      @ Archaeic_bloke, Thanks man, she's comin along.. As far as exterior accents, no..

                      However! I'm developing a wangan/chibi wing for r32 gtst's and GTR trunk lids so stay tuned everyone who's interested in those; as i know quite a few of you are!

                      Wings are also being looked into, carbon fibre of course.. You may think, "oh a wing big whoop" .. This won't be some cheesey ass knock off CDN tire wing lol..

                      My father actually developped/develops airfoils for aircraft, and we can actuall design and build a wing to provide maximum downforce for different driving categories - as well as offer adjustable wings with preset configurations or even limitless adjustability..

                      Still working on this but i'll keep everyone informed..
                      The chibi wing should be done by the end of march!

                      @ Frank
                      Pm sent!
                      And yes, they look very nice finished..
                      They've actually been in my car, and finished all summer, i just decided to plot my build thread as such to show my work in order.

                      Here's a vague picture of it lit up..
                      NOTE - the far right gauge is now an AEM UEGO - looks nicer with a contrast of red and green :P


                      Boost gauge was temporarily placed there with a carbonfibre socket i made up for jokes.. ended up sticking around a little longer than i had hoped so im in the midst of designing a few gauge pods.

                      Also built a double din, single din and triple din block off for those of you interested!
                      I'll have a picture later tonight
                      Plan to place my boost gauge there as i find it attracts too much attention.. plus looks much more 'sleeper' with it out of the way and hidden I get the majority of my boost readings from my EBC mounted in the clock area (of a gtr)
                      Check out the GTST Projects page and keep up to date with my build!
                      www.nelsonmx.wordpress.com
                      Like us on Facebook! www.facebook.com/NelsonMX
                      Any part inquiries can be forwarded to marc@nelsonmx.com

                      Comment


                      • #12
                        -------------------------------------------------------------------------
                        Feb 6th

                        So this was epic besides exams and other busy junk, but i've managed to collect all my parts (minus now needing the correct, z32 maf..).

                        My turbo came in from Feast! Neo 6 RB25 R34 GTT


                        Here it is next to my stock RB20det turbo


                        With a little super high temp paint - 2000f and excess of.


                        Now get the wire wheel out and give'er to that grimey wastegate actuator!
                        Of course, this is the rb20det actuator, as it opens around 10 psi vs 7-8 psi like the rb25. You can tell the difference right off the bat in how stiff the actuator spring is between the 2 of them.


                        Voila, now you've got a fresh, clean looking turbo!


                        --------------------------------------------------------------------------

                        The AC Compressor dilemma; having AC troubles? Tripping your AC Fuse? Look here and this will explain everything you need to know!!


                        An issue with ac compressor's is that, in time like anything else, they become sloppy and die.. What dies in an ac compressor is a part called the "windings".

                        Lets understand 'electromagnetic clutches'
                        Ohm's law dictates basically how a circuit works in terms of amps, voltage and resistance..

                        In an electromagnetic clutch, such is the AC compressor, we have as coil of 'windings' surrounding an iron core. These windings are powered by your 12v source when you push the AC button. The resistance of these windings dictates the amount of current passed through them, in amps, and thus initiates the AC compressor sequence, whereby the iron metal core becomes charged, and draws the electromagnet towards it, pulling "open the clutch" and engaging the pump.

                        The problem with these systems is that over time the windings lose their protective layering and resistance DROPS. At which point your current becomes too much for the feedback loop of your cars ac electrical system, and BAM your fuse pops.

                        To alleviate this, you can have your windings REWOUND for a small charge, however it is really difficult to find a place that specializes in this sort of work because it's a bit out dated..

                        Time for a new Ac compressor im afraid!

                        AC COMPRESSOR RESISTANCE MEASURES

                        A GOOD PUMP - 3 to 4 ohms of resistance
                        A BAD PUMP - less than 3 ohms of resistance

                        It may work at 2.5 ohms, but your fuse will blow within the hour, as the feedback system will take longer to recognize the current draw and your 15 amp fuse (or is it 10.. i forget) will take longer to reach breaking point.


                        Ok so now that we've had a little lesson in electromagnets, lets get down to the fun part!

                        The test

                        First and foremost, check the resistance measured in your leads.
                        Yes, i know.. My leads blow - avg resistance over leads @ 20 ohm measurement is 0.7
                        Must factor this in when measuring resistance of compressor! So write it down.


                        Here is the resistance in OHM's meassured by the BAD AC compressor;


                        Here is the resistance in OHM's meassured by the GOOD AC Compressor;


                        Now, people ask why i measure from there. Well, good point. This wire is the power wire to the windings from a 12v source. You must take your + or - lead and place it on the connector, while grounding the other to get your resistance..

                        The OTHER wire going into the compressor, well, i dont know what they are, but they both read;


                        So there you have it; blown fuse = short, or bad ac compressor windings.. Typically go for the compressor if there are no obvious shorts, because it's highly unlikely those wiring bundles have short on their own..
                        Check out the GTST Projects page and keep up to date with my build!
                        www.nelsonmx.wordpress.com
                        Like us on Facebook! www.facebook.com/NelsonMX
                        Any part inquiries can be forwarded to marc@nelsonmx.com

                        Comment


                        • #13
                          ------------------------------------------------------------------------------------

                          Removal and installation process of the AC compressor

                          If i were to rate it on 10 in terms of difficulty, 1 being hardest; i'd say 3.
                          HOWEVER and this is a A BIG however. If your turbo is still in, this will NOT be easy as the compressor, for me was full from the top and out of the engine bay through where the turbo would normally sit..

                          Otherwise, if you want to drop it out you'll need to pull the PS pump to the side, or remove it entirely.. i know..

                          This is what causes people to not bother with swapping ac compressors but i highly suggest you do it regardless, it isnt as bad as it seems and i hope to walk you through most of the mess..


                          Step one; Releasing freon from charged system..

                          There's a lot in here and it's highly illegal to have this released to atmosphere. It's supposed to be taken somewhere and suctioned out and recycled promptly, however, if you're in a bit of a jam such as myself and car isnt functional, be discrete...

                          Remove the cap on the check valve by the rad brace (red cap) and press the shradder valve fitting down to see if anything is in there.. PSHHHHH is a good thing because your lines are still charged and you can rule out having a serious leak.

                          WEAR GLOVES

                          Freon discharges from liquid to gas at VERY low temperatures (ie. why it's for AC, duh). Get a 10 mm socket and a nice long extension and remove the fittings on the rear of the pump..

                          Wear a mask or something now, because the gas will start to discharge. Once youve got a good stream of air coming out, leave the room and open a door or ventilate it as best as possible.. Give it 15-20 min to discharge. I'm serious, there is a LOT in there lol.


                          Step 2;

                          Now that you've discretely discharged freon into your work place, return to the now ventilated and safe area to begin the removal process..

                          Get under the car, you will see the tensioner pulley for the ac compressor belt. Loosen the front of it with a 14 mm wrench, then a 10 mm socket will get the job done from the base of it, raising the pulley and removing tension.

                          Now pull the belt off and hang it out to chill.

                          You will see 2 bolts underneath the pump. Remove these LAST.

                          Look from the top, you will see 1 bolt on the far right.

                          There is another bolt on the far left in the same position, this one is the most epic failure of a b*tch in the EFFIN world. It's likely you'll hit the belt tensioner on the ps pump, so remove this bolt FIRST.

                          By removing this first, you wont have to mess with the pump being cocked and it will come out smoothly.

                          This is the one;


                          Ok, once that one is out, remove the other top bolt on the right, then proceed to remove the bottom 2 bolts ; AC compressor is free.

                          In my case, like i said, the turbo was off (IC PIPING TOO!), this is how my engine bay was when pulling the ac compressor;


                          Manifold intact, PS pump and lines intact, reservoir intact etc.. All but the turbo..

                          Pull it ass end up and jimmy it out, that's the best tip i can say.. It's a pain..


                          Repeat backwards for install..


                          ONE BIG TIP FOR INSTALL OF NEW PUMP!

                          The wiring connectors for power and the brown one (i have no clue.. control? lol) are bolted down to the compressor housing. They're very difficult to reach and connect when down there, so when you have the new compressor in hand, remove the bracket with the connectors on them and zip tie it to your ps pump reservoir line like so;


                          Now you can reach them at all times, even with IC piping in place!! Yayyy!!
                          Check out the GTST Projects page and keep up to date with my build!
                          www.nelsonmx.wordpress.com
                          Like us on Facebook! www.facebook.com/NelsonMX
                          Any part inquiries can be forwarded to marc@nelsonmx.com

                          Comment


                          • #14
                            ------------------------------------------------------------------------------------

                            So being we manufacture carbon fibre, i thought i'd throw some pics of the good stuff up


                            I think the oem sidemount intercooler lacks in size..


                            Most recent interior shot..


                            Now my single din carbon plate is in to get rid of that stupid cd tray, and the EVAC controls are at the bottom so that my screen doesnt interfere with them anymore! finallyyyyy lol so damn annoying..
                            Check out the GTST Projects page and keep up to date with my build!
                            www.nelsonmx.wordpress.com
                            Like us on Facebook! www.facebook.com/NelsonMX
                            Any part inquiries can be forwarded to marc@nelsonmx.com

                            Comment


                            • #15
                              Other pics and stuff!

                              ACT pressure plate/clutch etc is all in.. waiting help for the bell housing install!


                              rotors were finally turned lol

                              Check out the GTST Projects page and keep up to date with my build!
                              www.nelsonmx.wordpress.com
                              Like us on Facebook! www.facebook.com/NelsonMX
                              Any part inquiries can be forwarded to marc@nelsonmx.com

                              Comment

                              Working...
                              X