Announcement

Collapse
No announcement yet.

Frankiman's street/track GTR project

Collapse
X
 
  • Filter
  • Time
  • Show
Clear All
new posts

  • Chapter 23 - Almost there, week12-13, part2


    ------------------------------
    Day 43

    Like everyday other day, when I start working on the car for the evening, I try to think about what I could have forgotten to do,
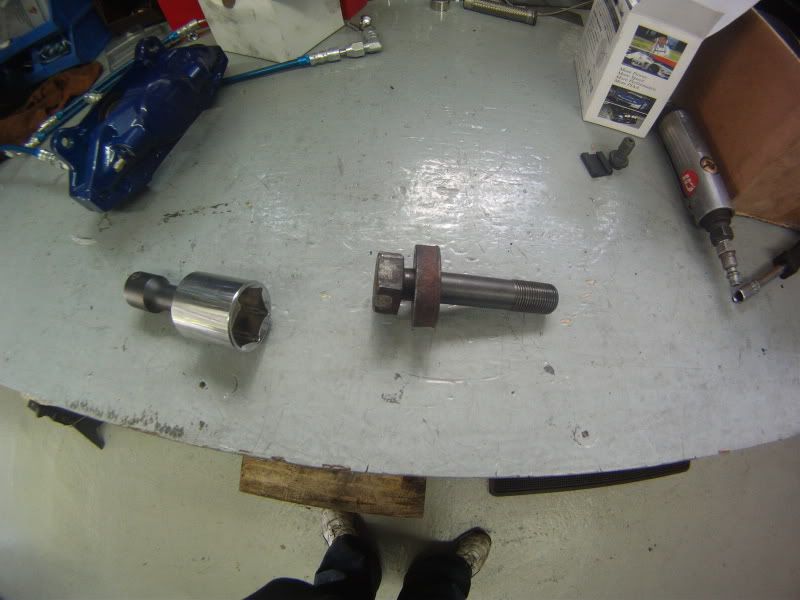
    Then I remember, the upper control arms…


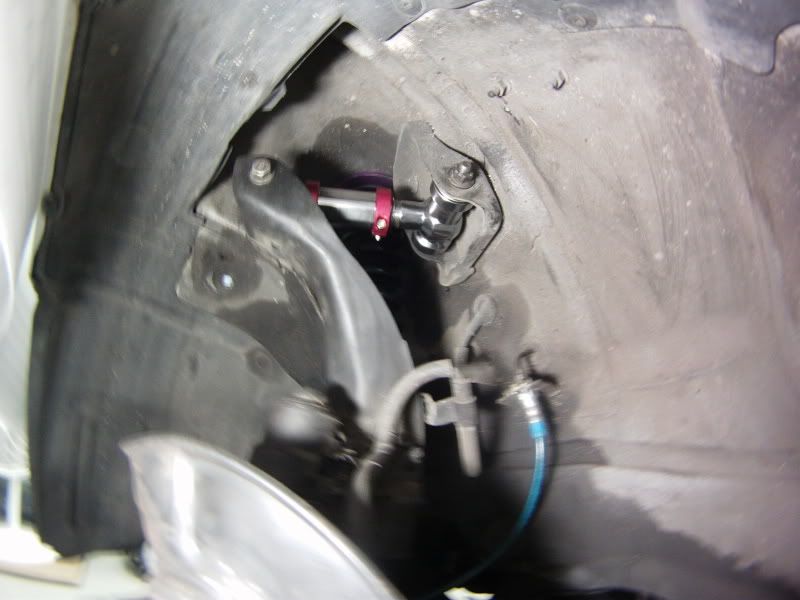
    A couple weeks ago, Josh (archaeic bloke) finshed work on his car (for now..) and after driving it around for a bit, he could hear a clunking noise coming from the front upper control arms,
    Turns out those arms being adjustable, with bearings, can’t be torqued as much as the OEM ones, because the bearings aren’t designed for axial load
    While hes got AMS parts, I have the exact same design from KTS, so I had the same problem
    And I talked to Haig@autoworx way back In January about this when I bought the arms
    Where Josh put red lock-tite and got the bolt just over finger tight, Haig told me to get them finger tight as well, but then lock them in place with a second nut


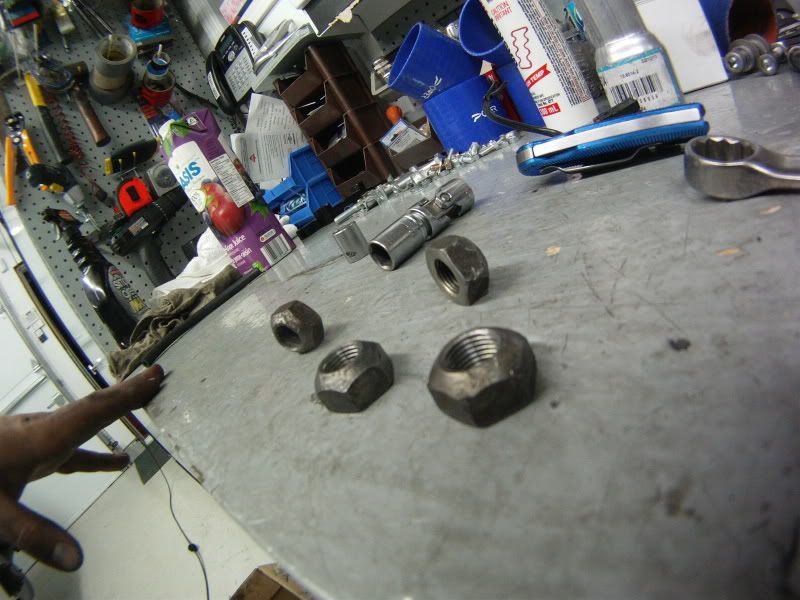
    Pretty straight forward, you first tighten the bolt/nut till the arm isn’t loose anymore, then you put the 2nd nut and tighten both nuts together


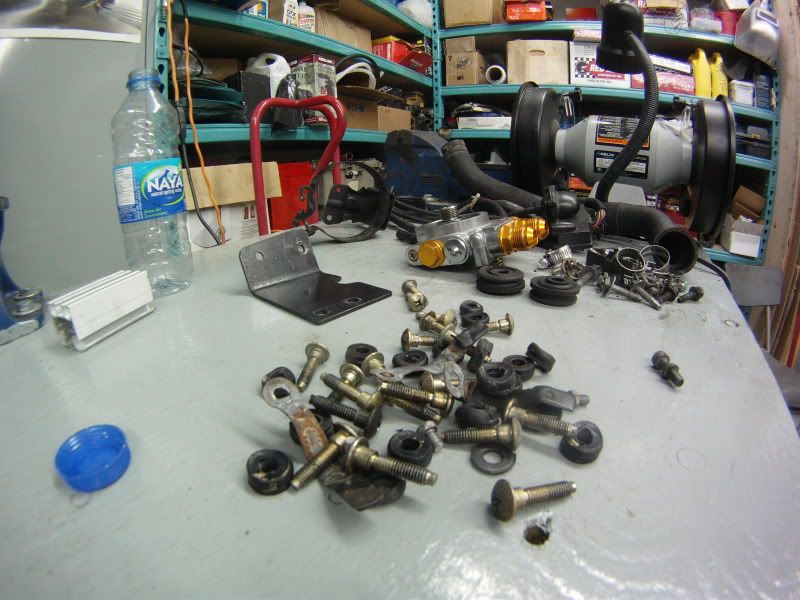
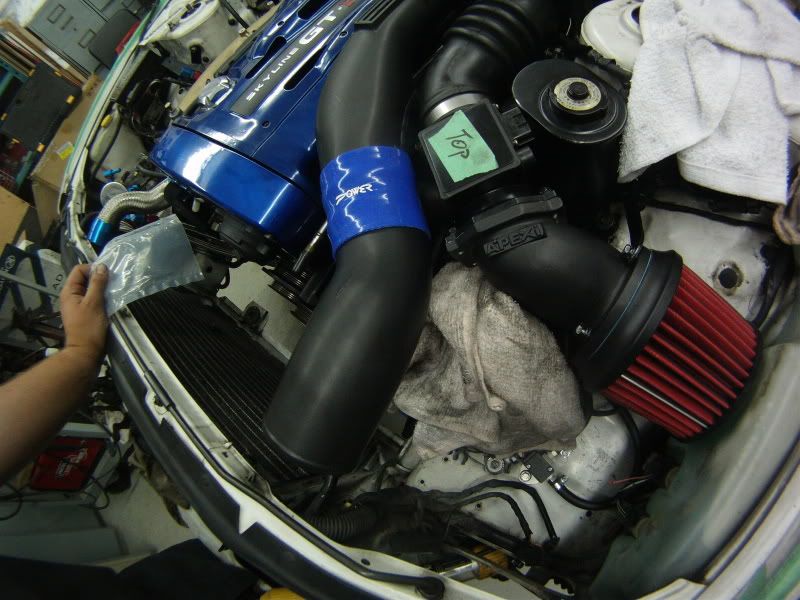
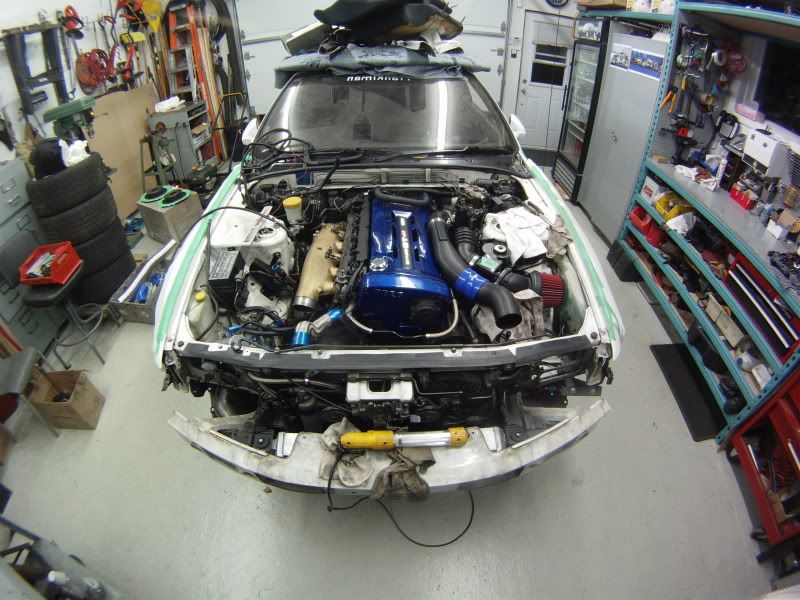
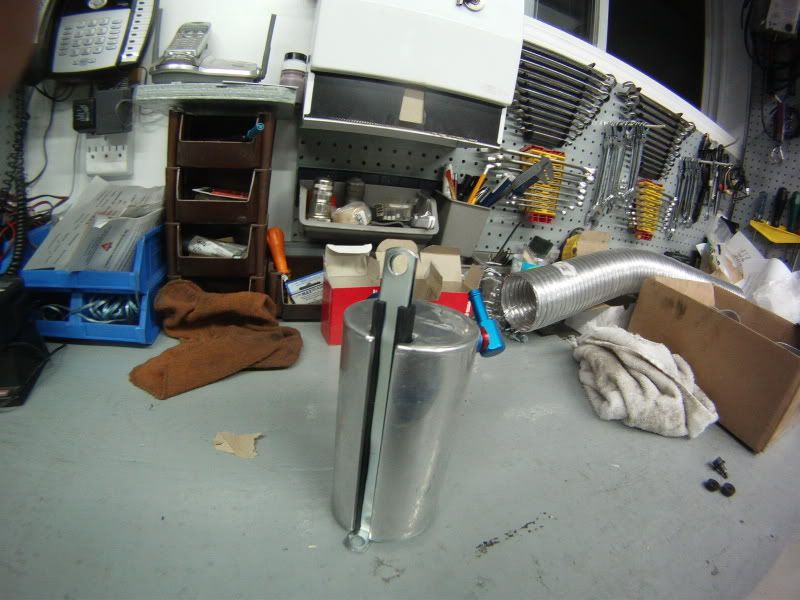
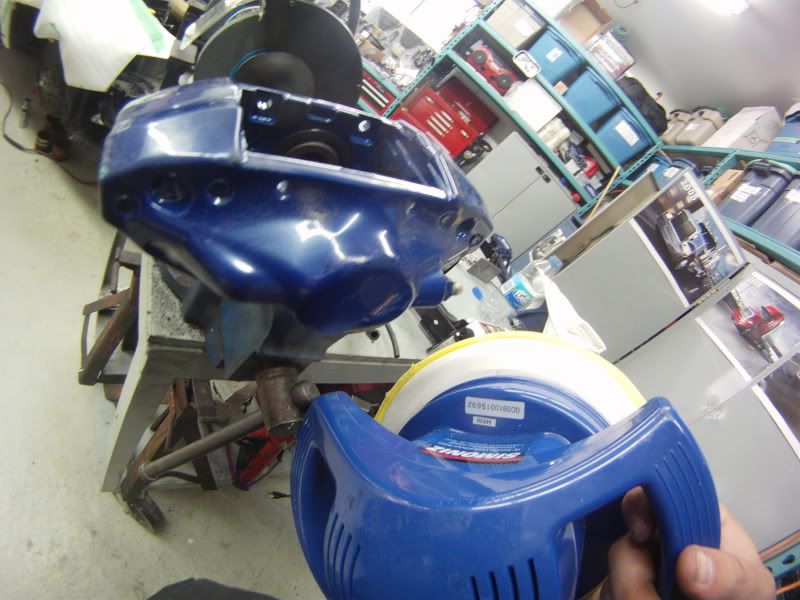
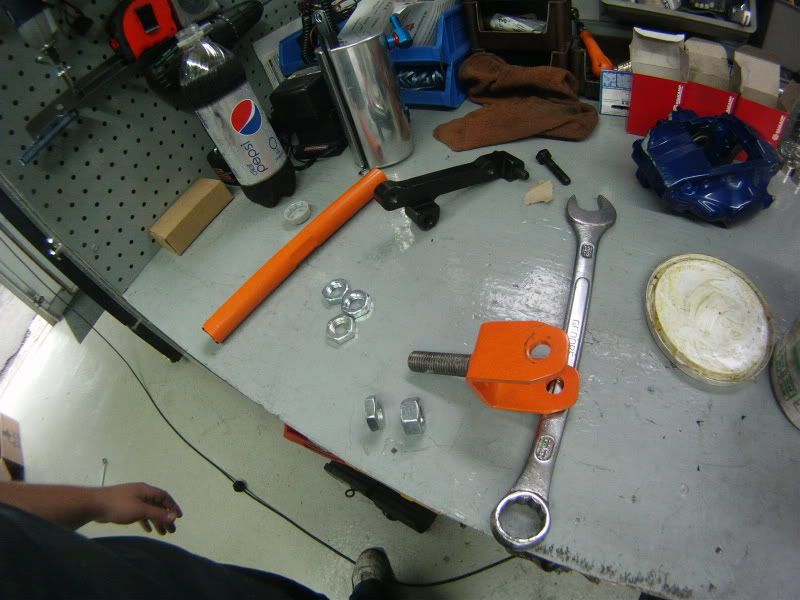
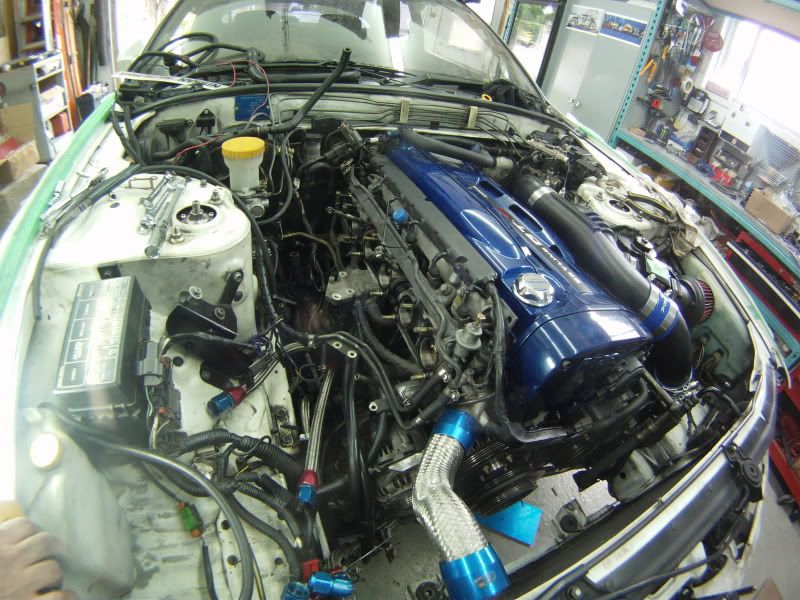
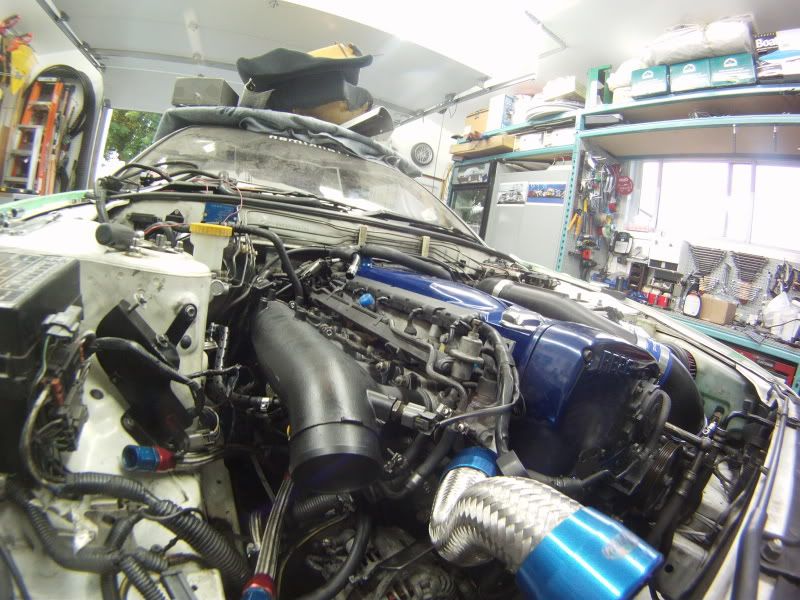
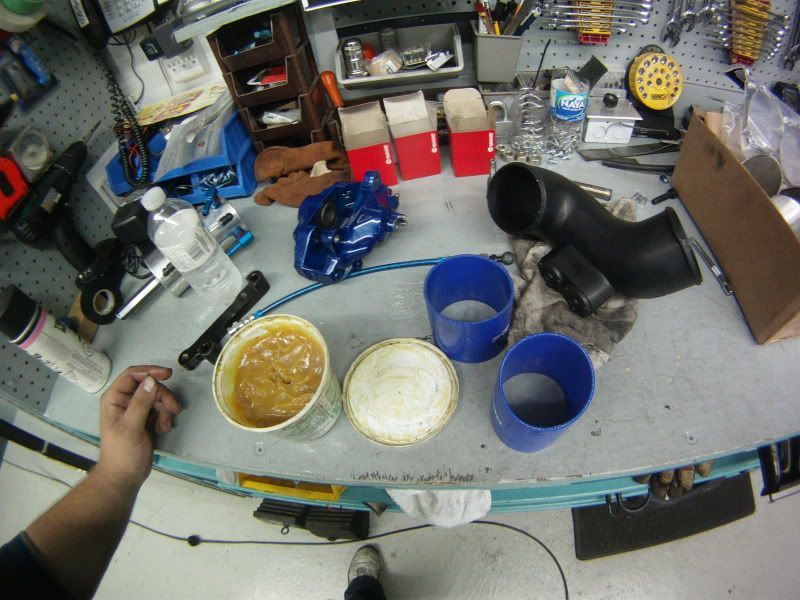
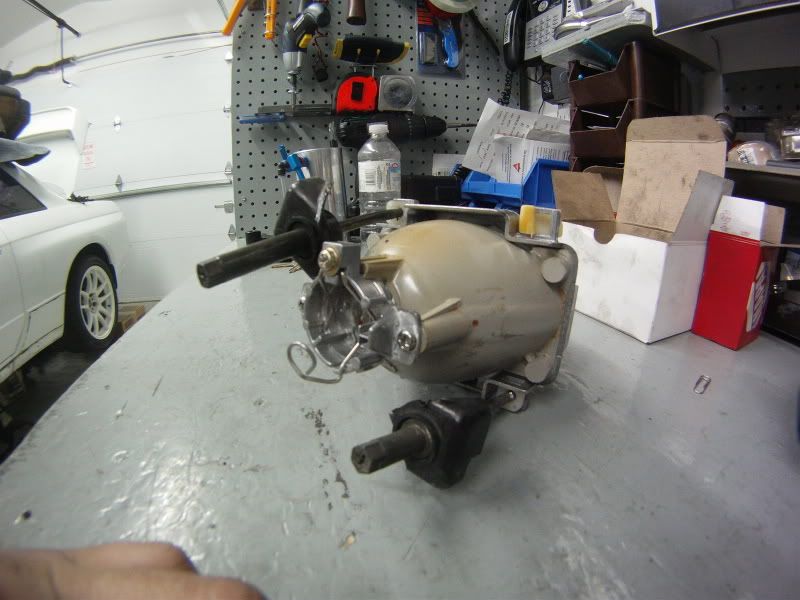
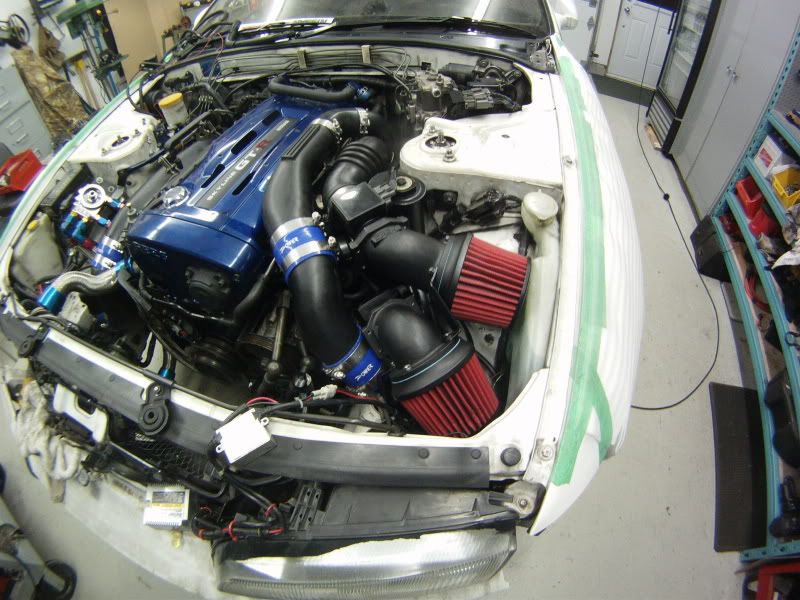
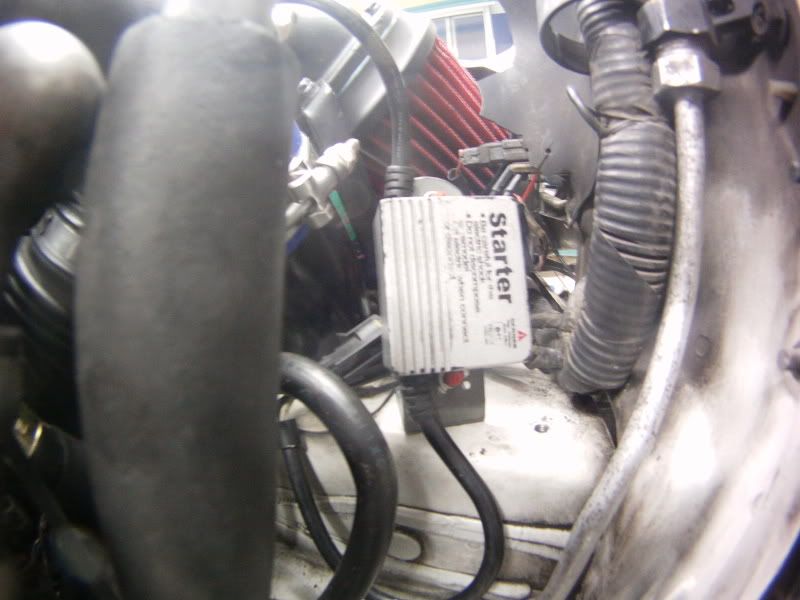
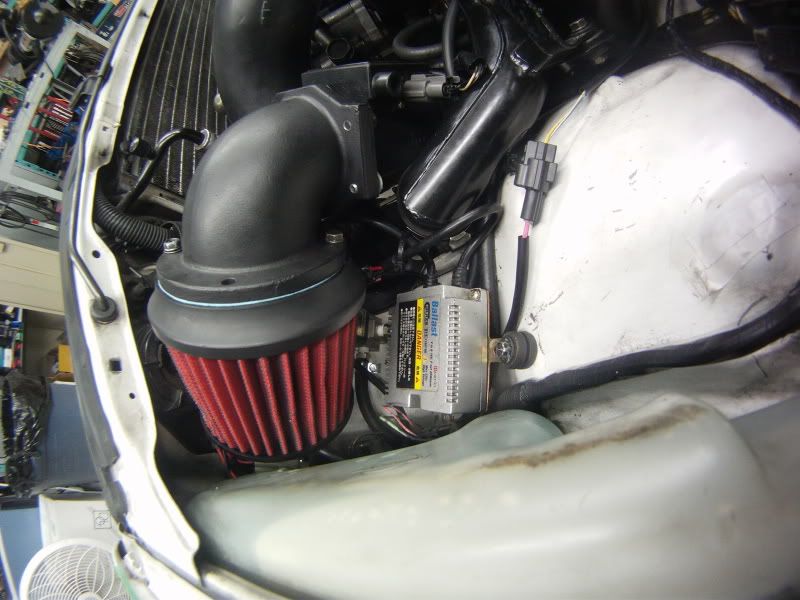
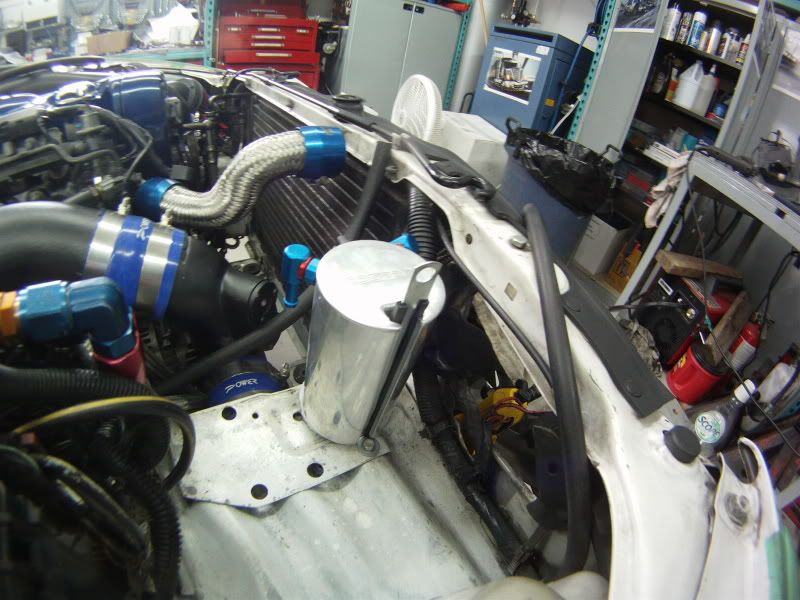
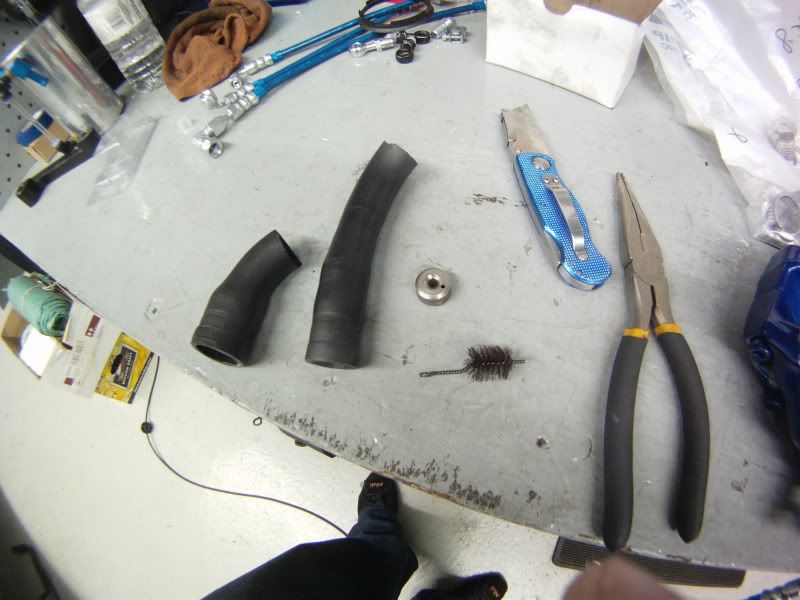
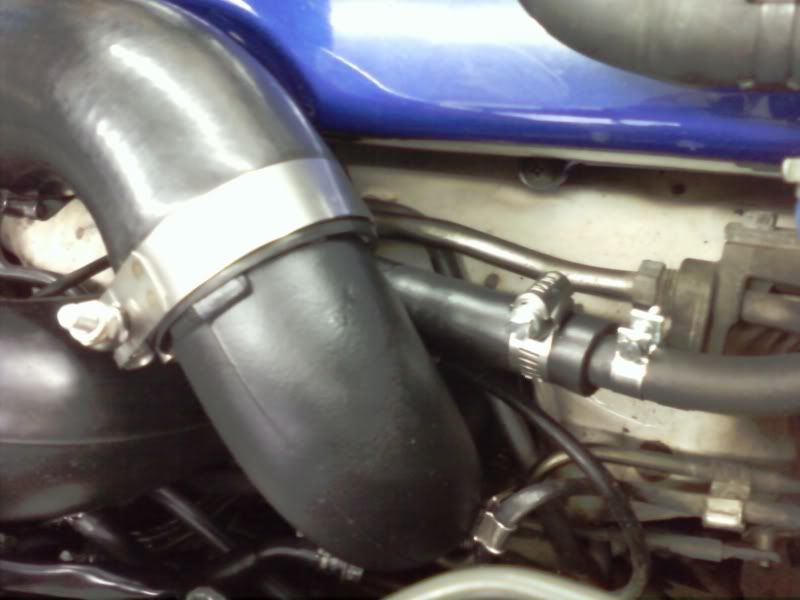
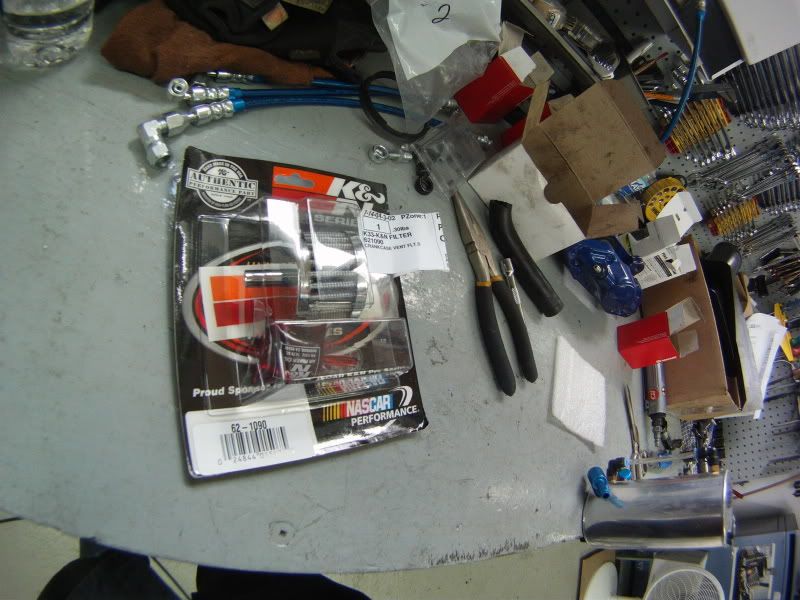
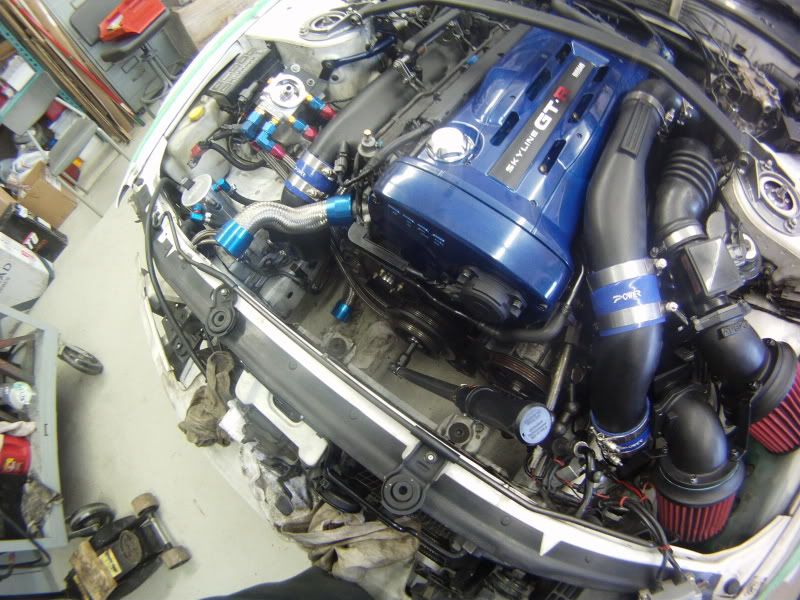
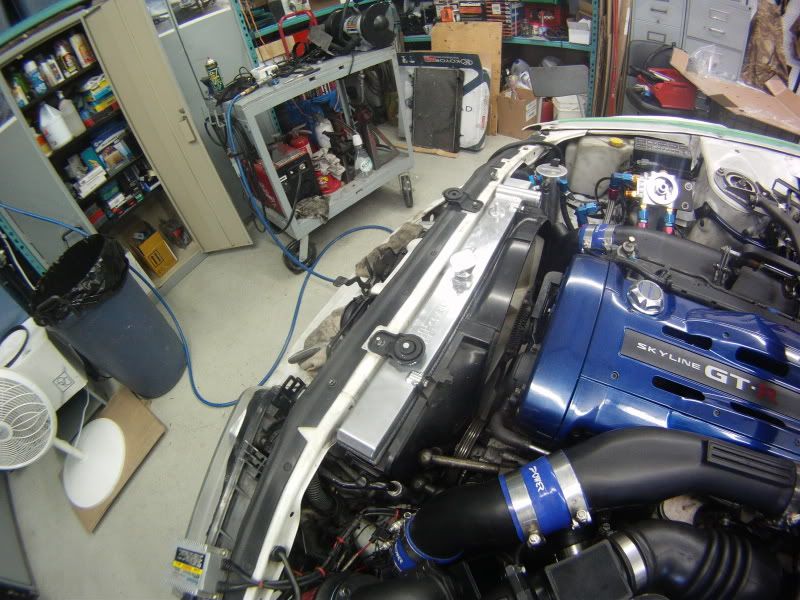
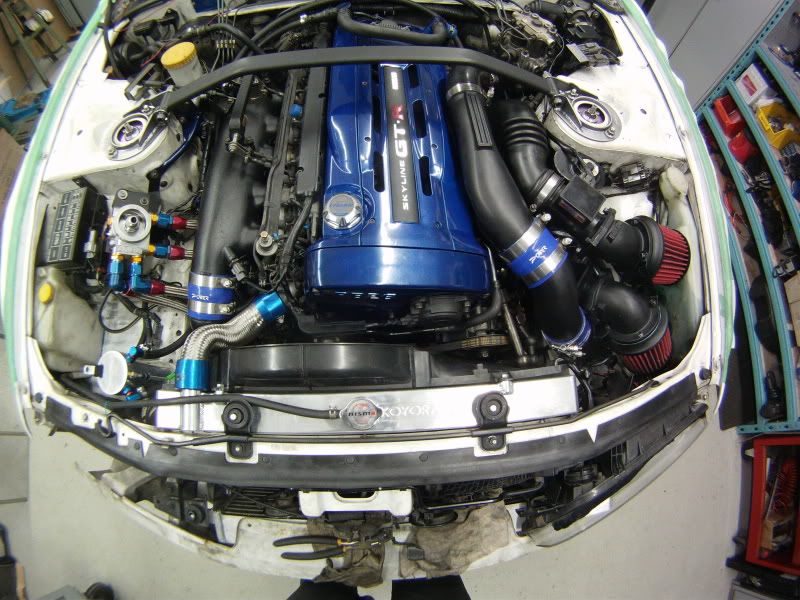
    After that I took out my Apex’i power intake kit with the freshly powder coated elbows and tried to assemble it

    The paper gaskets were to big, so I cut about 1,5mm off the edge


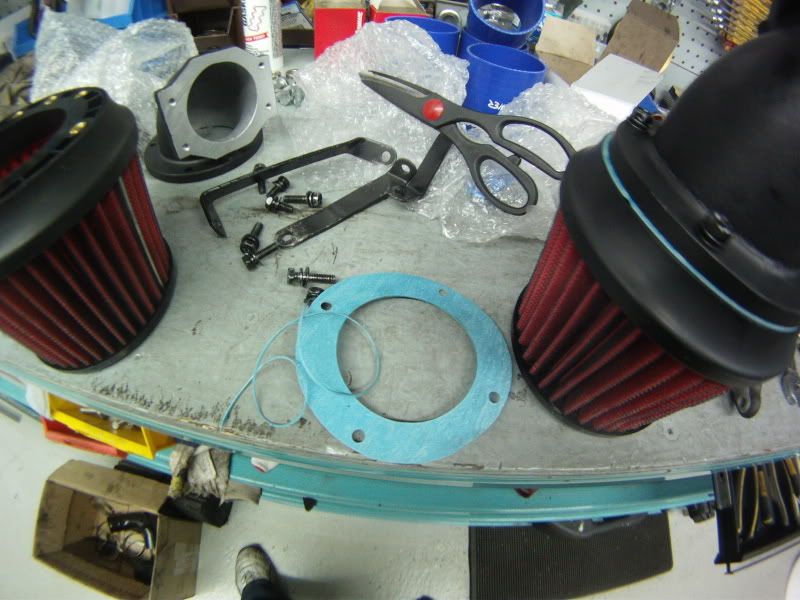
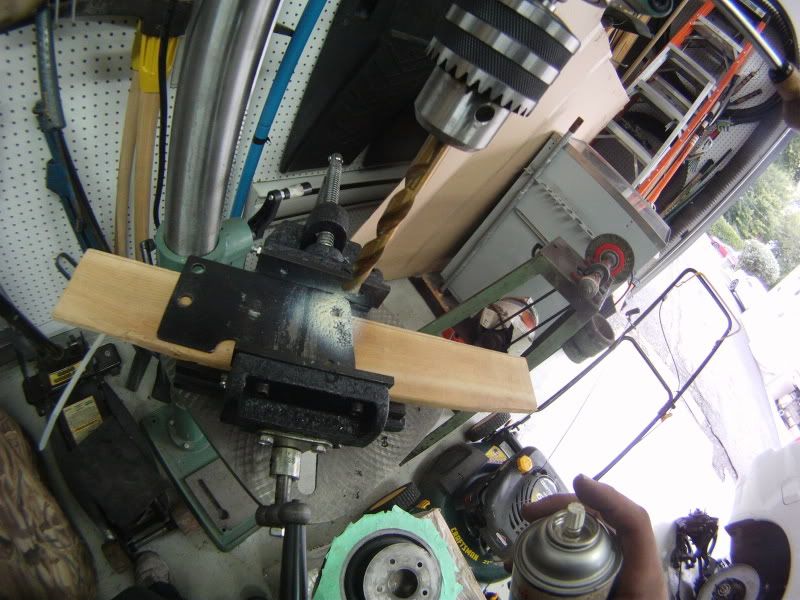
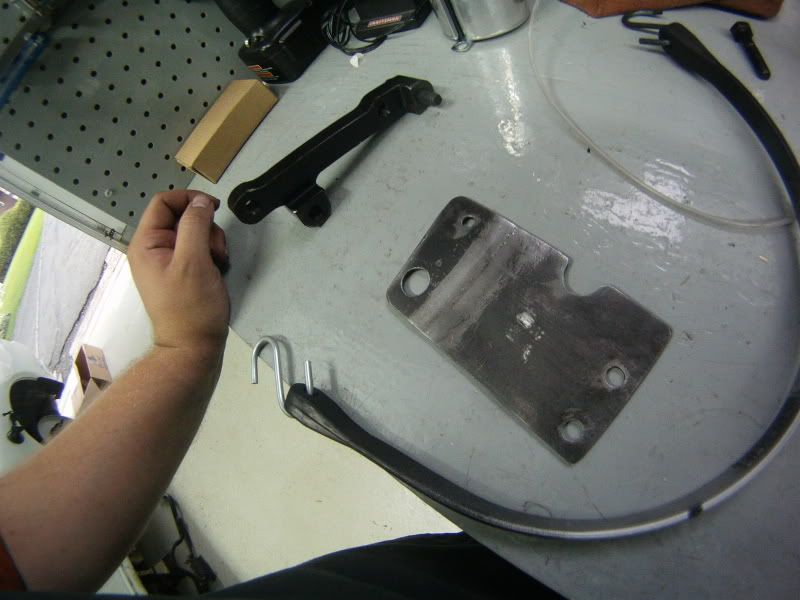
    And I say tried, because after downloading the pdf instructions from apexi’s website, I saw that I was missing one of the 4 brackets, and that the remaining 3 had been bent out of their original shape

    I bought the kit “new” only used for a couple dyno pulls
    Whatever, I paid about ˝ what its worth, so its all good


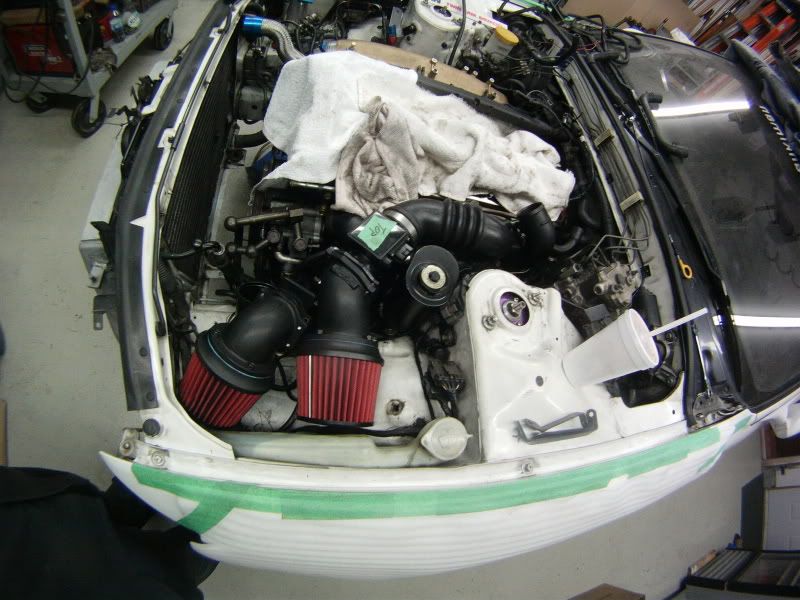
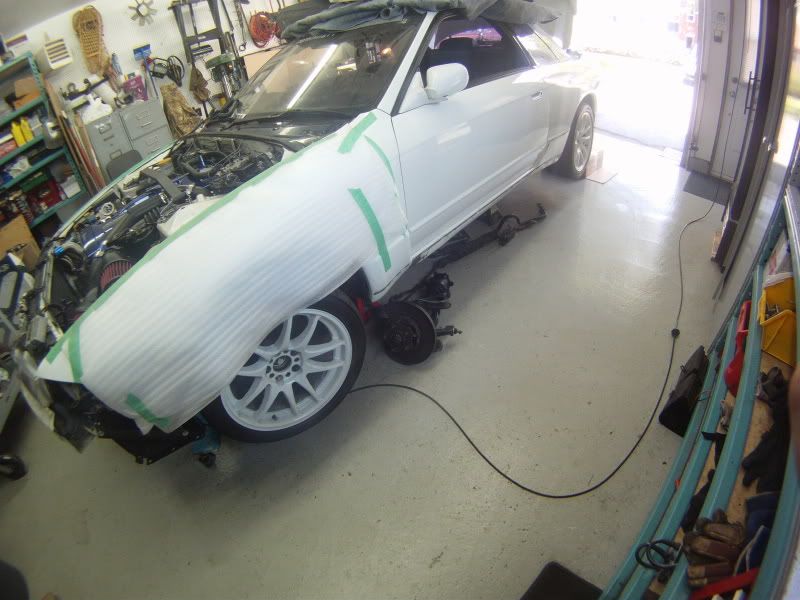
    So I left it like that, and bent the brackets back into shape, didn’t bolt anything down before I get the headlights back in

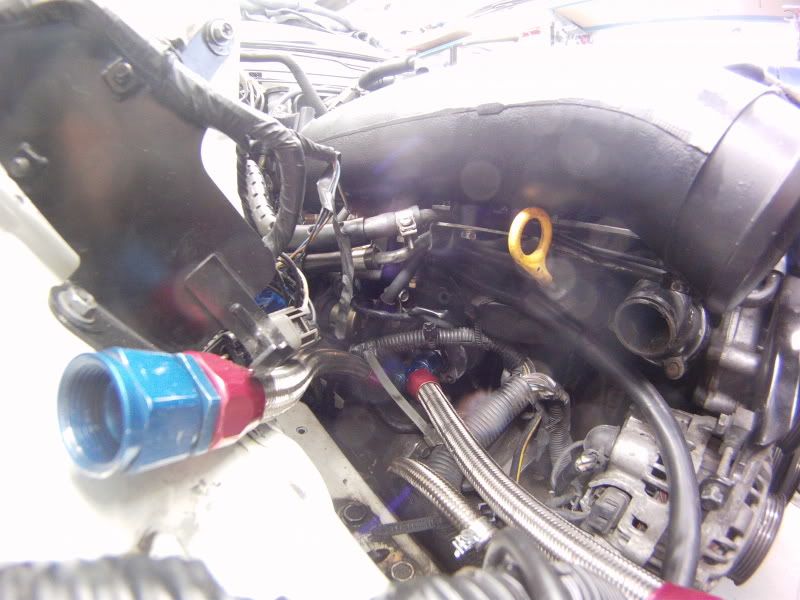
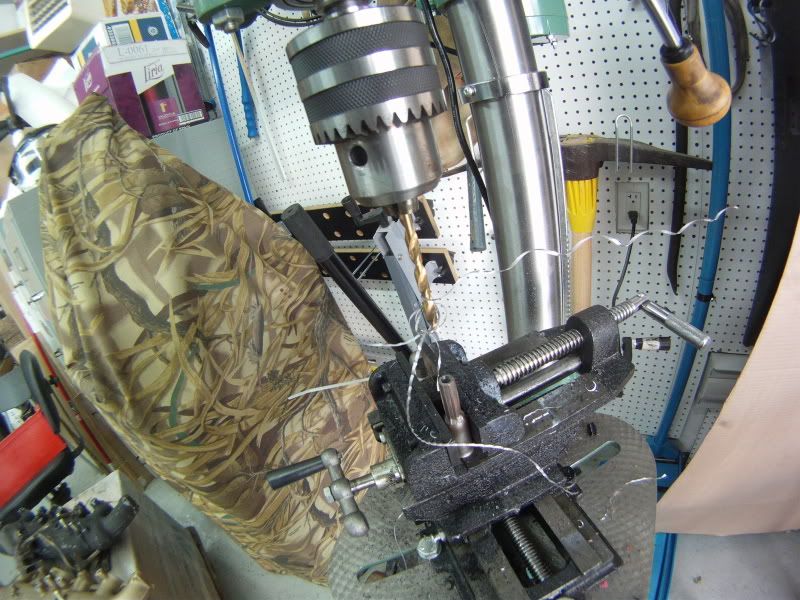
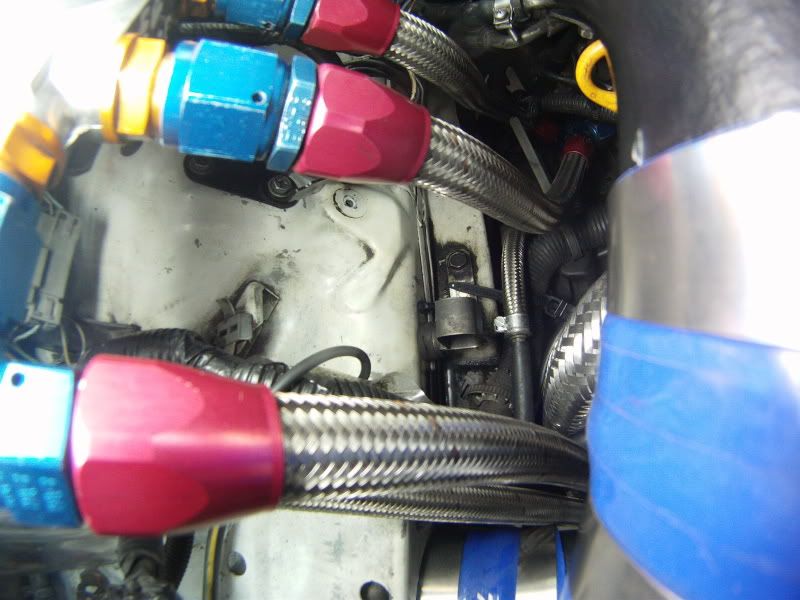
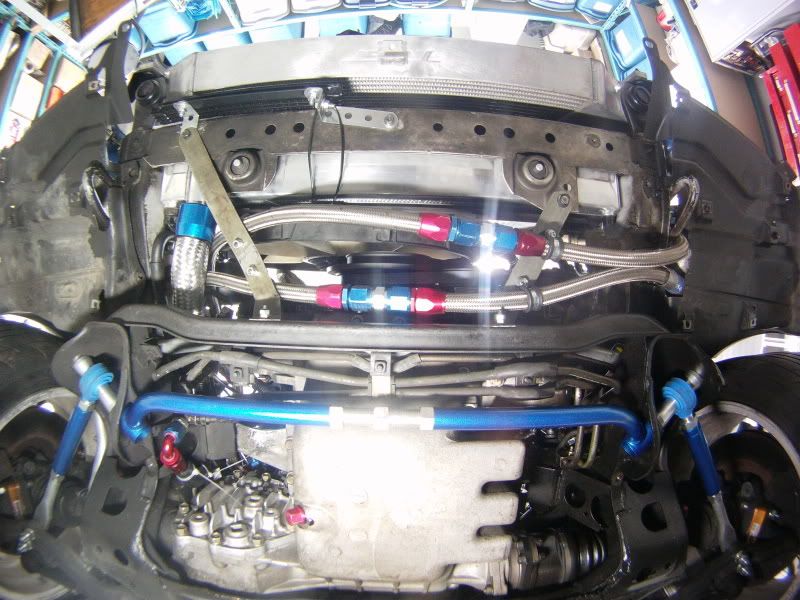
    At the beginning of the week, I called Tuboquip again about the AN-10 45deg fitting that I had been waiting for for 7 weeks,
    The last time I called (a week prior) I was told that they got the fitting and the line would be assembled and shipped the same day, but I never got it after 5 days
    So when I called, I got the customer service guy, and I was very serious with him, he told hed check and call me back,
    He called me after 5 minutes, apparently the fitting had been sittting under the counter for a week, I would have it the next morning, FINALLY


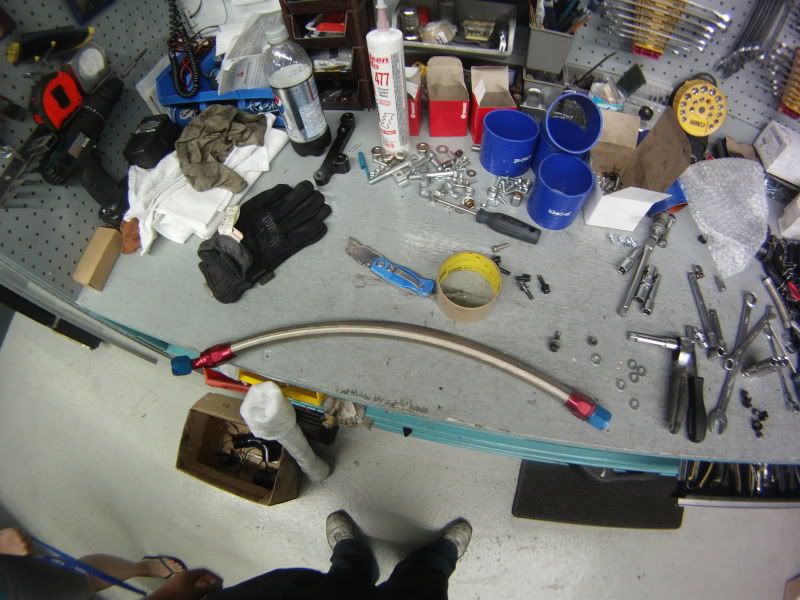
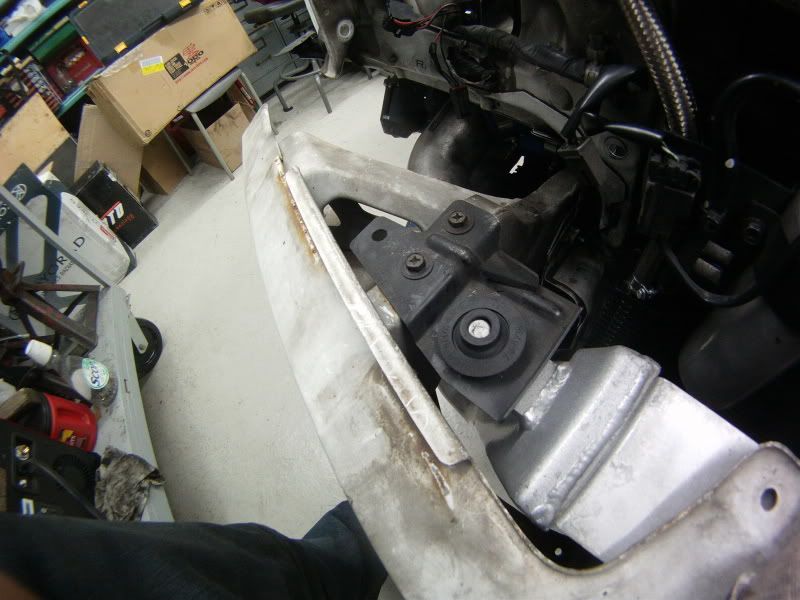
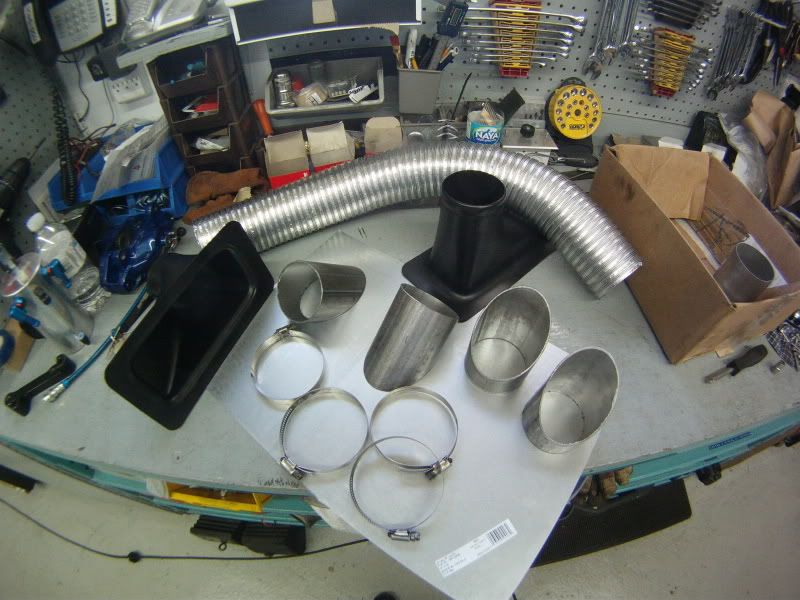
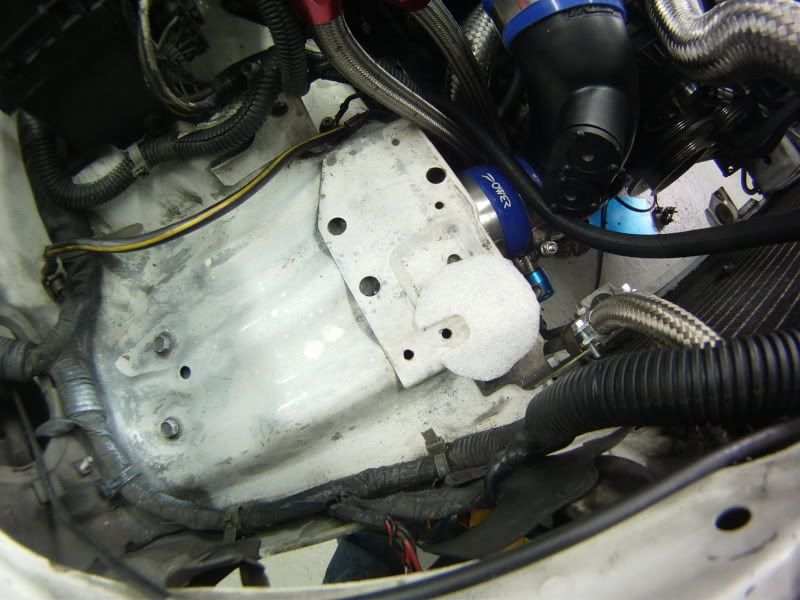
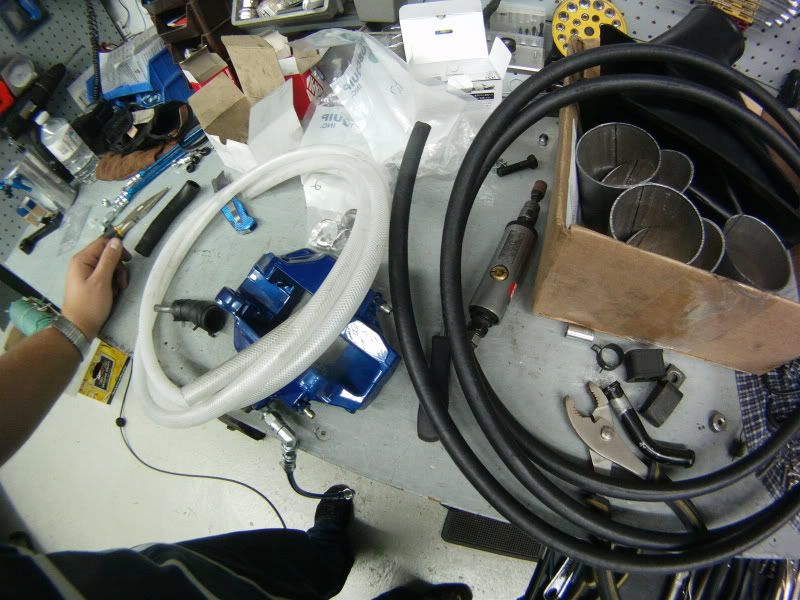
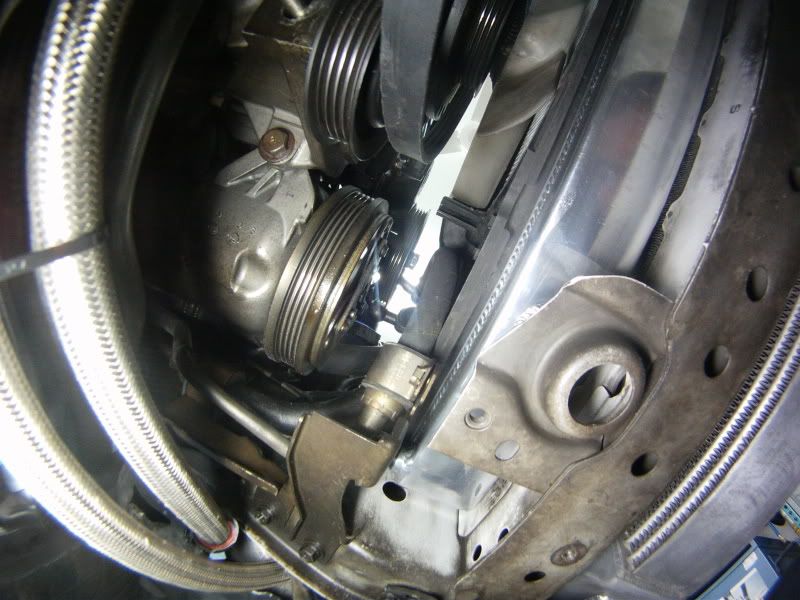
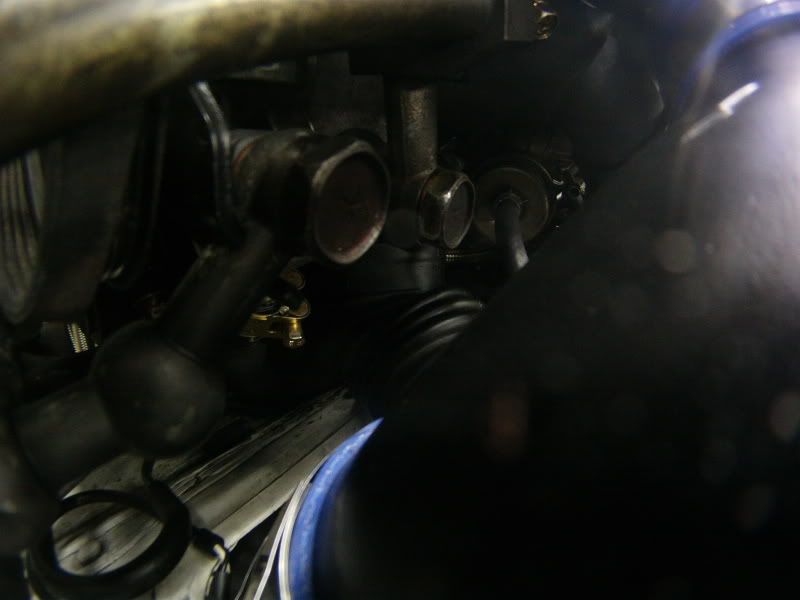
    So I finally screwed it into


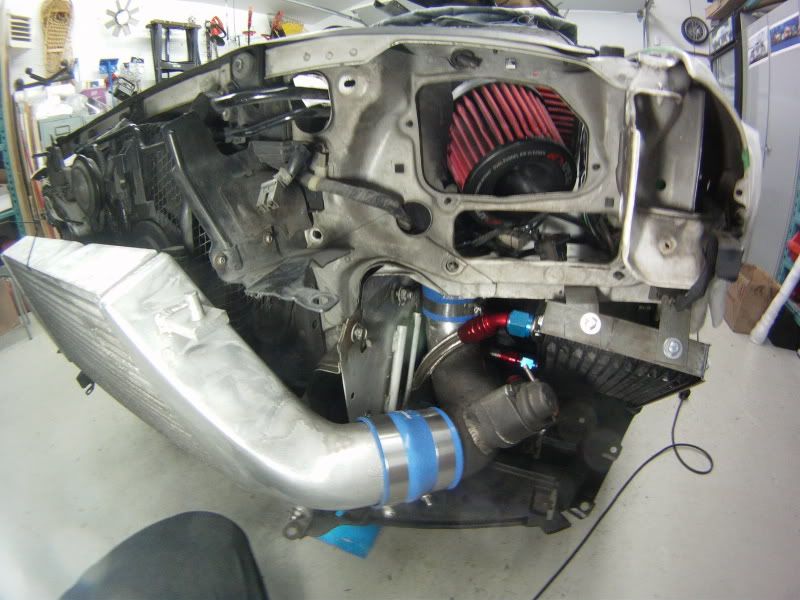
    Because of the angle of the line, and the fact that its pretty stiff, I had to cut a much bigger hole in the plastic fender liner to have it go through

    And then connected the original lines going to the filter plate

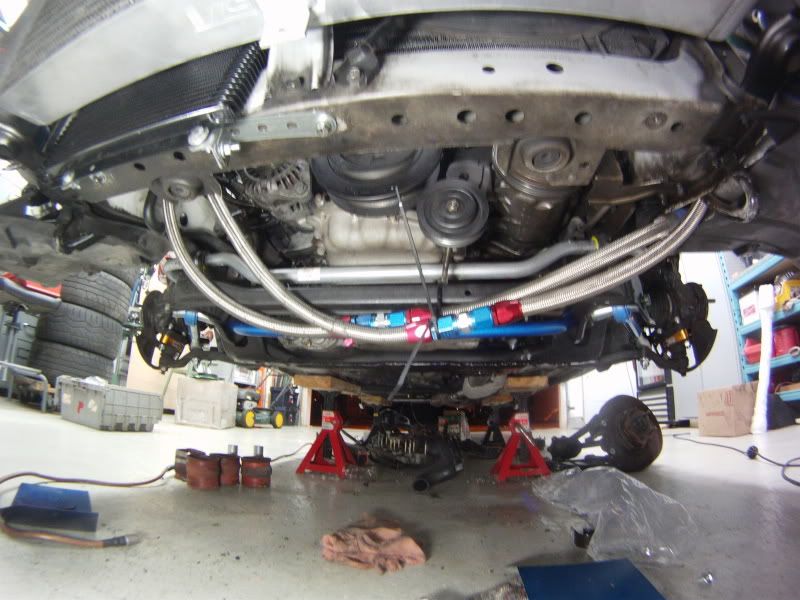
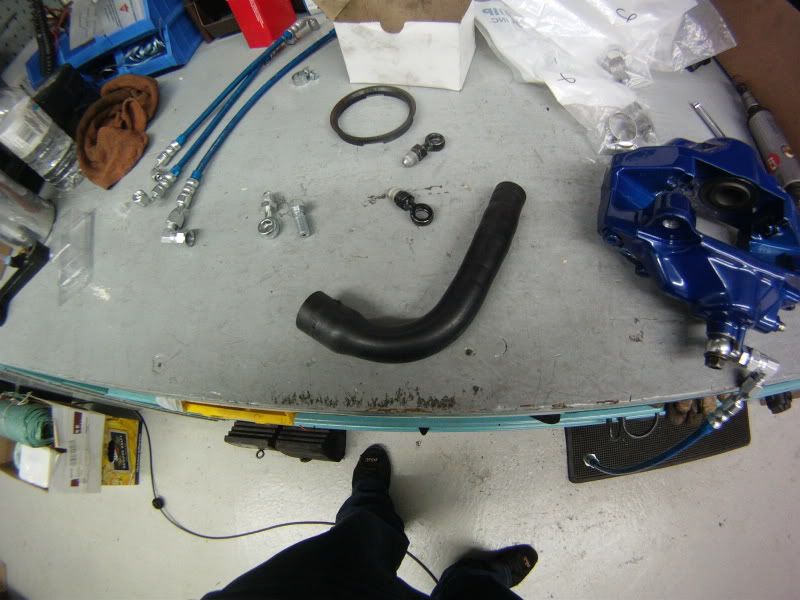
    When I originally measured the length of the extensions, I put a piece of tape on each of the old lines to indicate which went with which line afterwards

    As you can see, the lines are obviously not the same at all,
    At that moment I went WTF, WTF ! did I measure wrong ?

    After calming down, I swapped the lines, and it was pretty much the same length, oufff
    I must have labelled them wrong


    And talking about parts that look a-hell-of-a-long-time to arrive,
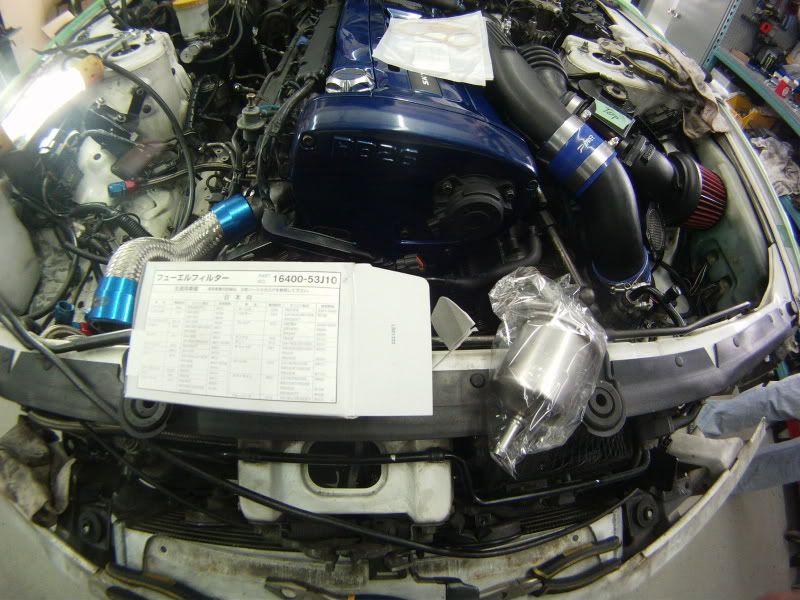
    The darn upper intercooler bushings, I was only missing 1 but ordered 2 just in case
    Got them straight from Nissan, which came from Japan, it took 6 weeks


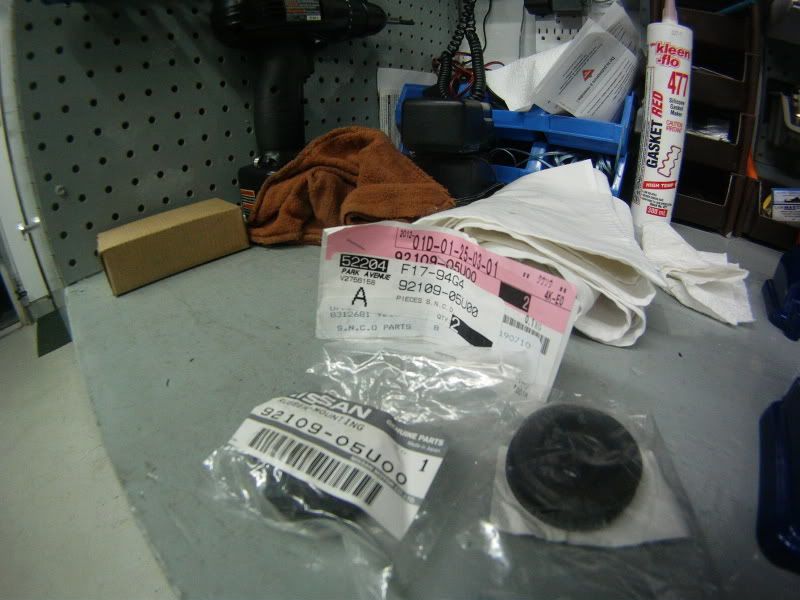
    At first I was scared it was the worng part number, because it was really hard to understand the nissan schematics


    Perfecto !


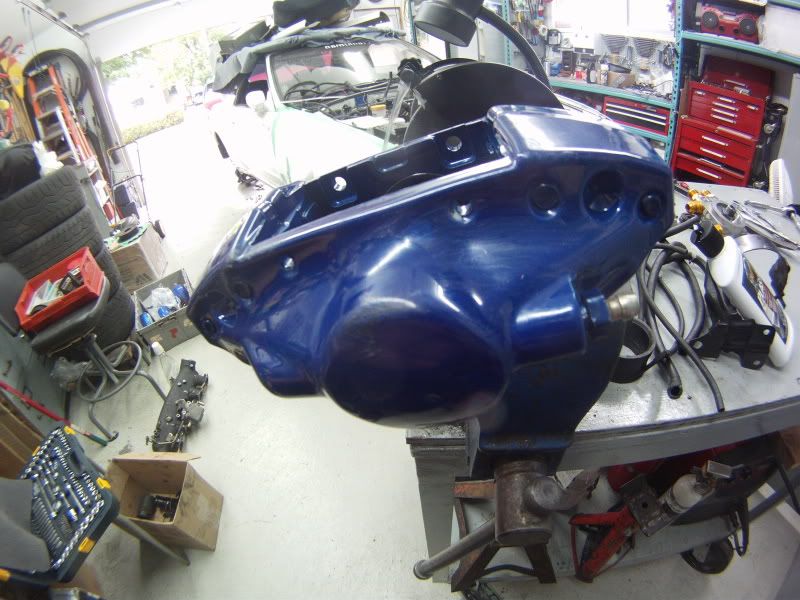
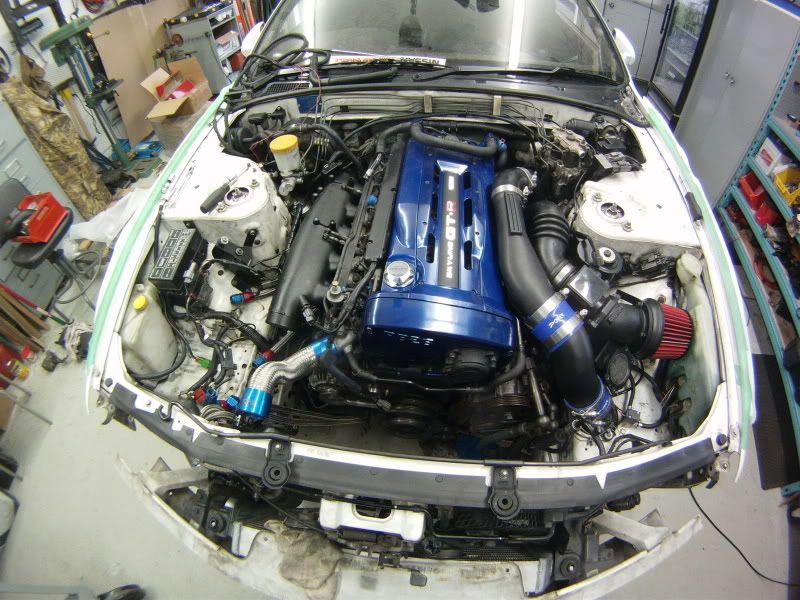
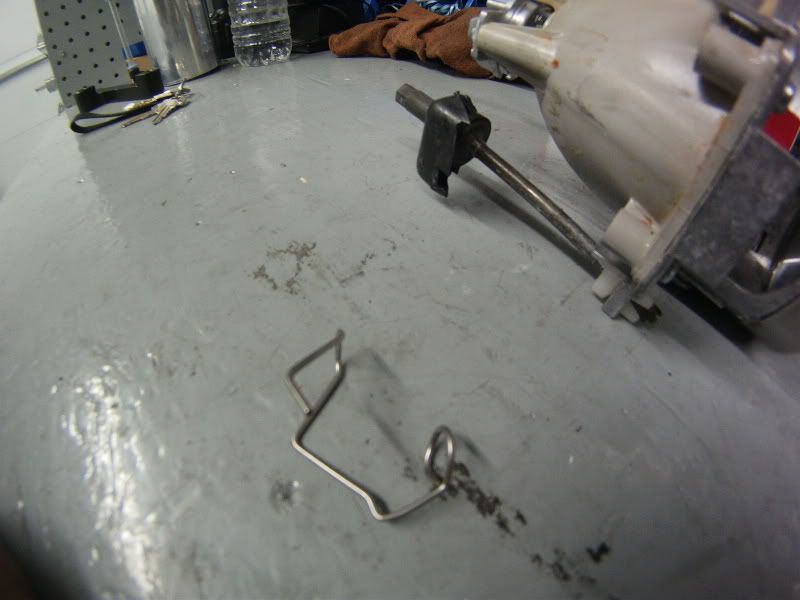
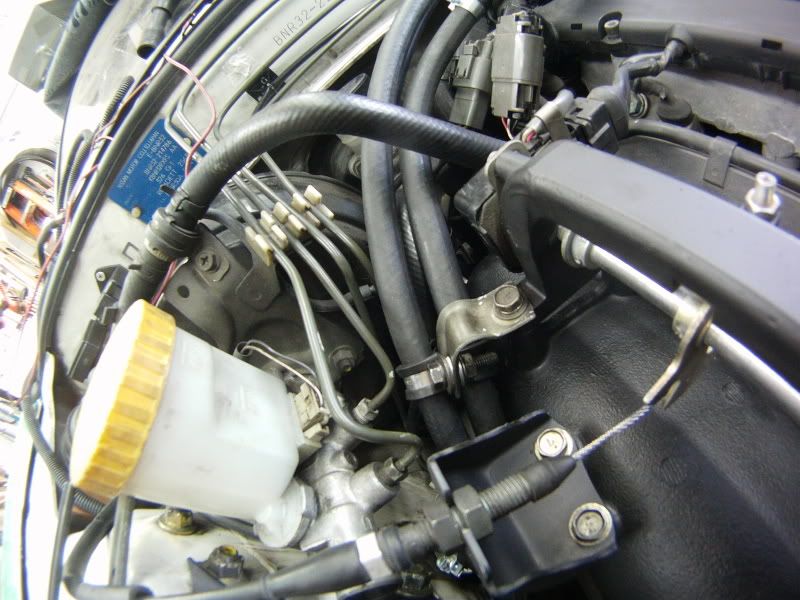
    Then I cleaned the surfaces were the valve cover gasket went,
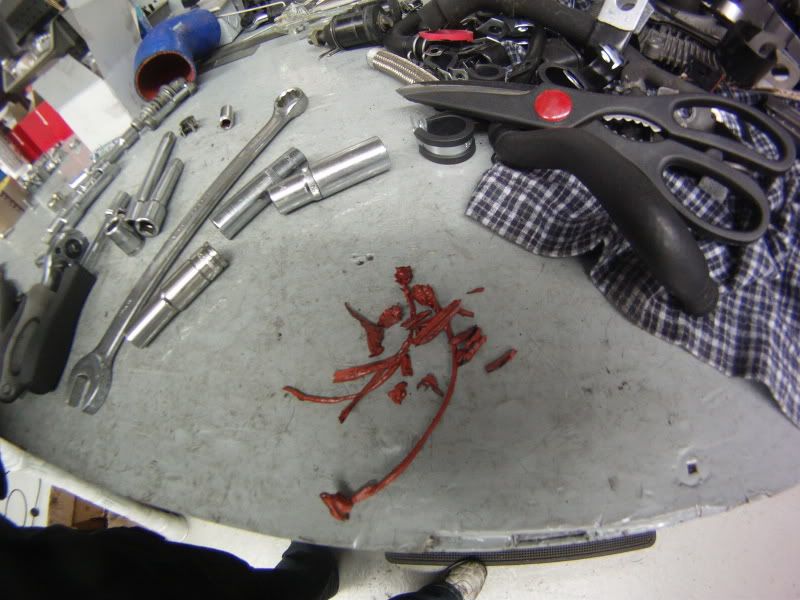
    There was a lot of silicone leftovers


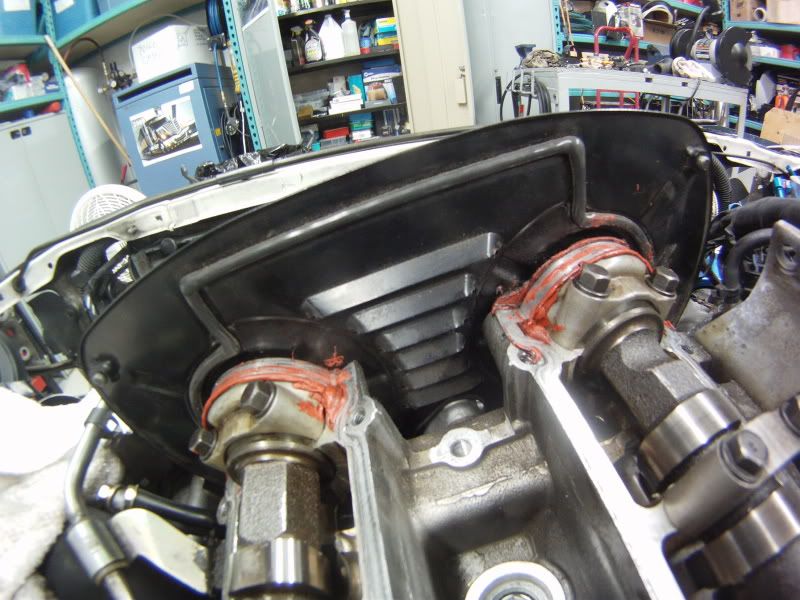
    I carefully scrapped it off with a razor blade, and finished it with soft steel wool


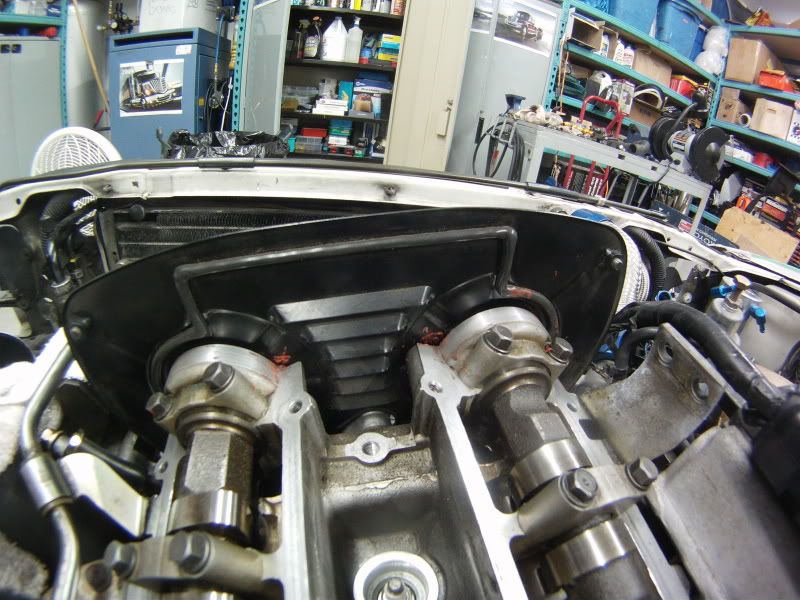
    Then fitted the gasket in the valve covers, I re-used the old ones which were still like new


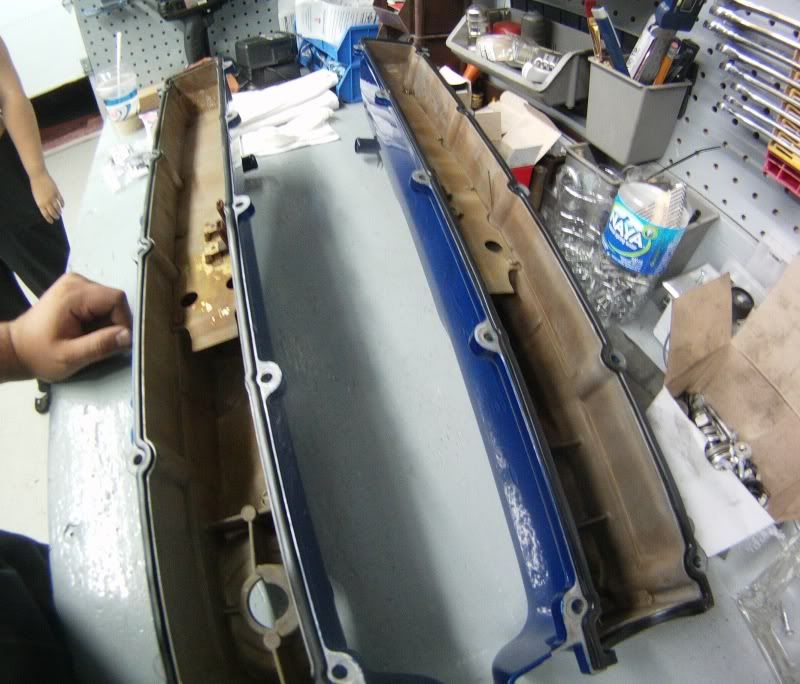
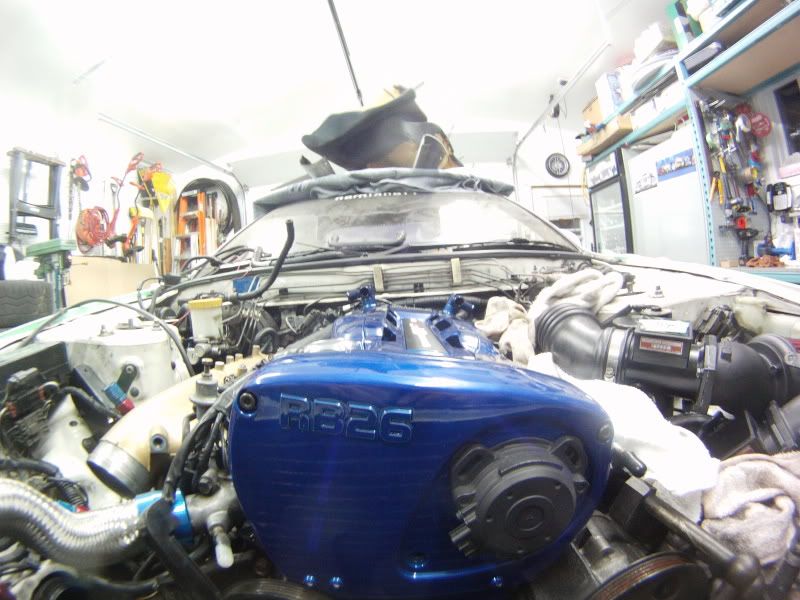
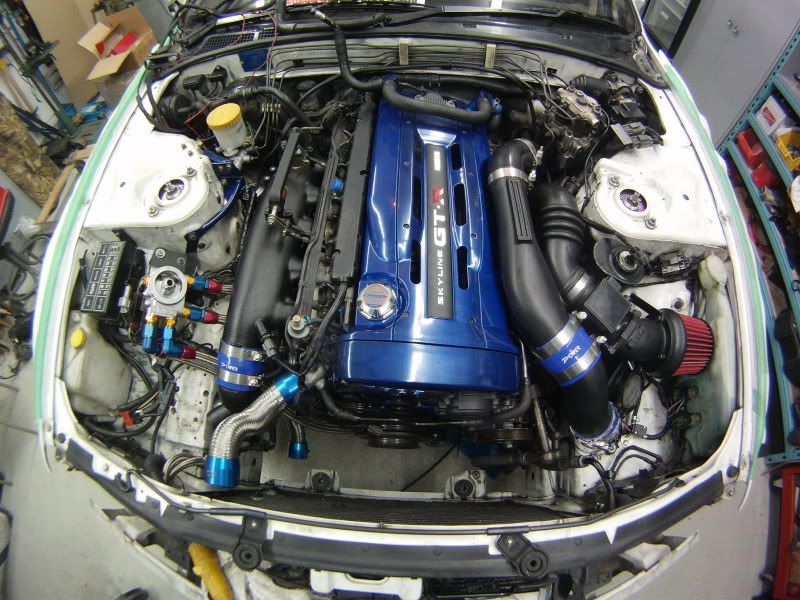
    And re-assembly of the valve covers began


    Put some new silicone gasket


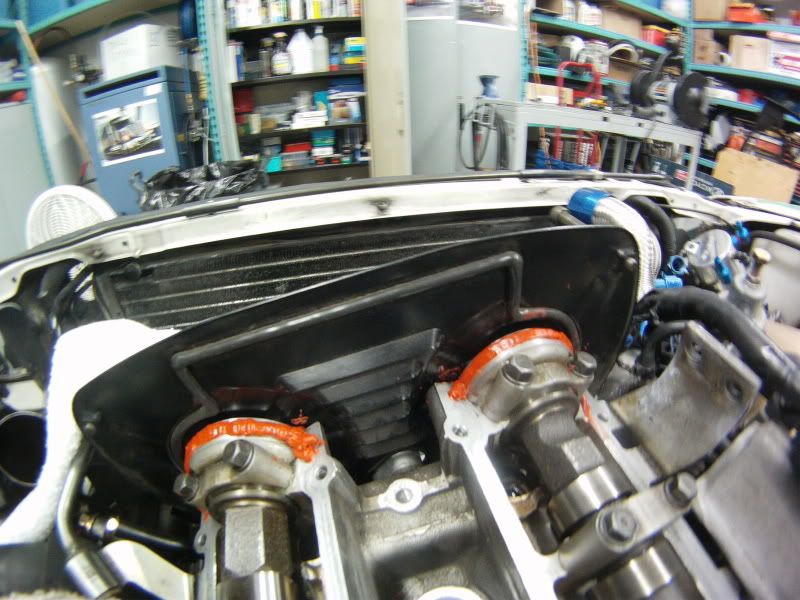
    I thightened all the screws in a cross pattern, just like you would with wheel nuts

    When I was putting the screws in place, before tightening them, I accidently dropped one of the screws’ grommet under the intake manifold, fuuuuu

    Filled the splitfire coilpacks full of jizz / dielectic grease


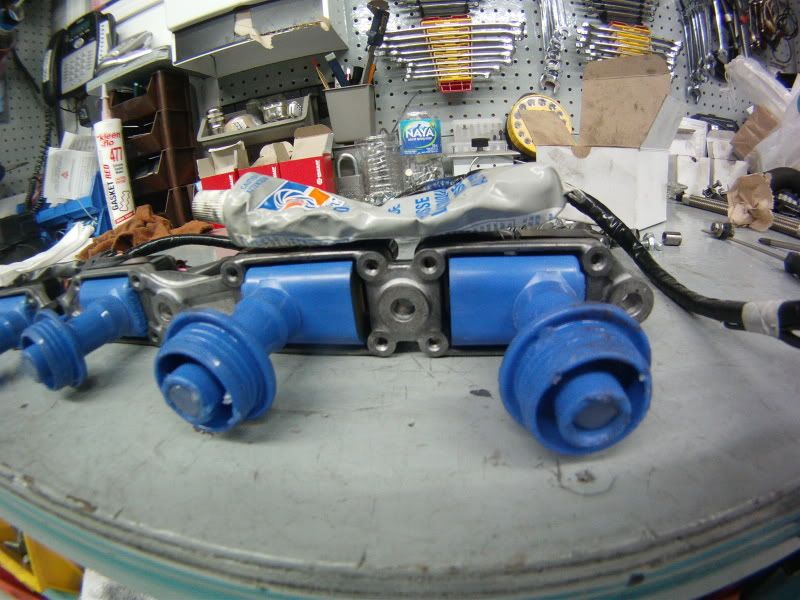
    And screwed them into place


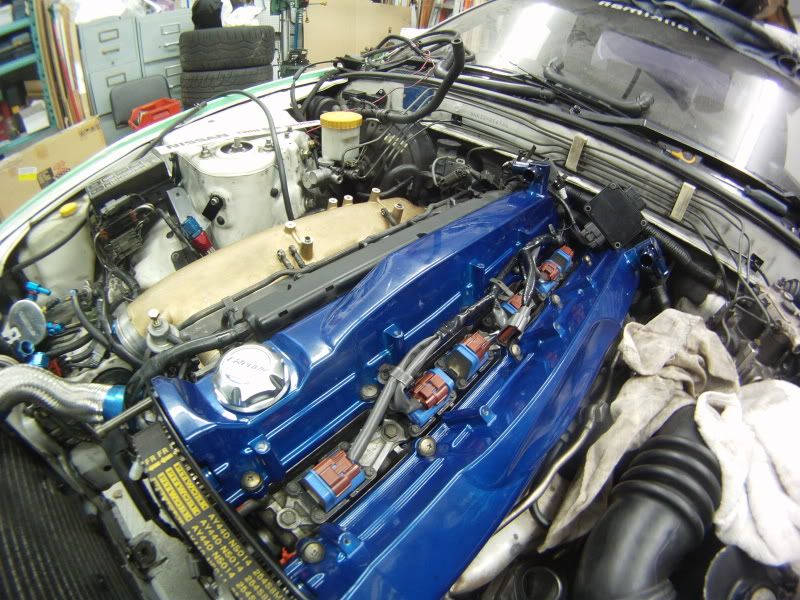
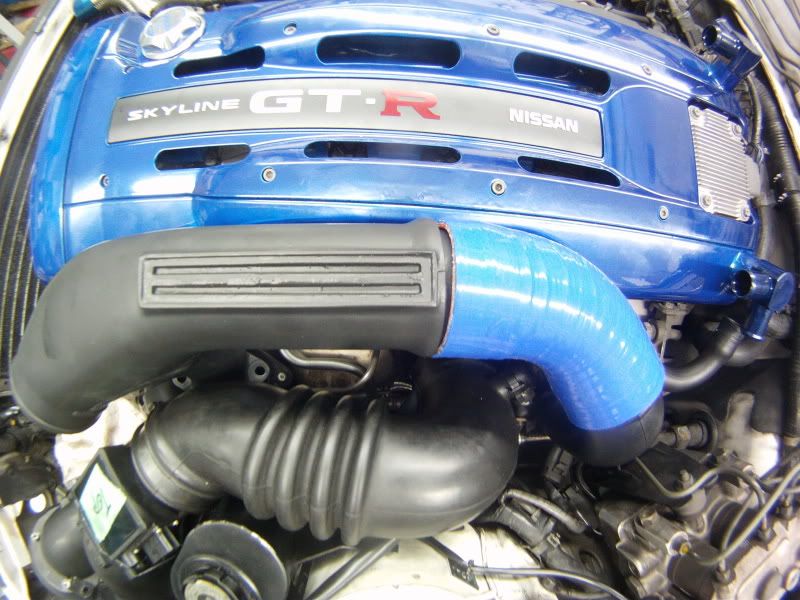
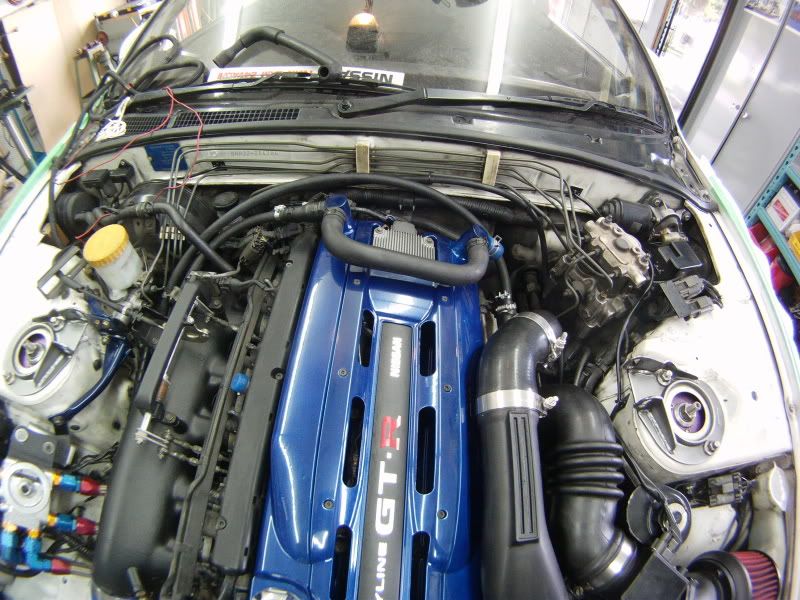
    Hmm blue on blue, Greddy cap FTW

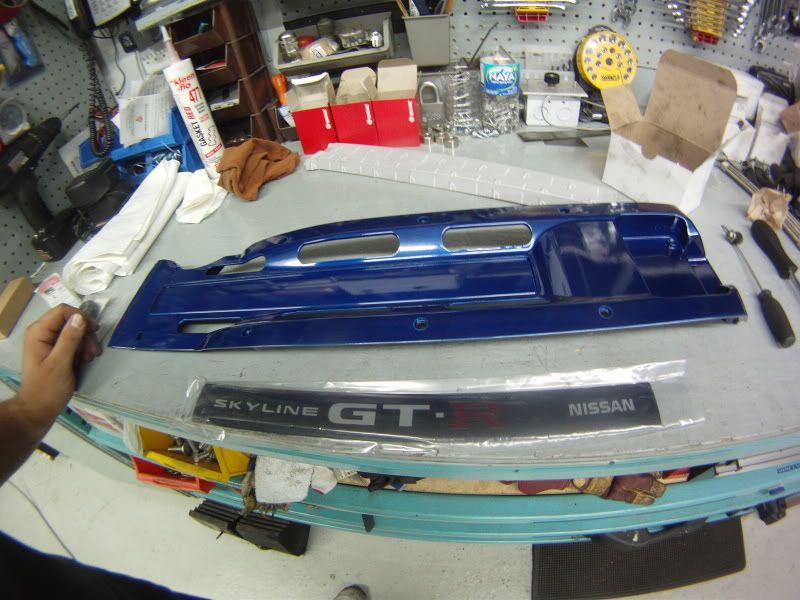
    Then stuck the R34 satin black ormament plate on the coil cover
    Yeah, that’s what it finally looks like, cover with 6 slots, baller


    Put when the paint shop acid dipped the cover, they melted the rubber seal, so it was a bit hard to put exactly in place, again a cross bolting pattern did the trick


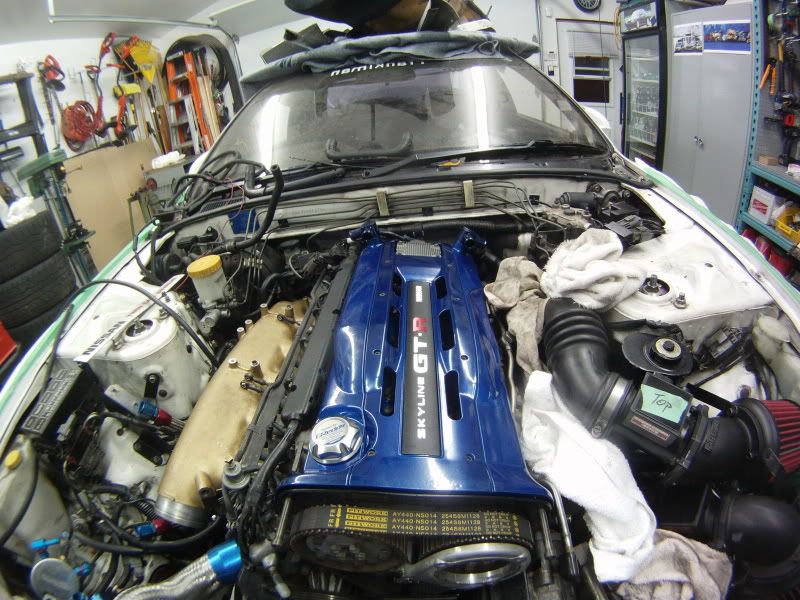
    After that I put the cam gear cover on, just to see how it would look and added the flat black painted CAS


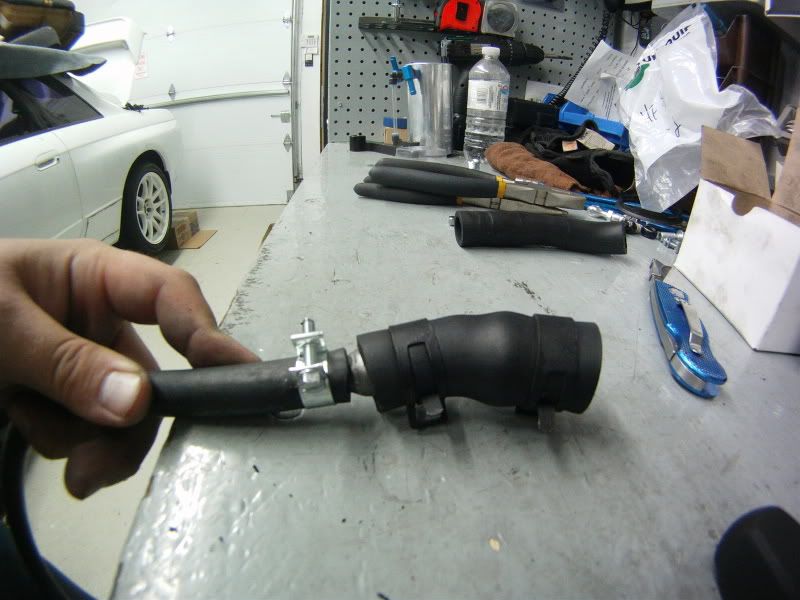
    Then I tried the rear turbo pipe Vibrant coupler I bought from Ben@JNS
    Which ended up not looking too swell


    So the OEM coupler went back on, with the Vibrant T-bolt clamps


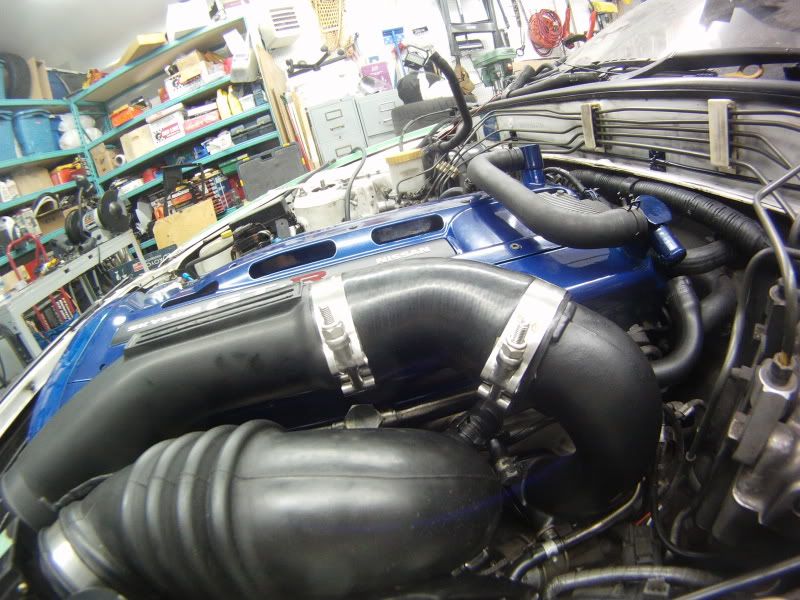
    Then I couldn’t remember how to get the HKS top hot hardpipe on and it was uber late so I stopped there and went to bed


    /day43
    Last edited by frankiman; 07-29-2010, 09:10 AM.
    sigpic

    [links to all chapters in first post]

    Comment


    • Chapter 23 - Almost there, week12-13, part3


      ------------------------------
      Day 44

      On day 44, I only worked a couple minutes because I drove around to get MOAR supplies


      I got plastic brake ducts from perry auto laval (+ Redline WaterWetter while I was there),
      60$
      I got 3” stainless steel tubing, cut at 45°
      (free, from my dad’s friend’s muffler shop)
      3” aluminum drying machine flex tube, 8ft long, at Canadian tire
      8,50$
      A 2’x1,5’ piece of fabrication sheetmetal, again from Canadian tire
      9,20$
      And a bunch of hose clamps I already had,
      …guess what I’m about to do with all this…

      And for a while now I’d been thinking how to mount my Cusco oil catch can, because I had just bought the can, used, nothing else

      So I had another spark of genius
      I bought some regular 2,5” neoprene hose clamps, 2$ each


      The trick is to bend them straight and when you put them back to back..


      They fit F-ing perfectly in the catch can’s slot


      Also, while I was away, my dad busted out the acetylene torch and using the bench vice bent my oil filter relocator bracket almost perfectly straight


      And finally, while mounting the cam gear cover the day prior, I realized I was missing the grommets for the 2 upper longer bolts, and that thinking about it, I never actually had them

      So I searched around the garage and found small polyurethane bushing things, drilled them bigger, and buffer the outside diameter, and they fit perfectly where the grommets should have been


      While I was doing that, I took out my front R33 Brembo callipers, placed the Brembo decals on them, and applied a couple coats of high temp clear paint

      And left them to dry overnight


      /day44


      ------------------------------
      Day 45

      I started work early on Sunday,
      First I had to correct something weird,
      When I got all the parts back from powder coat, I left them all in the (empty) trunk of the skyline, with all the foam sheets and stuff
      Well some of that packaging were made from recycled fibers (I guess) and for some reason, some of it stuck to one of my callipers, like really stuck


      I tried every cleaning product known to man, but nothing worked,
      So I resorted to using the orbital buffer and PlastX paste


      After 10 minutes, It was barely better…

      Then, for anyone following the driftworks groupbuy;
      http://forums.gtrcanada.com/group-bu...tml#post404585
      after speculations, I thought it would be a wize idea to change the locking nuts on my driftworks hicas canceller for the thinner ones, just to be sure I wouldn’t get it in the a s s while the car would be at the alignment shop

      so I took both rods off and changed the nuts


      After that, I took the plate my dad had straightened the day prior, and drilled it to make it fit directly where the OEM boost solenoid goes,
      The holes in the plate didn’t align properly, so I decided to simply drill one of the 2 hoels larger which would give me some adjustment


      After that, I buffed the back of my rear STI brembos, to see if the lines would fit without the paint


      Then I realized another huge f-ing error Tuboquip did;
      When I got them to make the custom lines, I brought the OEM lines from an STI that are made to fit those callipers and told them to cut the banjo fittings off the line and re-use them for the SS lines (which is totally doable, they actually did it in the winter with my clutch line)

      But when I picked up the lines, I saw banjo fittings and didn’t think twice about it,
      Turns out, they used their own fittings (a different one on each line too!) which don’t fit on the callipers,
      Now I’m trying to find another set of OEM lines, go back to Tuboquip and be frustrated,
      Or I could re-use my old SS lines as extensions and rotate the banjo around, but I don’t trust it will stay tight that way

      The Mitch arrived to help me with the intake manifold,
      It was already 75% off, but I couldn’t do more by myself so it stayed like that for over a month
      after an hour or two of Mitch working his magic, it was finally out


      While it was out, I took the opportunity to swap the fuel filter with a brand new one from Nissan
      This is something 99% of people neglect to do, which can clog up the injectors and do other damages


      Then we customized the vaccum system for the wastegate actuators
      The charcoal canister was already deleted, and the lines going to it were cut and blocked
      Now we deleted the boost solenoid (which had always been unplugged on this car) and cut open its lines coming from deep under the intake manifold
      Also, the metal vaccum line that gets it signal from the manifold to the wastegates actuators was left completely open, unplugged from the intake manifold

      Then ran a vaccum line from the intake manifold directly to the HKS EVC solenoid, which then split to both wastegate actuators

      Heres a little diagram to help comprehension


      And the new flat black manifold was back on an hour later
      But the stock boost solenoid wasn’t

      Also, we changed some of the paper gaskets for new ones from nissan


      Just after Mitch left, this is what it looked like

      Oh and I forgot to mention that earlier in the day, I remembered how to put back together the upper hot hardpipe, grease did the trick,


      Then a made a friend for the remainder of the night, a stray kitten came into the garage, and stayed with me for hours, wasn’t scared of anything, he couldn’t be bothered

      So I poured him a bowl of water and made him a bed of foam, I called him Tiger


      Maybe it was the full moon, look how bright that thing was, even through the window screen


      I kept working till late, fitted the upper cold hardpipe, again, a thin film of grease helps enormously


      I installed the oil filter relocator block, with the plate that had just dried from the morning when I painted it
      I connected all the oil lines, which for the ones coming from the sandwich plate was a tad hard since they were stiff as hell, good thing I had the adjustment for the plate from the bigger hole I drilled
      Found the right place to run the lines to the oil cooler and connected them,
      Finished up the installation of the new(er) intake manifold
      And re-installed the freshly powder coated Cusco brake master cylinder brace

      And now we come to the picture that has made me drool since Sunday


      I think I can have the engine running before next Sunday, I hope
      Last edited by frankiman; 07-29-2010, 03:10 PM.
      sigpic

      [links to all chapters in first post]

      Comment


      • That looks CLEAN dude!!! well done!!!

        Comment


        • *Picks up wireless keyboard and smashes it into LCD screen*

          i JUST effing typed a long response to all this, it was super percise about your work.... gawd damnnnnit the window closed accidentally LOL

          anyways in breif. don't use grease on hose couplers... use WD40, when it dries it acts like a sealant,

          also, i had many of the same problems you did here... i love seeing innovative solutions,

          i love the color scheme, its amazing. im jealous.

          and..... never ever work on your car while frustrated or angry... leave it for another time when u have a clear head, it`ll save you money in the long run.


          the book is a good idea, you know bureau en gros can do that sort of thing too, but not a real book spine, just like other types.


          great work man.
          The SkyLife Community & News Website --> http://www.skylife4ever.com

          Comment


          • I use hair spray! it gets really sticky and acts like an adhesive, works really well!

            The bay is looking alot better !
            My car keeps on stealing my money .

            Comment


            • well now that its all done, could any real problems occur because it was done with grease?
              i mean, there are still t-bolt clamps on those so...
              and i didn't use alot of grease, just enough to make the silicon slipery
              sigpic

              [links to all chapters in first post]

              Comment


              • worst case is the charge piping blows off...
                My car keeps on stealing my money .

                Comment


                • Chapter 24 - Because MOAR is MORE, week14, part1


                  ------------------------------
                  Day 46

                  so i wanted to fnish installing the apexi intake kit, which i consider beeing almost custom mounted,
                  but before i tighten every last bolt, which is a pain with its brackets, i wanted to see how i would need to mount my HID ballast and wiring,
                  last summer, it looked like shiit how i mounted it on the passenger side

                  so first step was to install the headlights, to get an idea of the space i had left around the filters behind the headlights

                  but even before that, i installed my new Foglight bulbs

                  last year i went through 2 sets of cheap as s chinese made bulbs, which could only last a couple days before the body of the bulb would crack
                  thing is, H3C bulbs are required, which aren't sold is Canada anymore for some reason, and i couldn't figure out how to make H3 bulbs work
                  so again, i ordered from Japan

                  JDM super yellow FTW


                  first thing i noticed was the bulb was much tighter in its socket then the crappy chinese ones, maybe thats the reason they broke

                  after the passenger headlight was installed, i took the driver's side headlight i noticed i was missing the retaining clip for the foglamp
                  then i rememberred that last year i had issues with that clip, since it wasn't tied to the socket like the one on the passanger side (something must have been broken) and it kept felling out of the socket everytime i messed with the bulbs, so i guess i must have lost is (or its somewhere in the garage and i got absolutely no friging clue where it could be)


                  so now i'm desperatly trying to find a replacement clip
                  and as Klys pointed out to me, the clip doesn't have its own p/n because its part of the headlight assembly

                  then i think; "hey, i got an old broken headlamp from my old GTR, i wonder if the clip would fit"

                  so i find that broken projector lamp


                  and sure enough, the clip DOESN'T fit, fuuuuuuuu


                  so i couldn't really install the headlight at this point, because i'd have to take ot off again to custom a new clip on it,
                  so i took the opportunity to do a bit of cleanup around where the battery used to be

                  so i took the coolant reservoir off, cleaned the area, and sprayed a bit of white paint because the original paint in this area was FUBAR


                  while that was drying, i loosely bolted the apexi kit in place


                  and started to make brackets to hold the HID system
                  again using strips of galvanized steel


                  and mounted to smaller module with zip ties


                  then found a big enough space underneath the filters for the ballast, and its beeing held only by a single bolt with a rubber spacer, without touching anything else, so to isolate it from the car's vibrations


                  then finally bolted the apexi kit in place "permanently"


                  also, earlier that day i went back to Tuboquip to get a fix for my custom brake lines they made me
                  the problem was the banjo fittings on the lines weren't the OEM ones i gave them, even the guy there didn't WTF they were and where they came from

                  while he went in the shop to check on something, i looked at their wall of Aeroquip products and found exactly what i needed;
                  much longer banjo fittings, from AN-3 male to M10x1 banjo

                  but the way i designed the lines, i realized (when test fitting them) that they would be too short because they were coming off the calipers at a 90° angle
                  so i grab the Brakequip parts catalog and try to find something that would fit, while explaining to the guy what i want, but he just had no clue at all,
                  then, Yan (who you should always ask for if you go there, is teh best) while serving another customer tells me; "basically, would a simple AN-3 male to AN-3 female 90° fitting work?"
                  and i'm like: "yeah thats it"
                  so the other guy runs in the shop and comes back with the perfect fittings, from Aeroquip, and "job done" runs off back store again and doesn't come back at all

                  after Yan was done with the other customer, he start to write me an invoice, and tells me each banjo is worth 22$ to which i made a point i wasn't paying for them because they were a fix for a problem they caused, and then tells me the 90° fittings are also 23$ each (ouch)
                  then he tells me: "would it bother you if the fitting was more boxy?, i might have something much cheaper"
                  "ok, well do you have any in stock?"
                  "hmm, i got 845, if you take 800 i'll give you 15% off"

                  and it costs 1,45$ each, nice

                  so my rear brake lines are fixed


                  then to round out the evening, i started work on custom brackets to hold my oil lines underneath the car, which took alot more trial/error than i thought

                  /day46
                  Last edited by frankiman; 08-10-2010, 09:06 AM.
                  sigpic

                  [links to all chapters in first post]

                  Comment


                  • Chapter 24 - Because MOAR is MORE, week14, part2


                    ------------------------------
                    Day 47


                    On saturday, i did the custom installation of my oil catch can

                    During the winter, I bought a used Cusco catch can, without any of its mounting hardware (used and low price)

                    So first I had to find a good way to mount the can itself

                    I bought 2” neoprene hose clamps


                    Then I straightened them, put them back to back


                    And voila they fit perfectly into the can’s slot


                    Then I cut a piece the shape of the can out of the thickest piece of packaging foam i could find


                    after that i placed the can where i wanted it to be, marked the spot for the holes, drilled the wholes and glued the foam piece to the body using 3M spray-on adhesive


                    then put the can in place


                    then i used the oem hose from the exhaust valve cover to rear turbo intake


                    wait WTF is this ?


                    i cut it up and this is what i find inside, a restrictor in the narrower end and a brush thingy in the larger end... o k


                    a couple months ago i had custom reducers made by Tuboquip
                    its a 5/8" steel tube, flared at one end and crimped to 3/8" at the other end
                    the hole at the 3/8" was a bit small because of the compressed material, so i drilled it larger on my press drill, i love soft steel


                    and i originally bought white transparent nylon hose, but decided it would look funky in my engine bay, so i switched to regular black hydraulic hose (3/8")


                    then connected the hose together using the reducer, oem spring clamps, and a fuel line clamp

                    (it actually looked much better afterwards)


                    that hose was then connected to the intake valve cover


                    since i don't have any Hicas components anymore, i used the empty space formelly taken by the hicas selenoid to bolt a small bracket to guide the hoses to the catch can
                    because i didn't want them to be too visible and in the way of anything, the hoses partially run underneath the intake manifold


                    ran the first hose to the can then cut it to the appropriate length (i only bough a 10 footer of hose)


                    after that, i used the longer bit of the oem hose i cut earlier, and with the reducer, connected the second line directly into the stock rear turbo intake port


                    ran that line along the fire wall, over the engine,
                    and as you can see, i used silicon caps to block the PCV and exhaust valve cover outlet


                    and with some custom bracketering wizardry and neoprene hose clamps, i made a support bolted to the intake manifold to hold the hoses to guide them


                    then ran that second hose through the same guide as the first one and connected both of them to the can


                    now this setup is good for daily driving, when oil temps are low,
                    but since my car is prepared to hit the track every week, i need something else to take care of the added blow-by gases and higher oil temps that occurs on the track
                    (and when you're pushing the engine to its limits, you really don't want to loose octane levels)

                    so i ordered a K&N crank case breather with a 3/8" OD inlet, from canadian tire
                    i was going to use a 3way valvle to be able to easily switch between an atmospheric release and recirculation,
                    but i was told not to, because it would make the car run funny if tuned to only 1 setup
                    so the breather is going up for sale soon


                    /day47
                    Last edited by frankiman; 08-08-2010, 11:42 PM.
                    sigpic

                    [links to all chapters in first post]

                    Comment


                    • Chapter 24 - Because MOAR is MORE, week14, part3


                      ------------------------------
                      Day 48

                      the timing was done a couple weeks ago, but i had yet to torque the crank bolt to spec;
                      1. because i didn't remove the a/c condenser (and didn't want to) so i couldn't get an impact gun on the bolt
                      2. because there was no brakes on the car, hence no way to lock the engine in place

                      the only remaining solution was to drop the car on its wheels and lock them

                      so thats what i did, the wheels had been on the car for a few days now, i just needed the drop the darn thing


                      before i could do that, i needed to clean all the stuff i stored underneath the car


                      big pile O' money


                      also found a piece of the trunk i cut out and the very old (very fawked) hose couplers (don't even think they are silicon)


                      then proceeded to drop the car, using my patented "two jacks at the same time" method
                      only works without the front bumper on


                      the spec for the crank bolt is ~340 lbs.ft of torque, which i doubt very much i could do by hand (wit the tools i have)


                      so i put a bit of loctite on the bolt, blocked the wheels with blocs of wood and rubber,
                      put it in 5th gear, pulled the e-brake,
                      set my torque wrench just above its last setting, so ~260 lbs.ft
                      and pulled like crazy, like two girls fighting over a Gucci purse on sale,
                      till i heard the magic "click" of the torque wrench


                      though my wrench is only 2 ft long, i had a breaker bar that was about 4" longer
                      so i calculated, if i pulled the same; 260/24 * 28 = ~300 lbs.ft would be enough with the loctite

                      i pulled so hard, i could see the bar starting to bend and then stopped pulling when i heard the wheels start to slip


                      after that was done, i could finally install the whole radiator assembly

                      i took the wraps off the new Koyo Rad, hmmm


                      this thing is extra thick compared to stock


                      which leads me to this;
                      Because MOAR is MORE and is better

                      so i slid it in, super easily, just to see how much space it took


                      then i took the wraps off my mishimoto aluminum shroud kit,


                      and sure enough, even though half a douzen people already told me, it didn't fit, because the Koyo rad was much too thick

                      well, ok, back to plan B then i guess
                      re-install the oem fan setup

                      but for some reason, which i can't quite make out, 90% of the people using the Koyo rad, don't use any shroud
                      when i know for a fact that the OEM plastic shroud does indeed fit; proof of that is Josh's (archaeic bloke) car, Autoworx installed the same Koyo rad on his car with the shroud

                      and i think its ironic to install a thicker full aluminum rad to gain cooling efficiency, but not use any shroud when its responsible for 15%+ of that efficiency

                      thus, started an epic trial/error session

                      i started by enlarging one of the shroud's hole to align with the rad


                      then i kept sliding the rad in till it would get stuck,
                      and look everywhere with my work light to see where exactly it was getting stuck,
                      then took it back out and trimmed the shroud with my pneumatic dremmel tool


                      as you can see, the #1 problem with the rad beeing so thick, is the darn p/s and hicas lines that are intruding the radiator/shroud space
                      that wasn't the best design for those lines heh nissan !


                      anyway, after about 2 hours, i finally got it to fit absolutely perfefctly, without touching anything else


                      my brand new rad didn't like the experience much though
                      i didn't realize at first it was hitting the plastic pins for the electrical harness running inside the rad support frame


                      so anyway, if you plan on doing the same thing, heres the exact spots to trim to make the shroud fit, to save you some time


                      yes i even trim the lower insert of the shroud to be able to clip it in, and use the maximum efficiency of the shroud

                      /day48


                      ------------------------------
                      Day 49

                      now that i knew it would fit, i had to put my belts on
                      i had much problems with the adjustments and couldn't get a single belt on
                      then i started looking around for every possible cause, and remember that i'm not a mechanic and i've never done any of this before

                      for the a/c belt, i realized the lower puller was too loose and misaligned, fixed that
                      for the alt belt, i saw that the bolt the alt pivots on was uber tight and with a bit of elbow grease i got it to move, that was fixed
                      for the p/s pump, well that was another story, i just installed the darn pump a couple weeks ago and i left all the bolts just a bit loose, but still couldn't move it enough so the belt could go on, WTF
                      it was like it was hitting something
                      work light in hand, i checked everywhere and came to the conclusion that it was the huge T-bolt clamp i had put on the inlet hose

                      (gold thing in middle of pic)


                      the clamp's bolt was very long and touching the a/c compresssor everytime it pressed on the pump to put the belt on

                      but the clamp was pretty much in the worst place and the worst position possible fix,
                      and i sure as hell didn't want to take the i/c piping off,

                      so i used a medly of extensions and plyers and stuff and after half an hour of sweeting, i got it to spin 90°
                      then again using extensions and such and got my hands in spots thats weren't designed for my hands to get in, and finally secured the clamp tightly

                      got all the belts on, adjusted to the tension specs

                      then finalized the installation of the rad, connected the rad hoses and tightened everything


                      and this is how it looks from underneath after i messed some more with the oil lines brackets just to get everything to fit just right


                      /week14

                      i didn't get to start the engine because all the custom stuff took much more time than expected, and the battery cables are still hanging under the car

                      but the project is almost done, the mechanical apects of the car are 90% done (battery cable - brakes left)
                      all that will be left will be the bodykit (oem) that i should really get to paint, and while thats going to be done, i'll finish up the interior which really shouldn't take too long
                      i overshot my projected 8 weeks by a mile, but i'm really confident i can have the car driveable (don't need a bodykit to drive a car), get the ecu dyno tuned, get an alignment done and corner balance, all before the end of august so i'll be able to test the car out on a couple track days, be part of the UltraRide '10, have make it to the last ASE lapping club time attack, to see how much a s s this street car can kick on the track
                      Last edited by frankiman; 11-17-2010, 11:54 AM.
                      sigpic

                      [links to all chapters in first post]

                      Comment


                      • soo much cooling going on ...lol,

                        i think you've got yourself a fantastic track machine man, good work!!
                        will you be ready in time for ultraride? also did you get my PM?
                        The SkyLife Community & News Website --> http://www.skylife4ever.com

                        Comment


                        • theres a month left before the ultraride, the car should be tuned, aligned and corner balanced by them, and hopefully have at least 500km of testing done, and probly a track day
                          sigpic

                          [links to all chapters in first post]

                          Comment


                          • Franki Franki Franki...... i will buy a copy of your published book, it will sit next to the 900 page skyline manual lol. is there an exact date for UltraRide yet? i havent gotten an email yet and i dont want to miss it.

                            Keep up the good work!!!
                            Check out my RB30 build at
                            http://forums.gtrcanada.com/gt-r-pro...b30-build.html

                            Comment


                            • well now i'm seriously considering having the book made..

                              and yes the UltraRide will be held on Sunday September 12th,
                              click the link in my sig for more info, and please signup in that thread too

                              edit; a new video was made using last year's footage to promote this year's ride


                              check out 0;21
                              Last edited by frankiman; 08-11-2010, 06:22 PM.
                              sigpic

                              [links to all chapters in first post]

                              Comment


                              • haha i see you!!!
                                i will be there this year =D

                                DJ you got 1 month!!
                                Last edited by greddytrustGTR; 08-12-2010, 12:06 AM.
                                Check out my RB30 build at
                                http://forums.gtrcanada.com/gt-r-pro...b30-build.html

                                Comment

                                Working...
                                X